Server backup using INTROSERV Backup service
INTROSERV Backup Service allows you to backup your dedicated server or VPS, creating full, incremental, differential backups. Manual backups and scheduled backups are available. Linux and Windows operating systems are supported. After performing a backup, clients can restore the entire system, individual disks/partitions, as well as individual folders and files.
Creating a Backup
To create a backup, you first need to add the server to your Inventory. You will then have the option to create a backup once or customize the backup schedule to suit your needs.
Adding a server to Inventory
Important! When creating a backup, the necessary ports must be open on the server for the IP address of our backup service 62.112.8.70.
- For Linux - port 22 (or another port on which SSH access is configured) and 9446:
If you have a server control panel installed, it is recommended to open ports in the interface of this control panel.
/usr/sbin/iptables -I INPUT -s 62.112.8.70 -p tcp -m tcp --dport 22 -j ACCEPT
/usr/sbin/iptables -I INPUT -s 62.112.8.70 -p tcp -m tcp --dport 9446 -j ACCEPT
- For Windows - ports 445, 9446, 9448 - 10000 via TCP protocol:
netsh advfirewall firewall add rule name="Introserv Backup Service" dir=in action=allow localport=445,9446,9448-10000 protocol=tcp remoteip=62.112.8.70
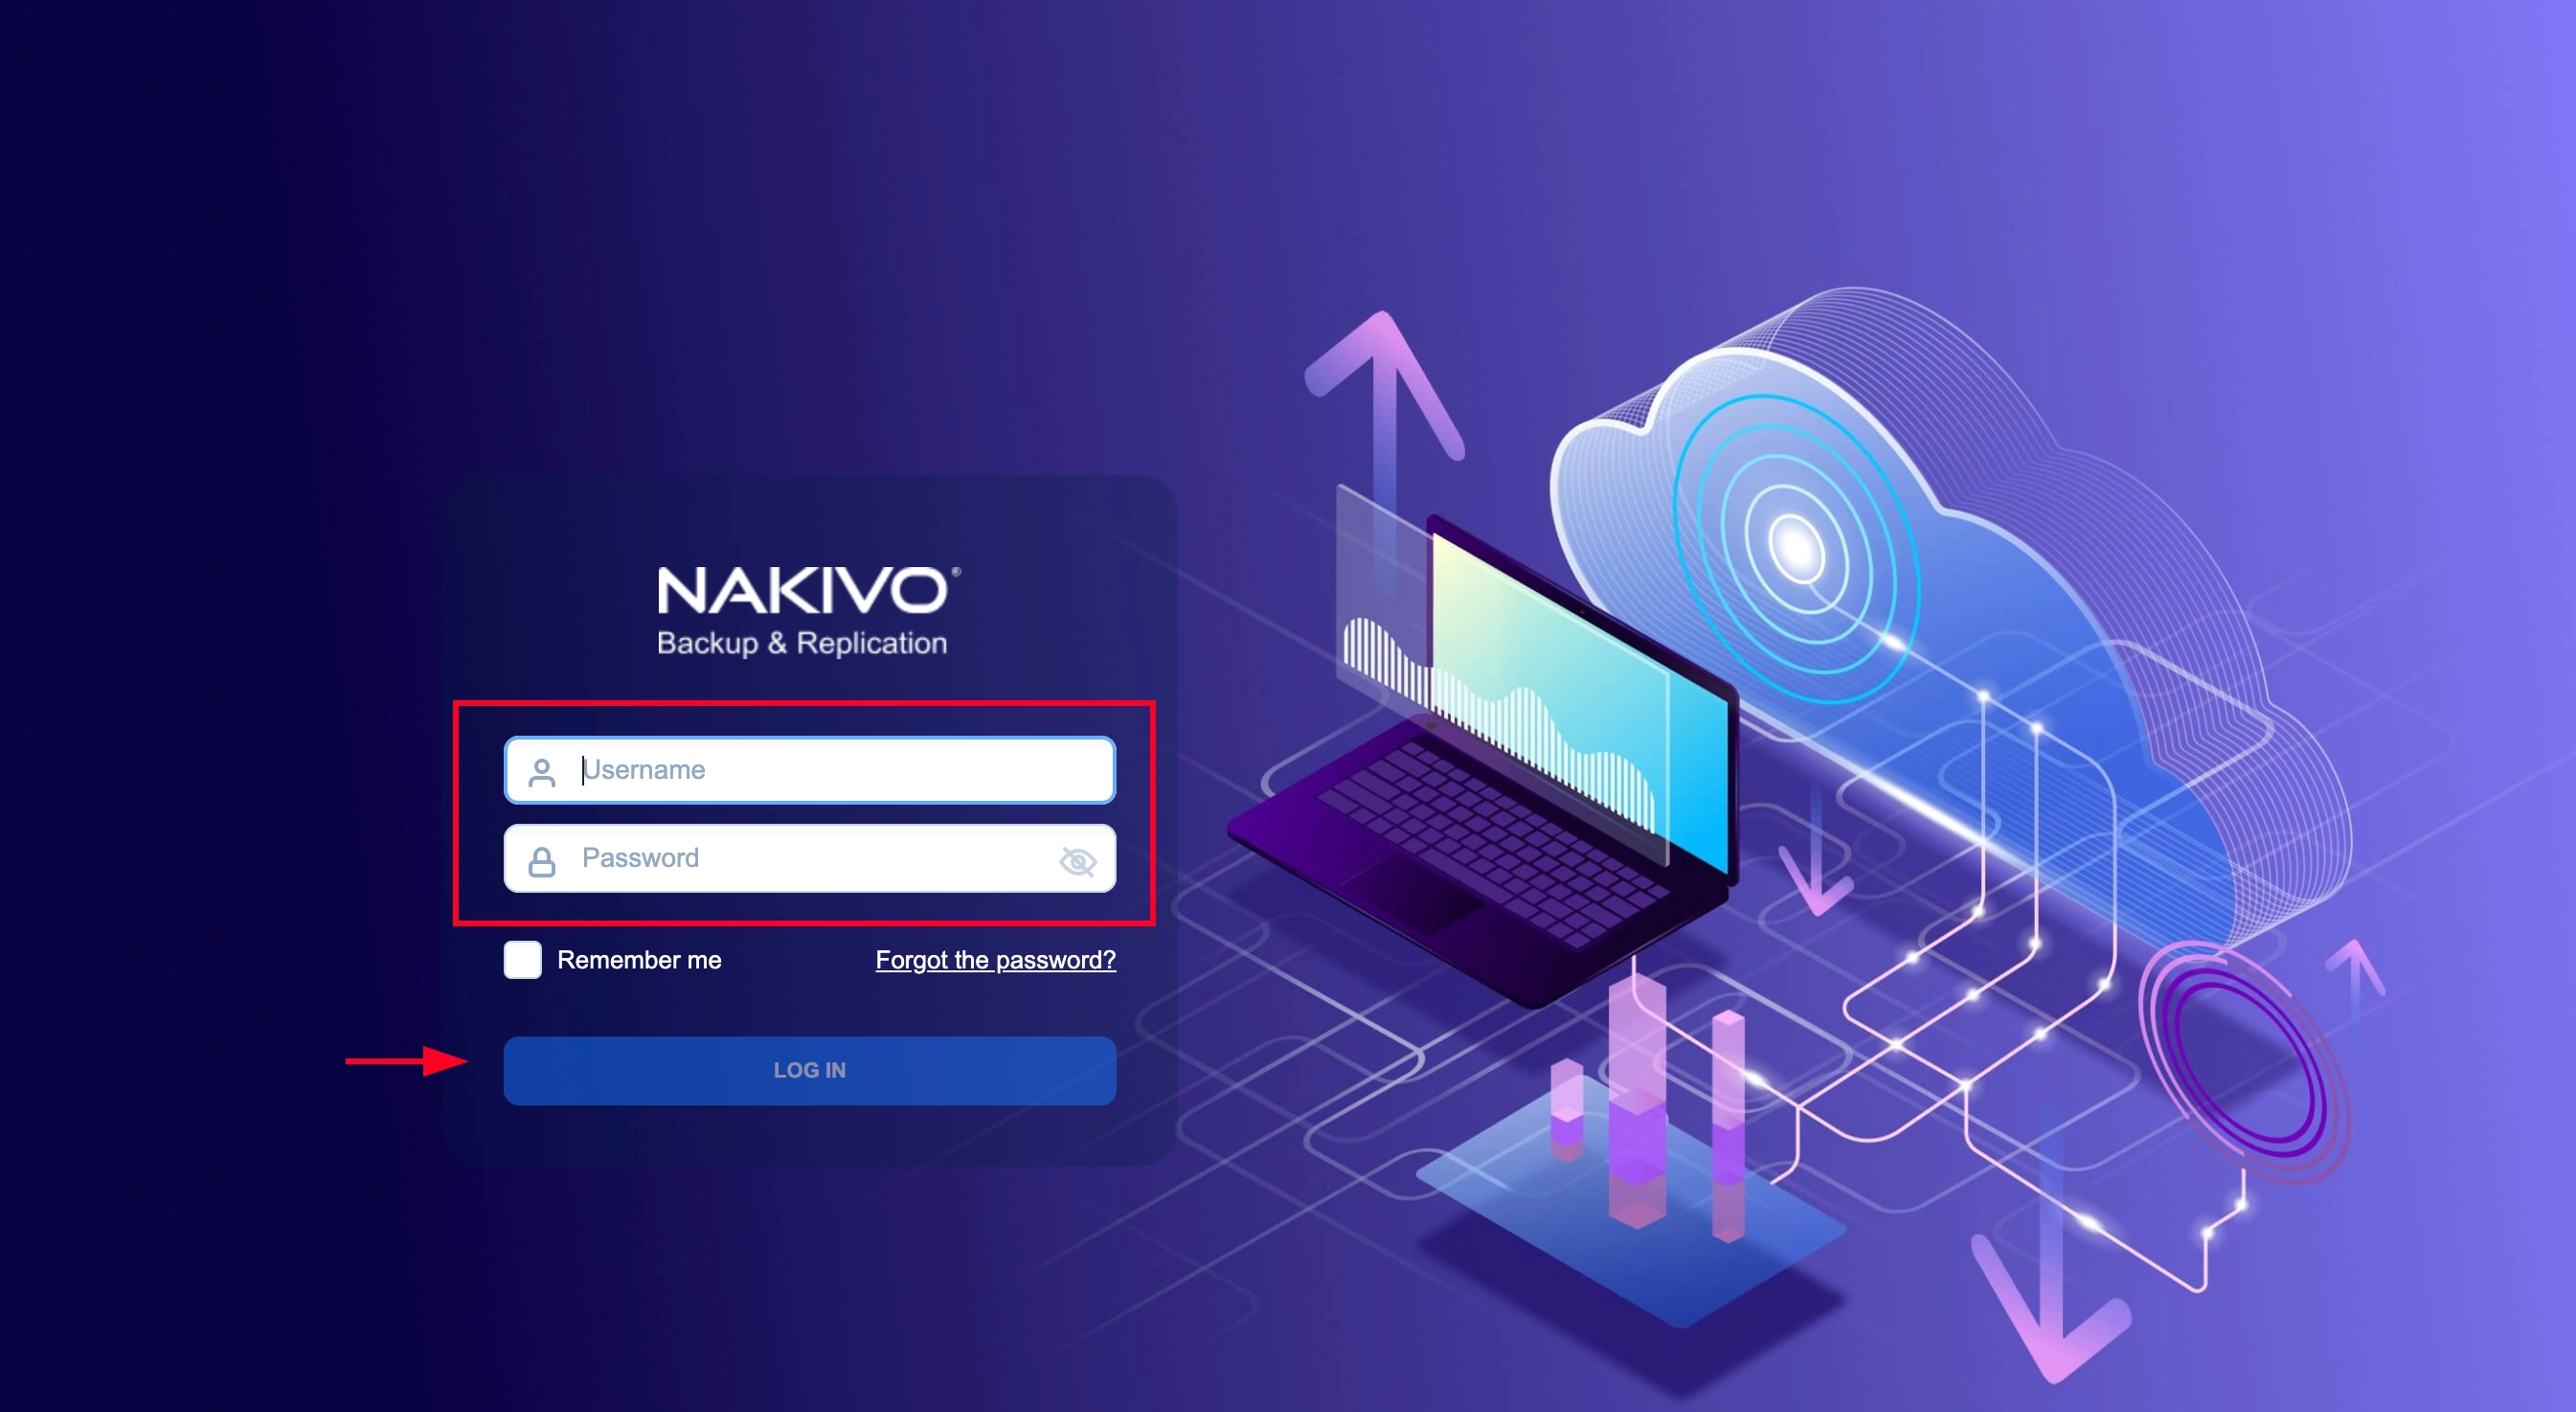
1. Go to the backup control panel in your personal INTROSERV account.
2. You will be redirected to the login page for the Backup Manager, use the login and password that were provided to you as part of the ordered service.
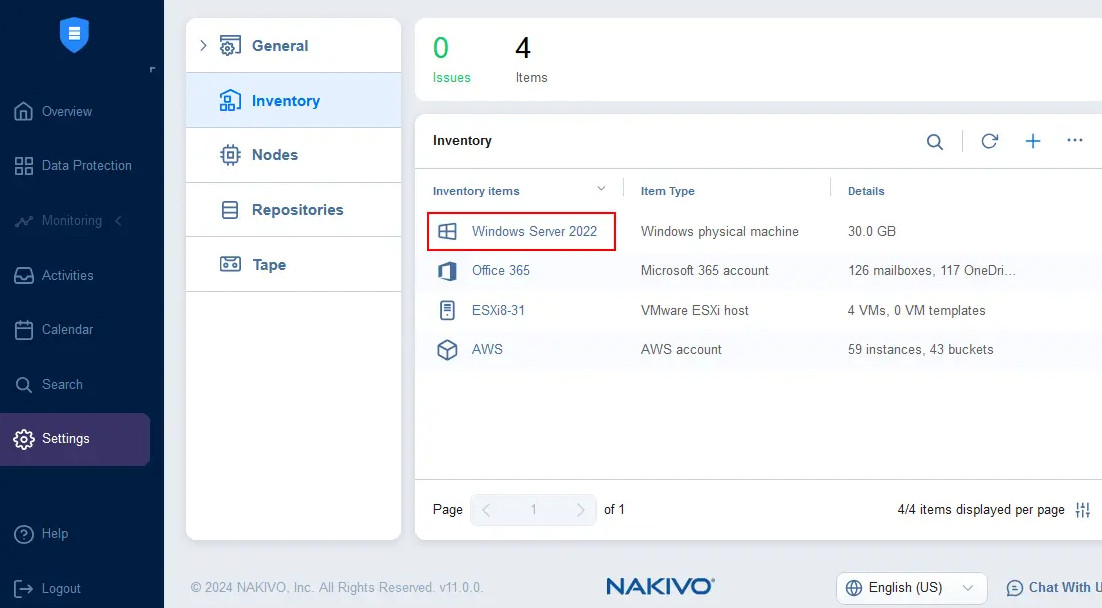
3. If this is your first time, you will be taken to the Inventory creation page. This is a list of servers that you want to back up (automatically or manually).
The next time you log in, the Inventory section will be available through the menu Settings - Inventory
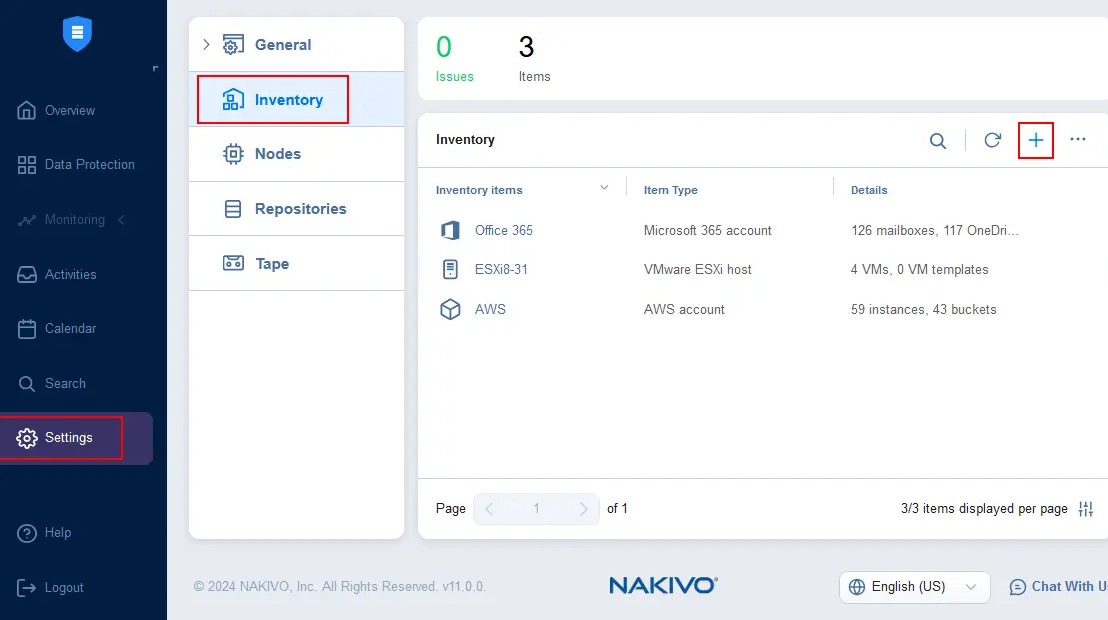
3.1 Add your first server to your Inventory by clicking +
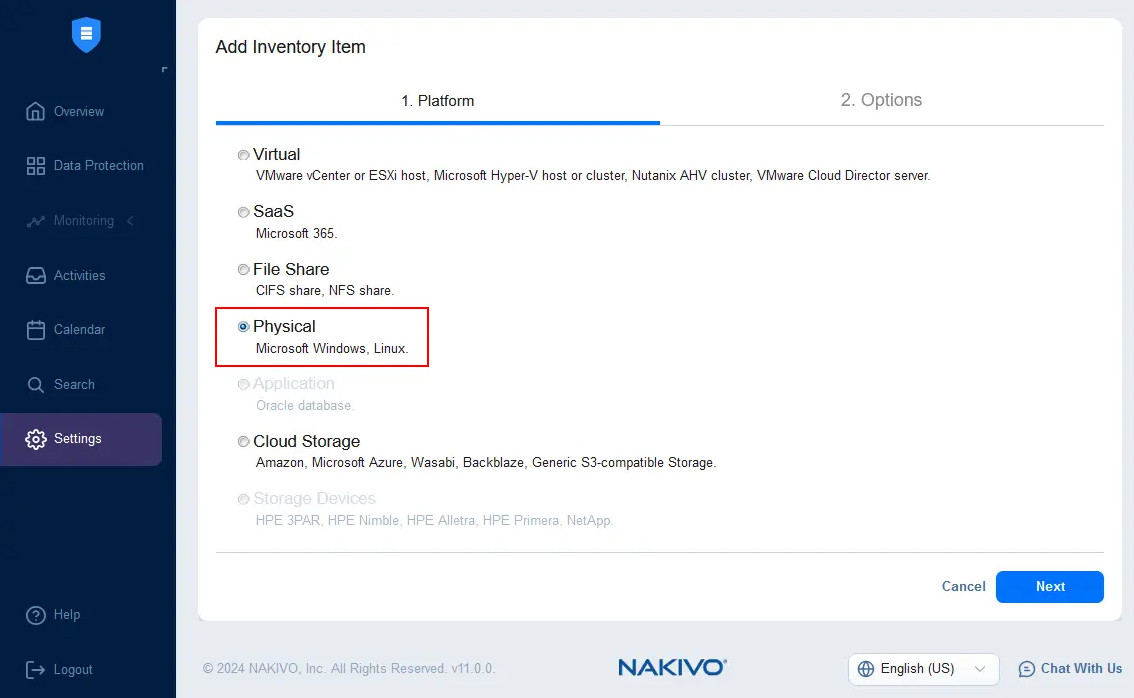
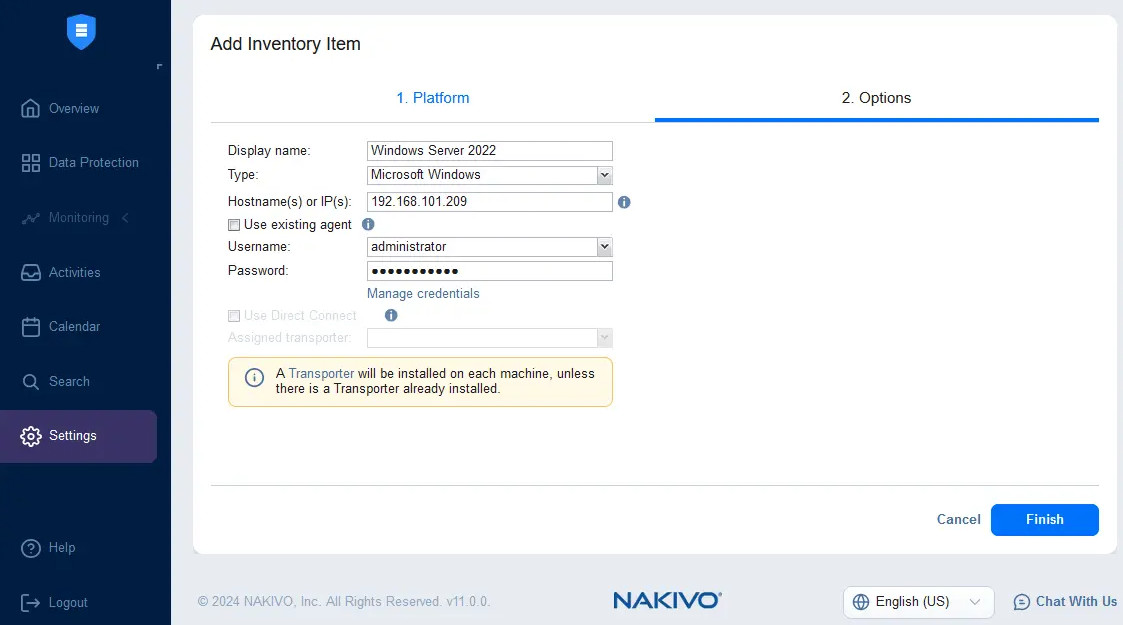
3.2 The Add Server wizard will open, select the Physical platform type
3.3 You need to enter data to connect to your server
- Display Name – a convenient name for your server
- Type – Operating system type (Windows or Linux)
- Hostname(s) or IP(s) – FQDN or external IP
- Credentials type (Linux only)
- Username – Administrator (Windows) or root (Linux)
- Password
- SSH port (Linux only)
3.4 Wait until the server is added to your Inventory
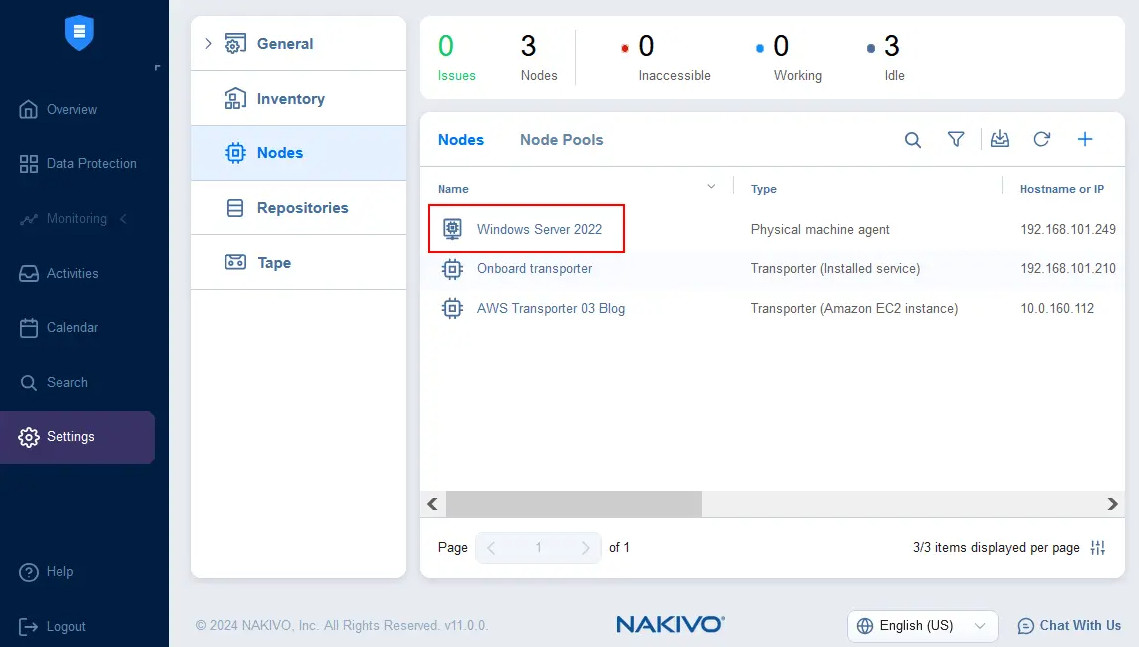
You can verify that the Transporter agent is installed in Settings → Nodes
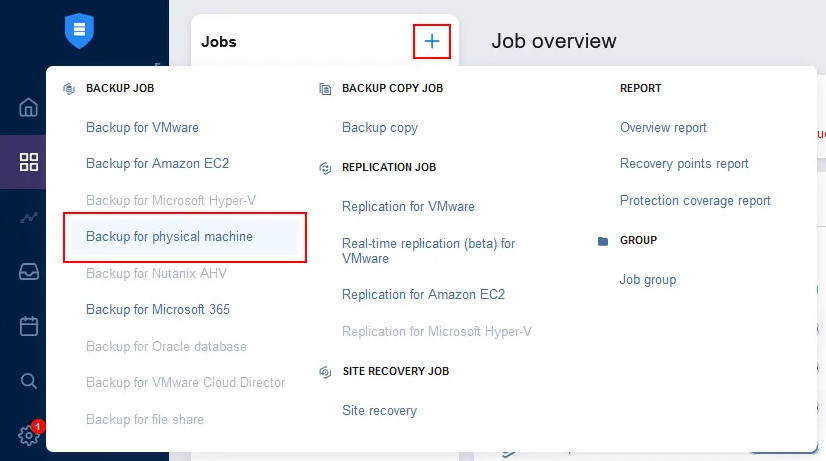
Create a Backup Job
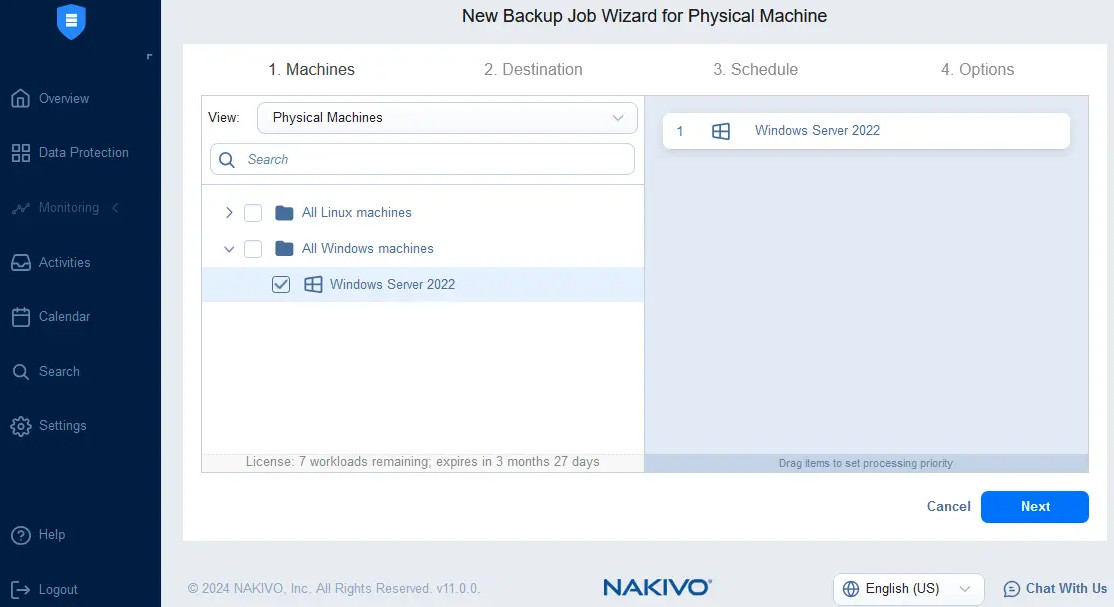
1. Go to the Jobs section and create a backup job: Backup for physical machine
2. Select the server(s) from the inventory for which the task(s) need to be created
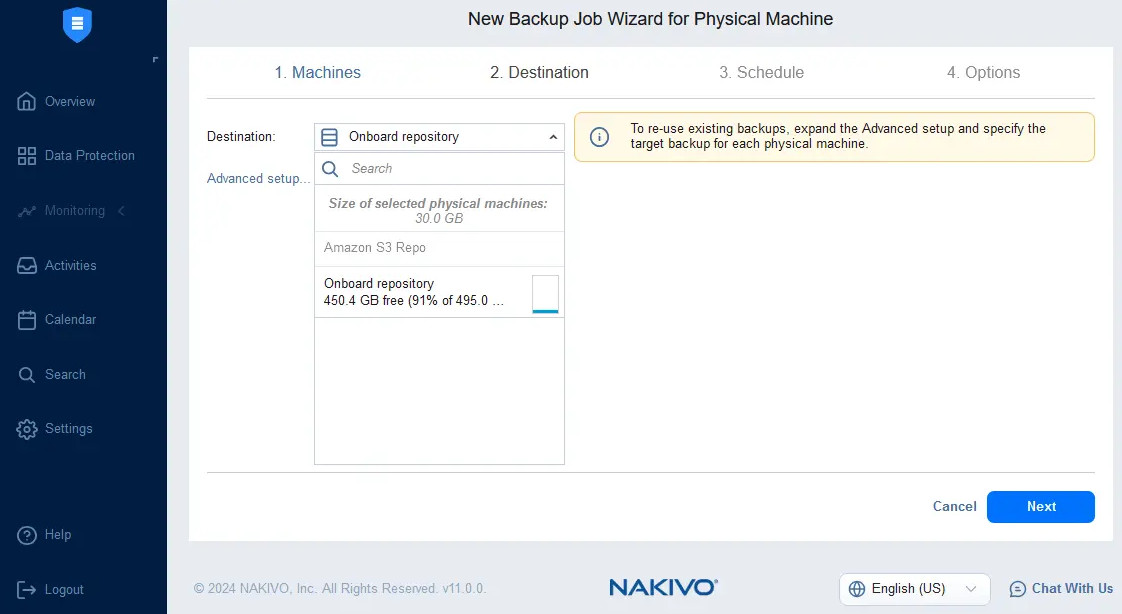
3. Your repository will be automatically selected. In the Advanced setup tab, you can select resources that need to be copied
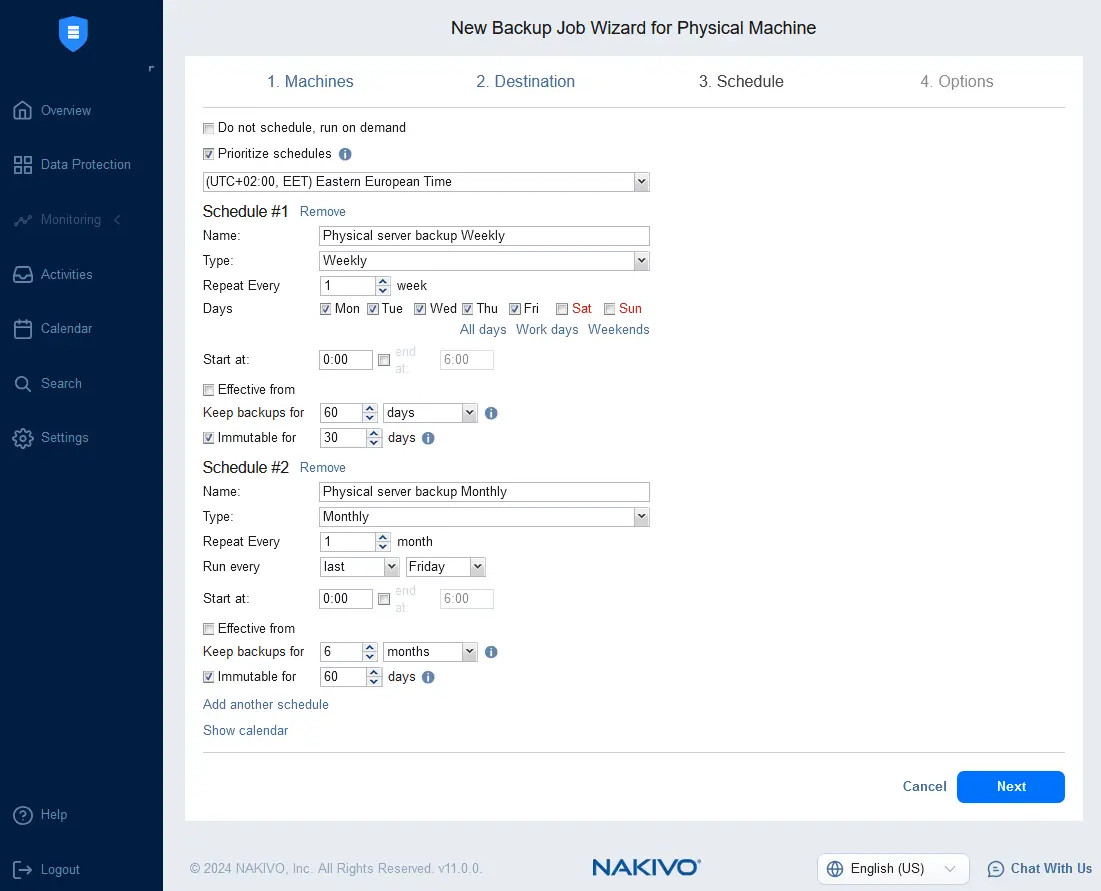
4. Configure the task schedule Prioritize schedules or select Do not schedule, run on demand
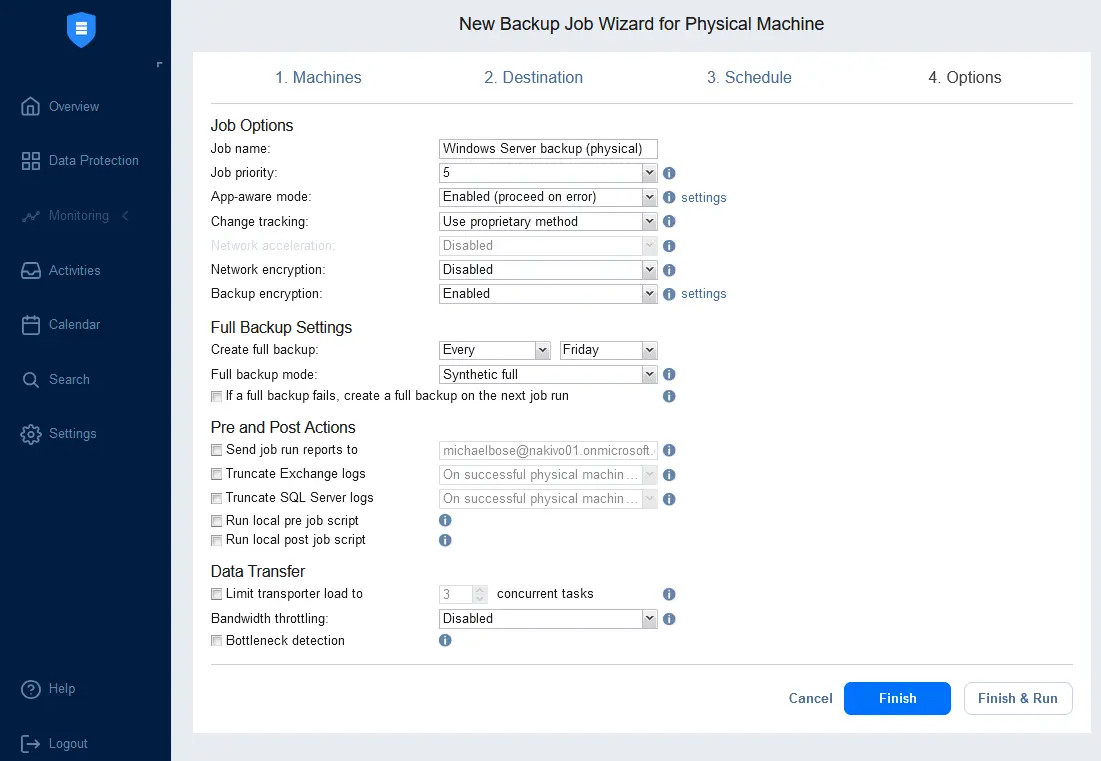
5. Specify task options. Click Finish to save the task or Finish and Run to perform the first backup immediately
Restoring from a backup
Restoring from a backup is implemented in two options: full recovery of the entire system or partial recovery of individual folders and files.
Full server recovery
A complete server recovery is performed using a boot disk. You can perform the recovery yourself using IP-KVM.
1. Go to the Jobs section - Name of your backup task - Recover
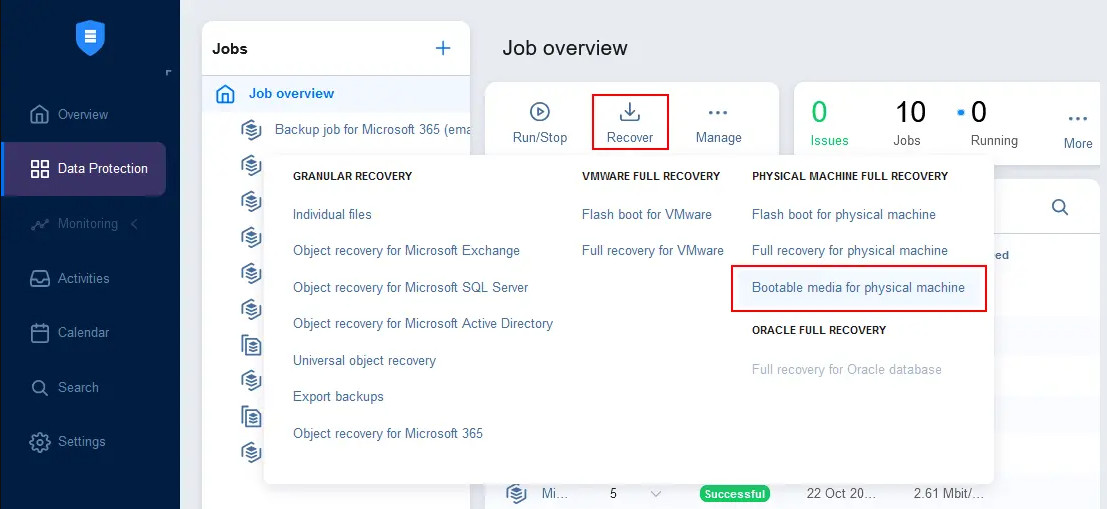
2. Select Bootable media
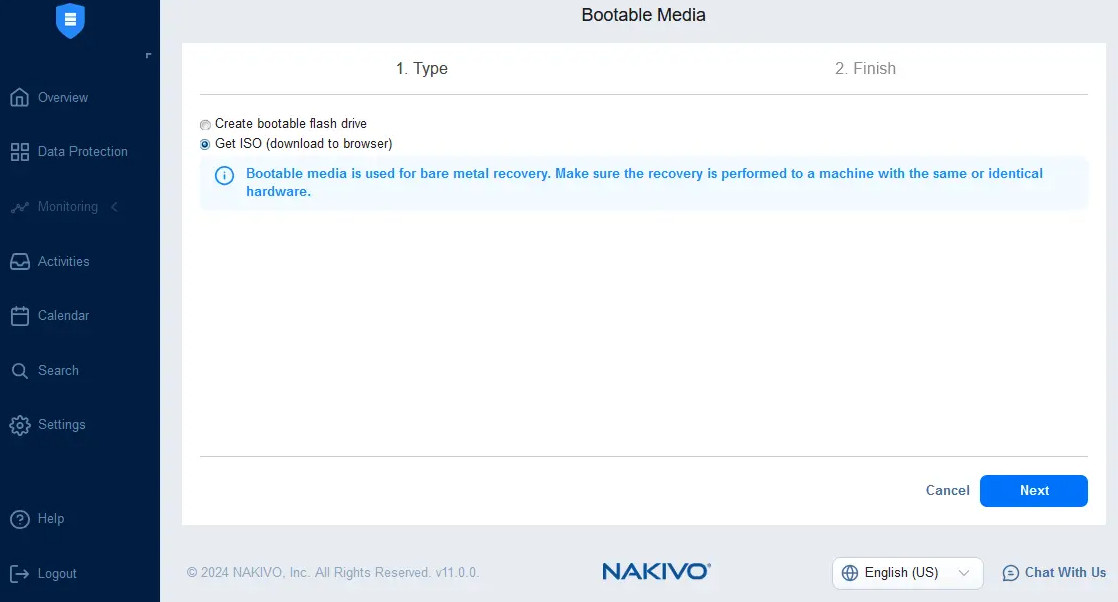
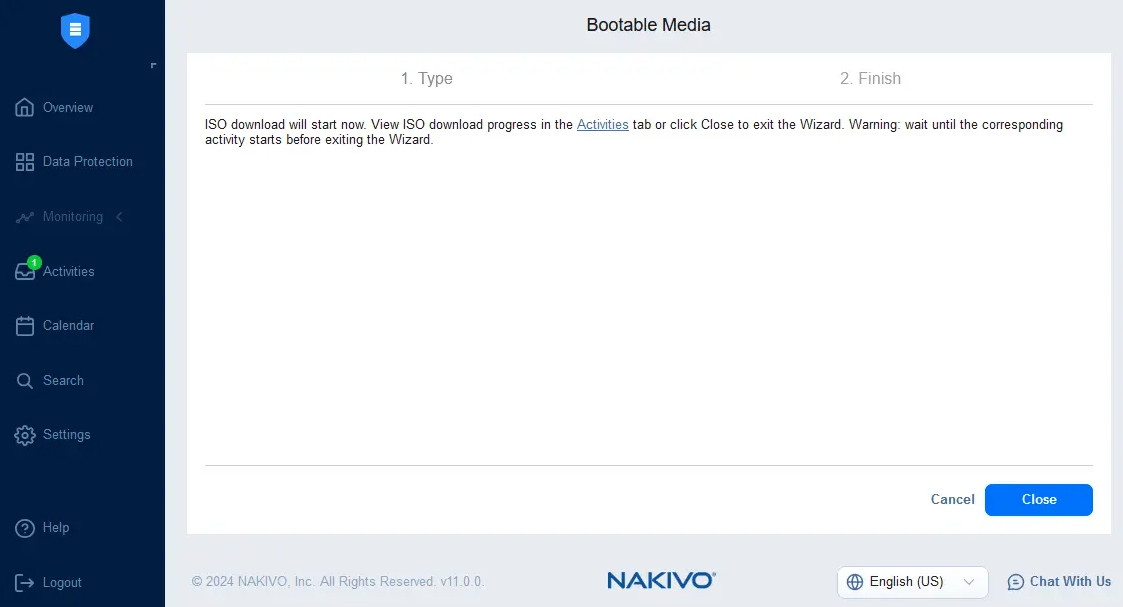
3. Select Get ISO (download to browser), click Next and wait for the image preparation to complete
4. Boot the server from the downloaded recovery image. The Ubuntu OS with graphical environment will boot.
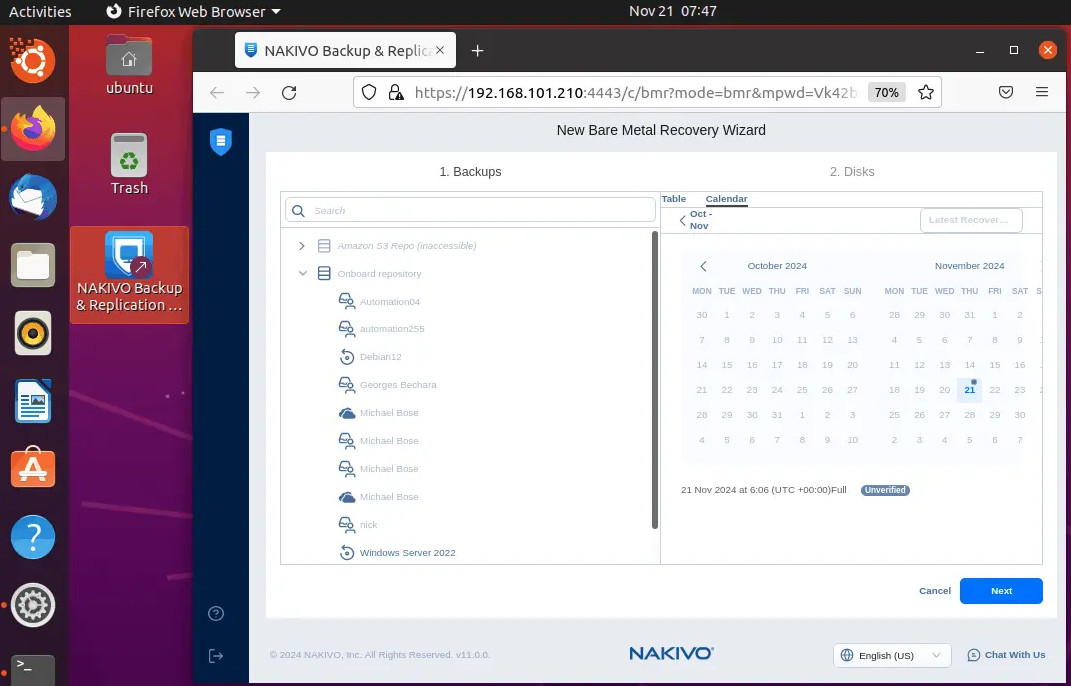
5. Enter your Backup service credentials. Select the required server and its backup copy, click Next.
Important! When restoring a physical server, its hardware must be identical to the one on which the backup was created.
6. Select the source drives you want to restore and the target server drive. Click Recover
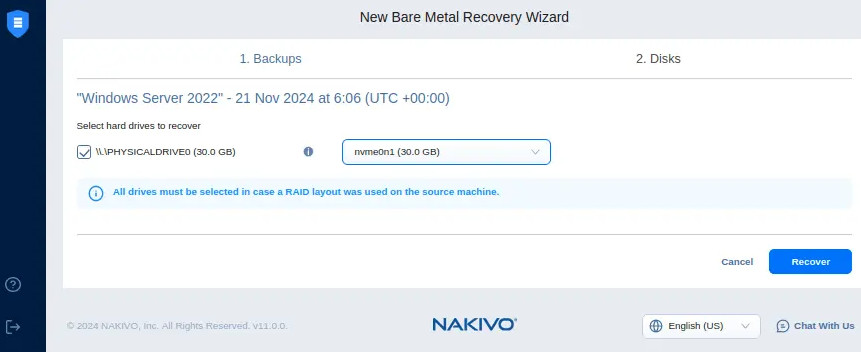
7. The recovery process will start. If successful, you will receive the message "Recovery was successful!"
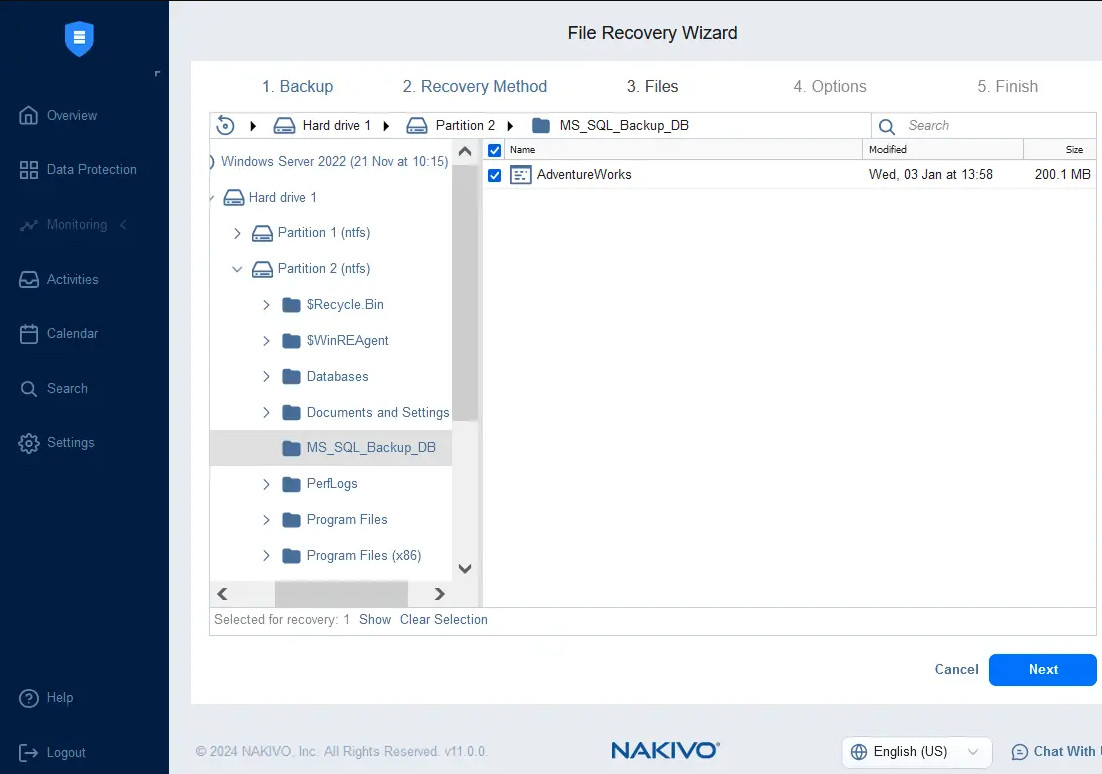
Recovering individual files
1. Go to Jobs - Name of your backup task - Recover
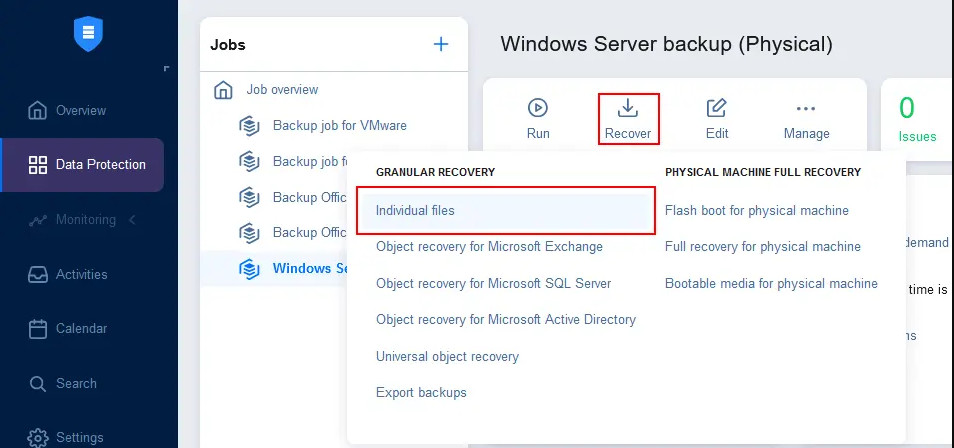
2. Select Individual files
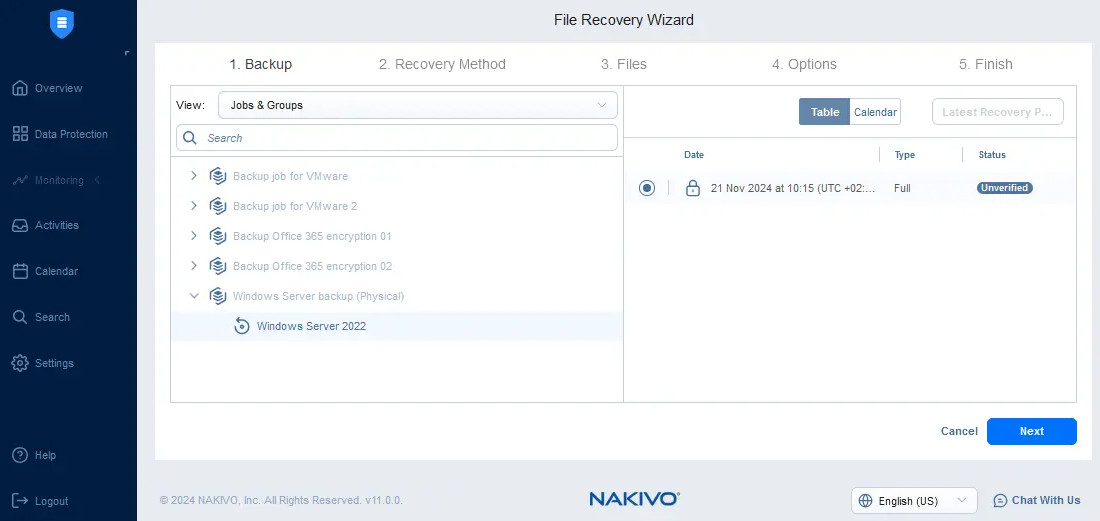
3. Select the required backup
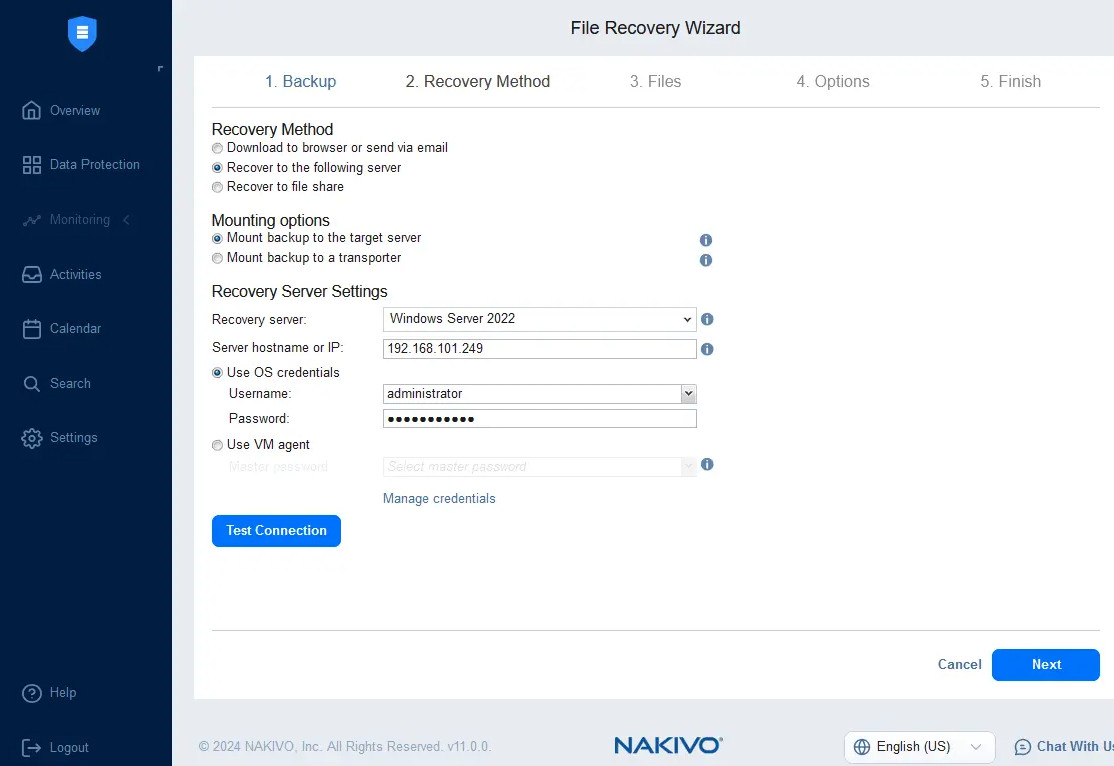
4. Choose a recovery method:
Download to browser or send via email – download selected files as archive
Recover to the following server – restore files to the selected server
Recover to file share – restore files to file storage
5. A file manager will open with the files contained in the backup. Select the desired file or folder and click Next
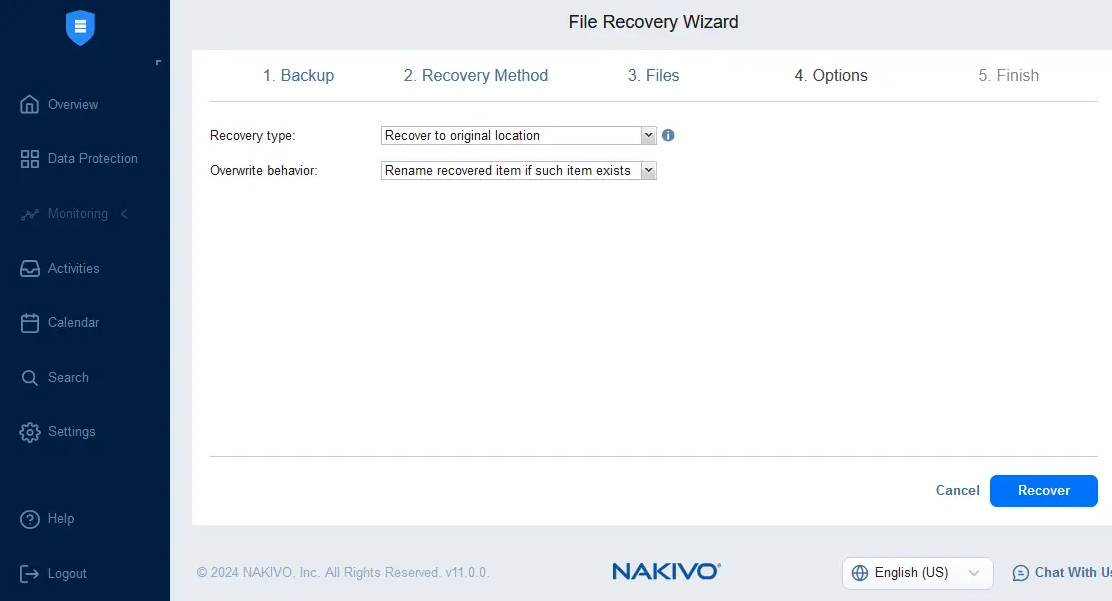
6. Select the recovery type and overwrite behavior. Click Recover
7. The selected files will be recovered