
How to set up VLAN on Windows Server
This instruction will allow you to configure a VLAN using NIC Teaming and specify the VLAN ID. Make sure your switch is also configured to support VLANs and is bound to the correct ports that match your VLAN configuration.
NIC Teaming, also known as Link Aggregation or EtherChannel, allows multiple network adapters to be teamed together to increase throughput and improve fault tolerance.
1. Open Server Manager
Open Server Manager, which usually appears on the server's desktop. If it's not there, you can launch it by pressing Win + X and selecting "Server Manager".
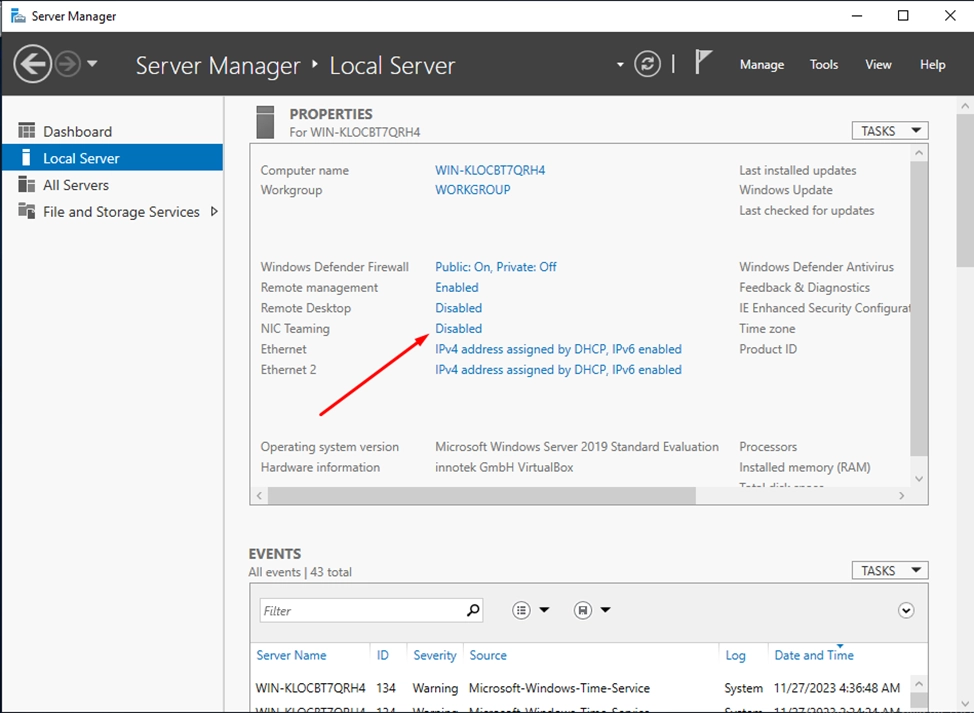
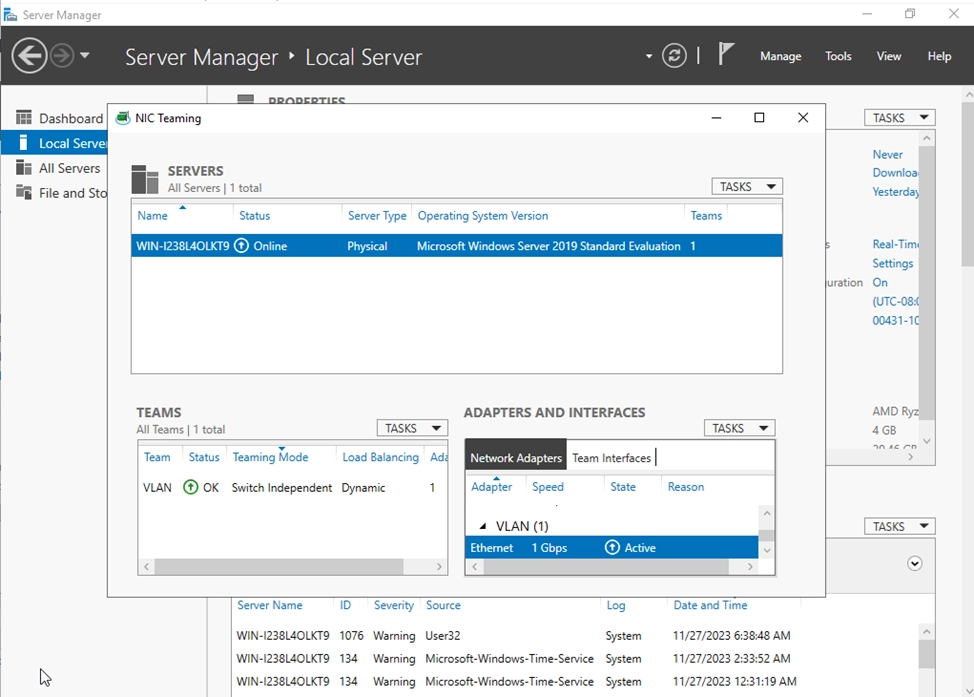
2. Click to Local Server section
On the left side of the Server Manager window, select Local Server.
On the Local Server tab, find your network adapters in the NIC Teaming section (If the section is missing, this may require installing additional roles, such as Hyper-V). Click on Disabled next to NIC Teaming to open the setup wizard.
Similar actions must be performed on the second server.
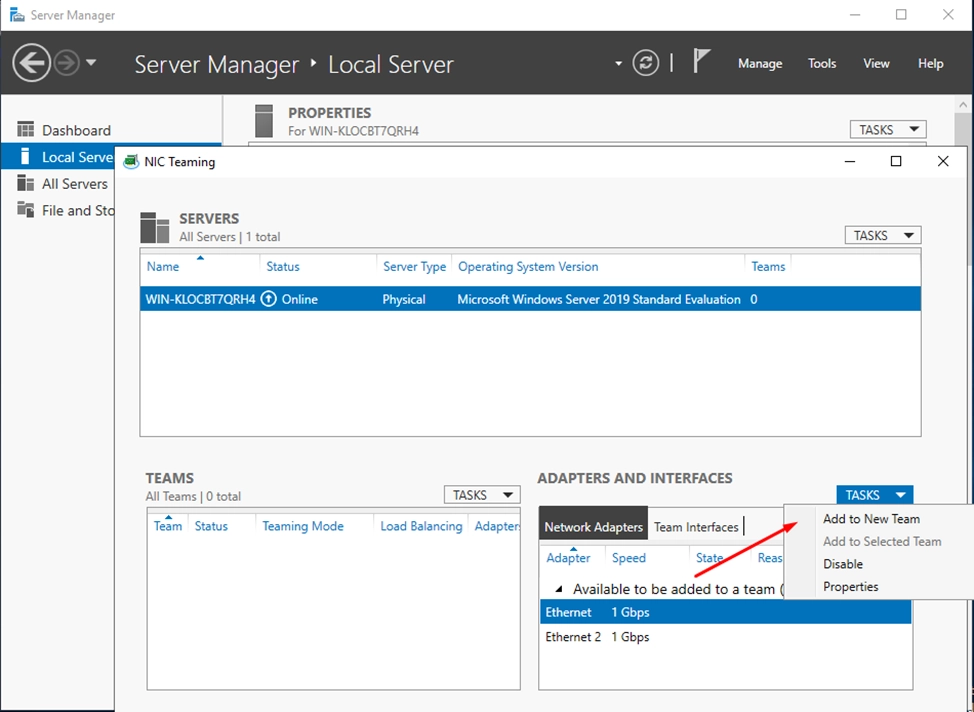
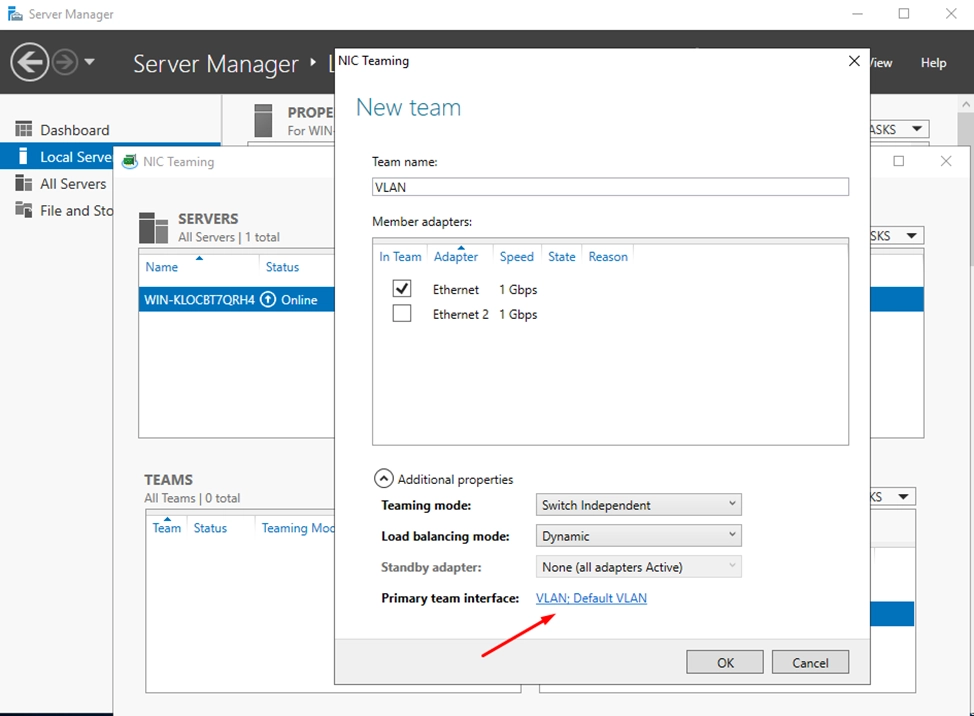
3. In the setup wizard, select the network adapter and click Add to New Team
4. Adapter setup
Enter the word VLAN in the Team name column. Select the operating mode (Teamimg mode). You can select the mode that best suits your needs, such as LACP (negotiate with the switch) or Static (choose a static configuration without negotiating with the switch).
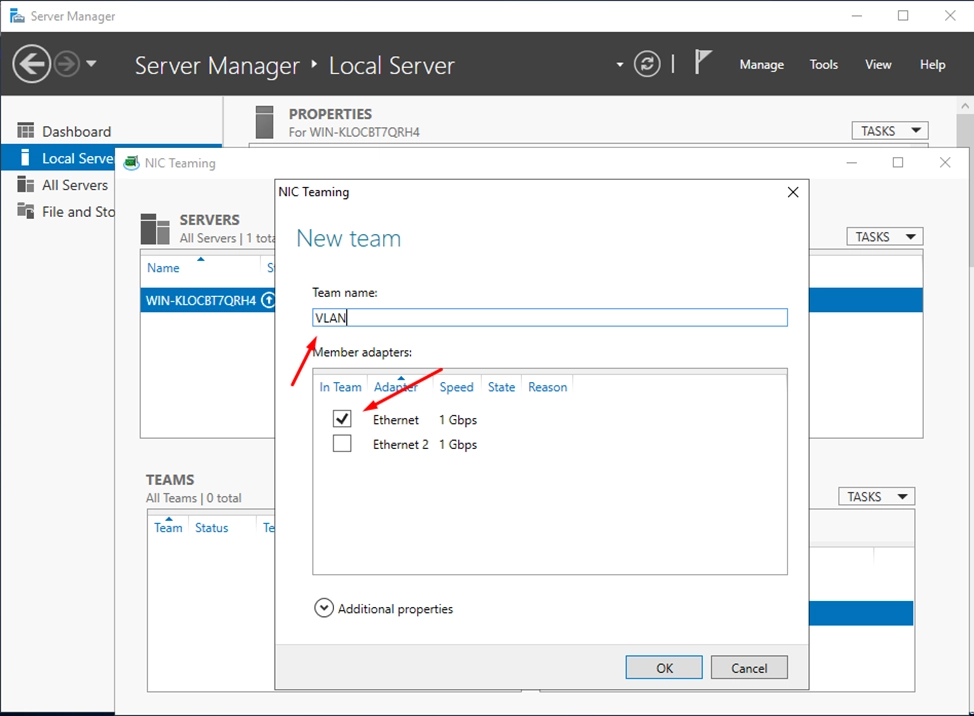
Click OK and complete the setup wizard.
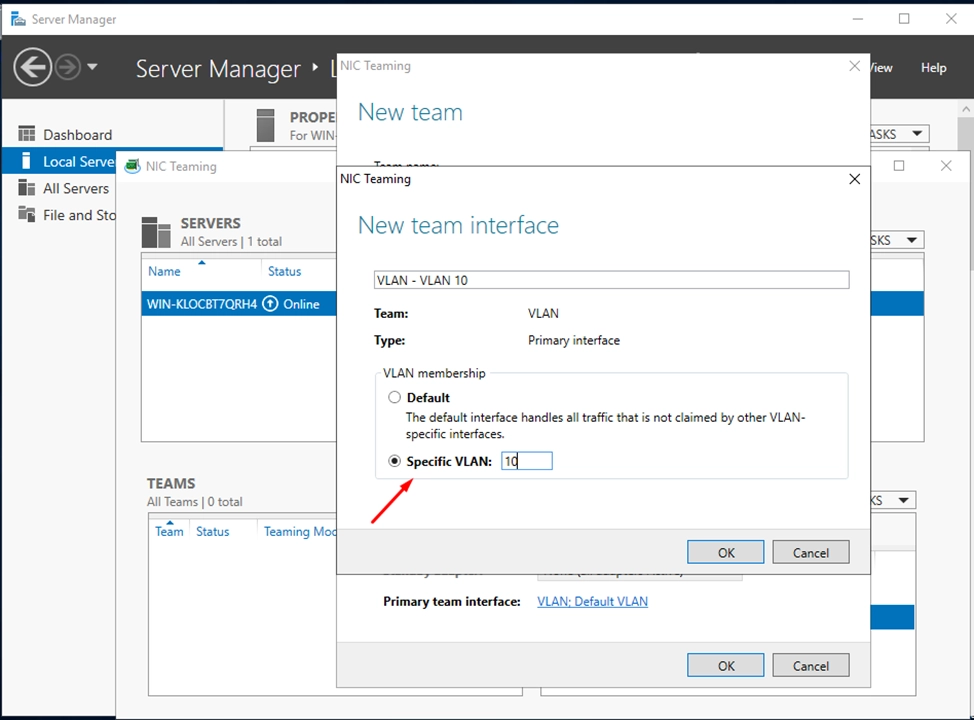
5. To configure Tagged VLAN, go to the Primary team interface section
Specify the VLAN ID and click OK.
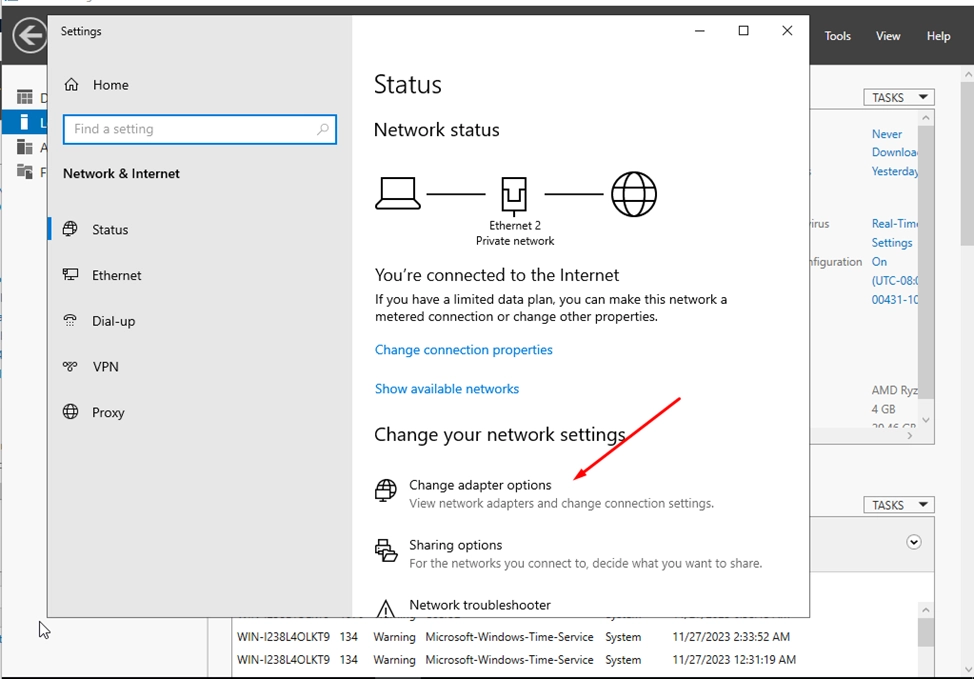
6. Open Network Connections on the server
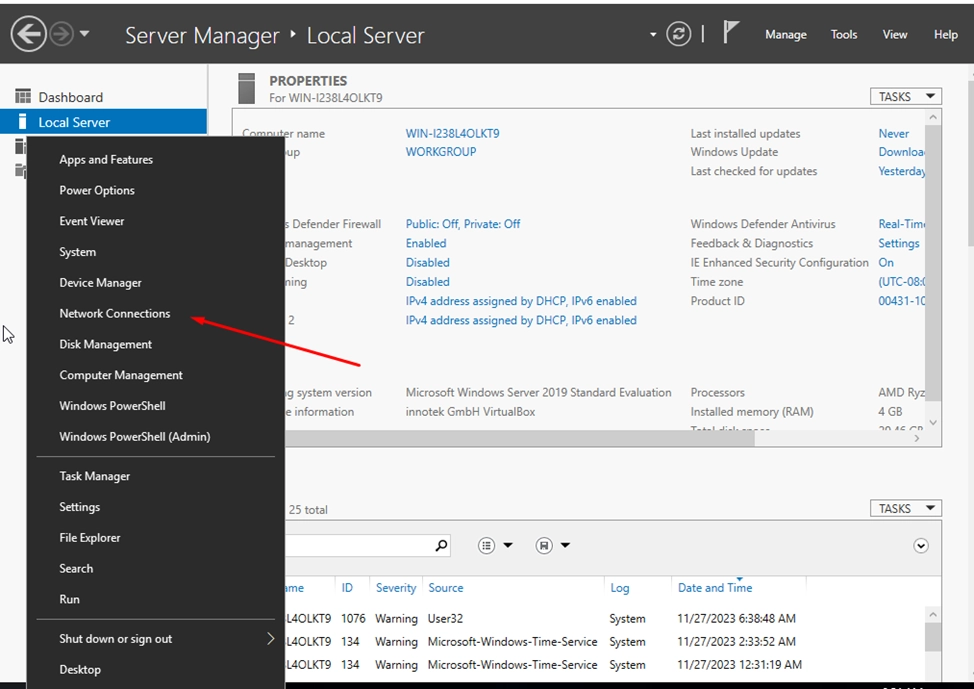
Choose Change adapter options.
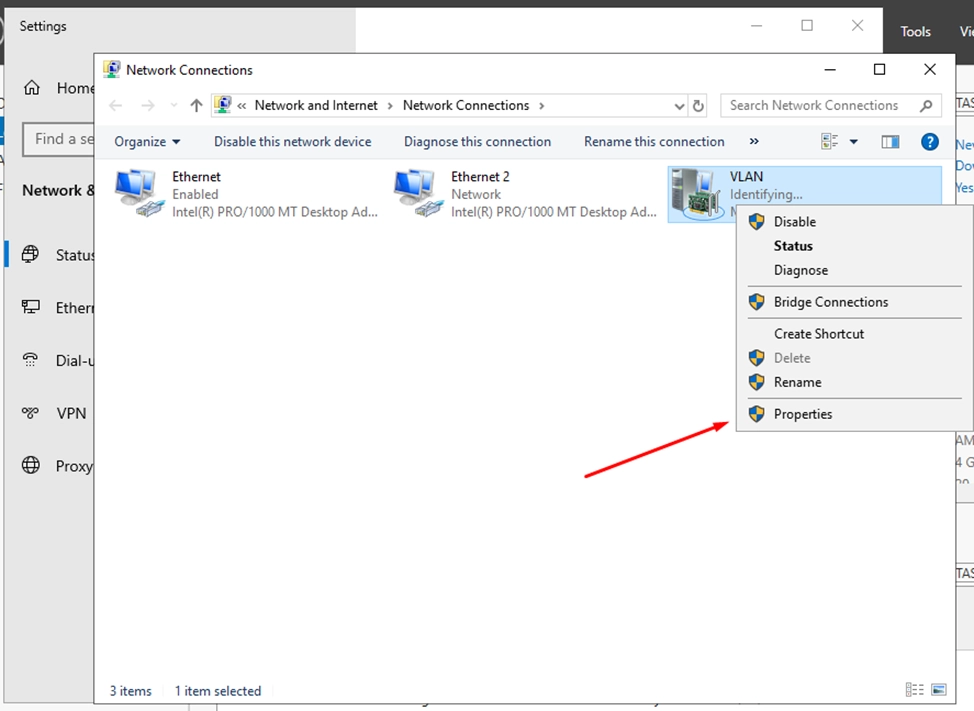
7. IP address assignment
Right-click on the VLAN network adapter we created in the previous steps that you want to configure for the VLAN and select Properties.
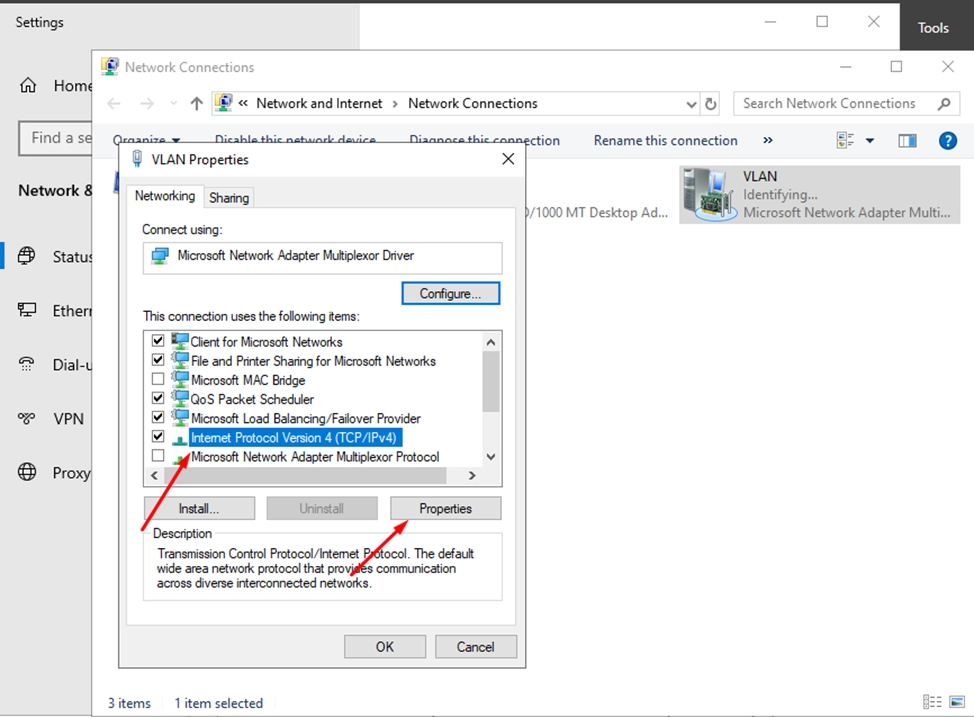
8. Find Internet Protocol Version 4 (TCP/IPv4) and click Properties
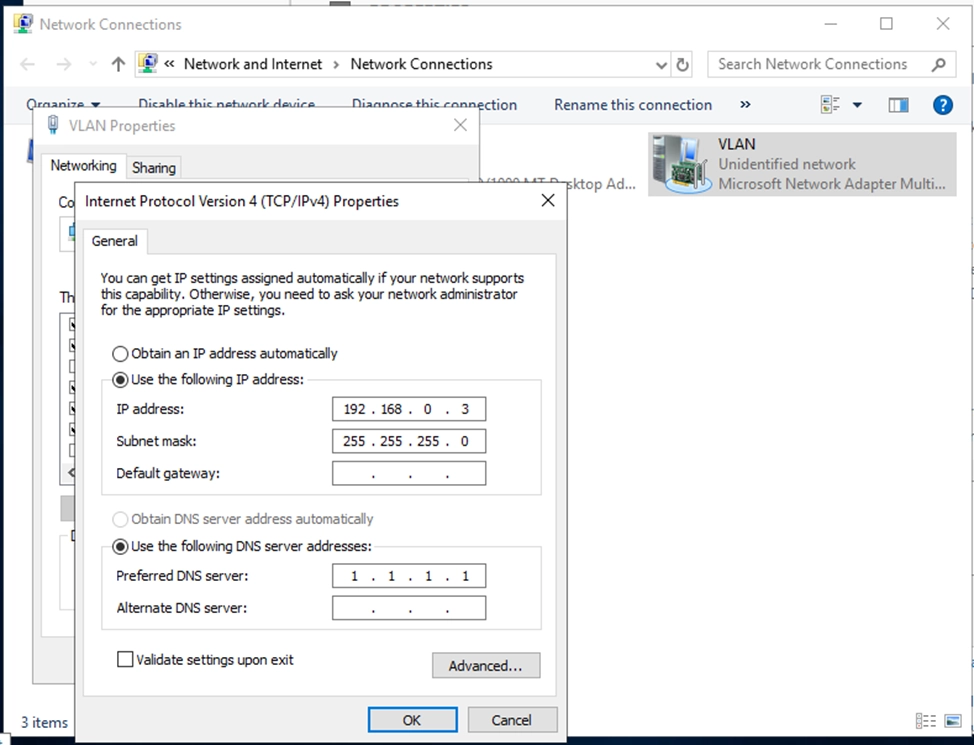
Specify the IP address, subnet mask and DNS server.
Same for second server.

Click OK to apply the changes.
10. Check ping between servers in this VLAN
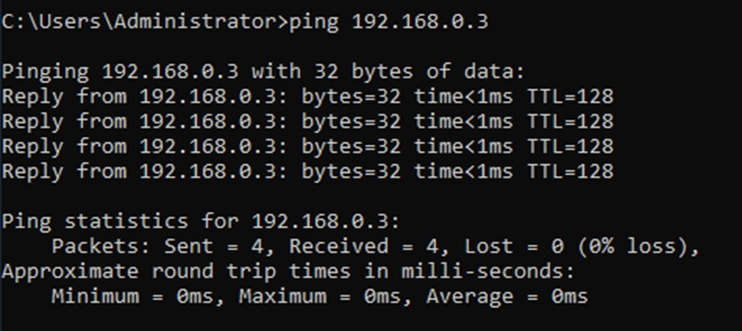
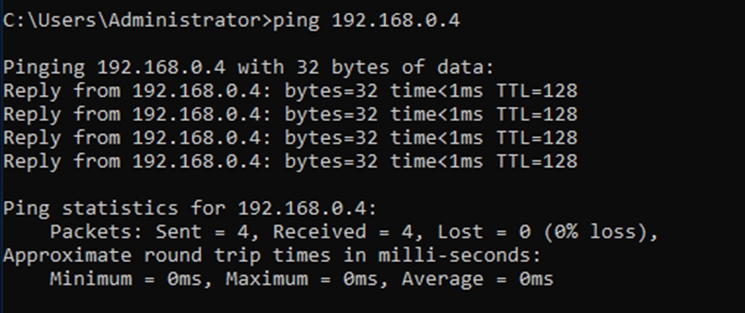
This is the basic process of configuring VLANs in Windows Server. Please note that the specific steps may vary slightly depending on your network infrastructure configuration.


