
Connecting servers to a VLAN
Configuring VLANs (Virtual Local Area Network) on Linux servers allows you to create virtual networks to control and isolate traffic on the network.
Ubuntu 22.04.
Configuring VLANs on two Ubuntu 22.04 servers can be done using the netplan tool, which provides a convenient way to configure network interfaces in Ubuntu.
1. Configuring an untagged VLAN
Let's configure a VLAN without using identifiers (VLAN ID), but in this case it will be called an "untagged" VLAN. Untagged VLAN means that the traffic of this VLAN will be carried without VLAN tag through the physical interface.
Let's figure out the interface to configure the VLAN using theshow link command.

In this case we have enp0s8 on both servers.
2. Assigning IP addresses to VLANs
Let's find our netplan configuration; the YAML file may have different names.

Open the configuration and make changes to assign an IP address to our interface.
sudo nano /etc/netplan/*.yaml
The changes need to be made on both servers.
enp0s8:
 dhcp4: no
 addresses: [192.168.1.2/24, ]
 gateway4: 192.168.1.1
Be careful with the syntax.
After that, apply the settings:
sudo netplan apply
Also check if the address has been assigned on the interface:

3. Ping addresses on the local network
PING 192.168.1.1 (192.168.1.1): 56 data bytes
64 bytes from 192.168.1.1: icmp_seq=0 ttl=64 time=3.894 ms
64 bytes from 192.168.1.1: icmp_seq=1 ttl=64 time=4.444 ms
64 bytes from 192.168.1.1: icmp_seq=2 ttl=64 time=4.268 ms
64 bytes from 192.168.1.1: icmp_seq=3 ttl=64 time=4.914 ms
64 bytes from 192.168.1.1: icmp_seq=4 ttl=64 time=5.063 ms
64 bytes from 192.168.1.1: icmp_seq=5 ttl=64 time=5.117 ms
64 bytes from 192.168.1.1: icmp_seq=6 ttl=64 time=5.176 ms
^C
--- 192.168.1.1 ping statistics ---
7 packets transmitted, 7 packets received, 0.0% packet loss
round-trip min/avg/max/stddev = 3.894/4.697/5.176/0.460 ms

The servers are now connected to each other using VLANs.
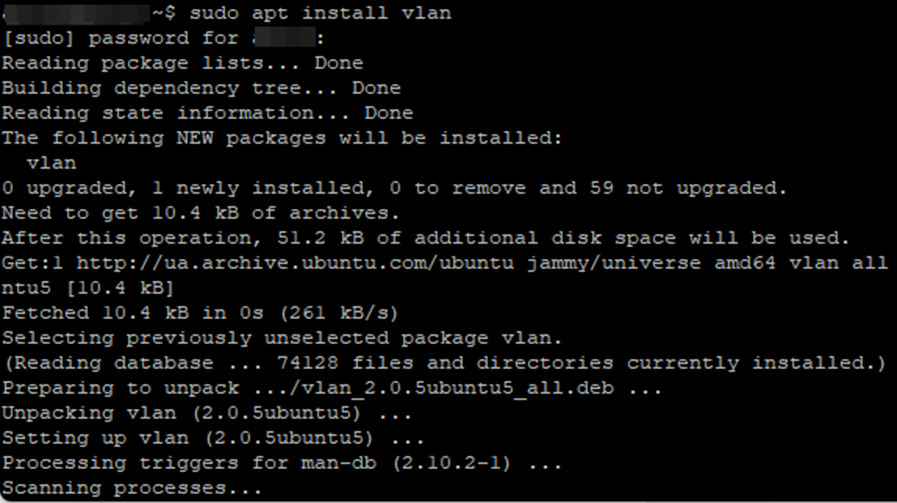
4. Install the VLAN package
First of all, make sure that the vlan package is installed on both servers. You can install it using the command:
sudo apt update
sudo apt install vlan
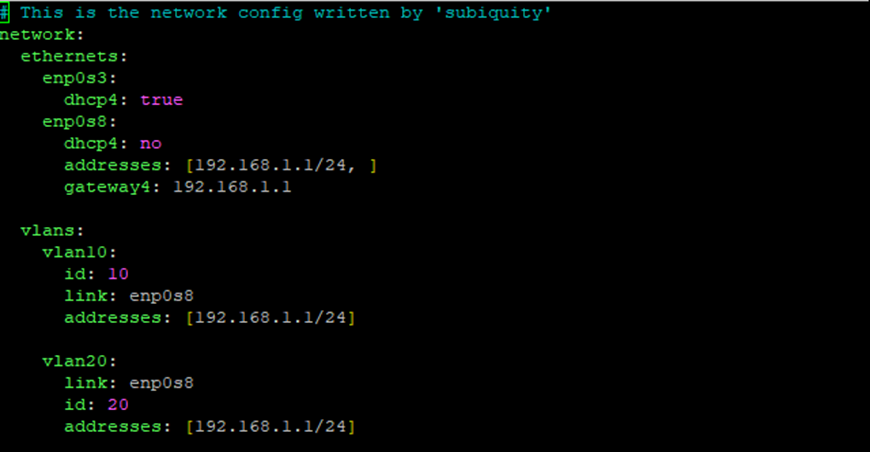
5. Also add 2 tags to our interface
All network packets will be tagged before being sent through this interface. For example, let's add two VLAN IDs 10 and 20 to the netplan configuration; all network packets will be tagged before being sent over this interface.
Open netplan and add the vlan parameters:

vlans:
 vlan10:
 id: 10
 link: enp0s8
 addresses: [192.168.1.2/24]

 vlan20:
 link: enp0s8
 id: 20
 addresses: [192.168.1.2/24]
Be careful with the syntax, as YAML is relentless.
Do the same for the second server:
 vlans:
 vlan10:
 id: 10
 link: enp0s8
 addresses: [192.168.1.1/24]

 vlan20:
 link: enp0s8
 id: 20
 addresses: [192.168.1.1/24]
Once this is done. apply the settings:
sudo netplan apply
6. Verify that everything is configured correctly
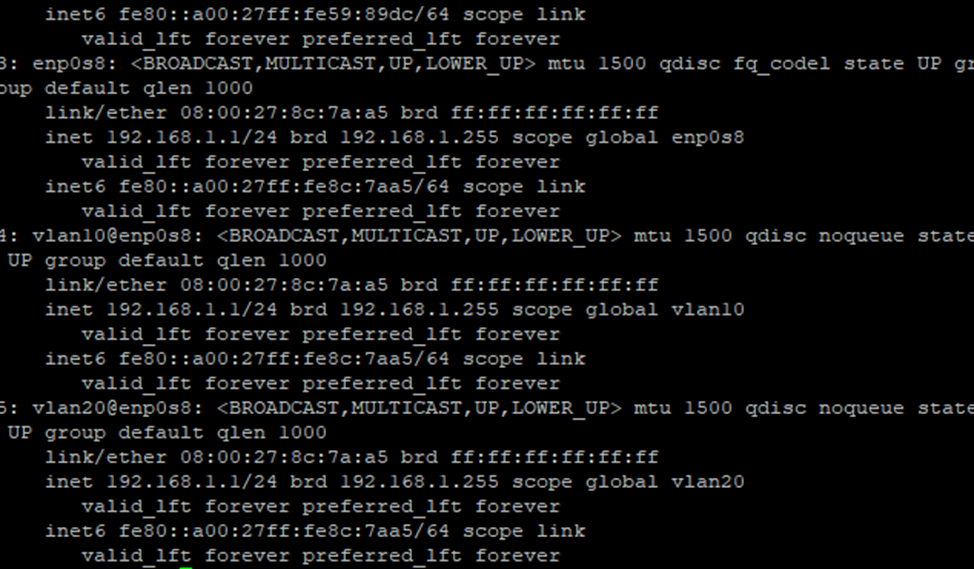
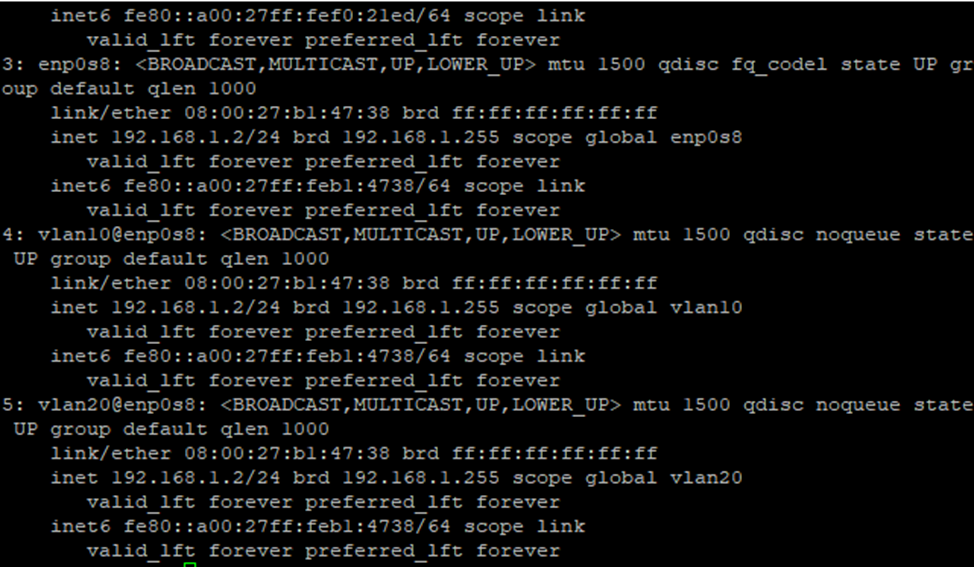
After applying the settings, verify that the VLAN is working correctly by running the ip a command to view the current network configuration on the server.
Debian 11
Configuring VLANs on two Debian servers can be done using the /etc/network/interfaces file, which provides a convenient way to configure network interfaces in Debian.
1. Configuring an untagged VLAN
Let's configure a VLAN without using VLAN IDs, but in this case it will be called an "untagged" VLAN. Untagged VLAN means that the traffic of this VLAN will be forwarded without VLAN tag through the physical interface.
First we figure out the interface to configure the VLAN using the ip link show command .
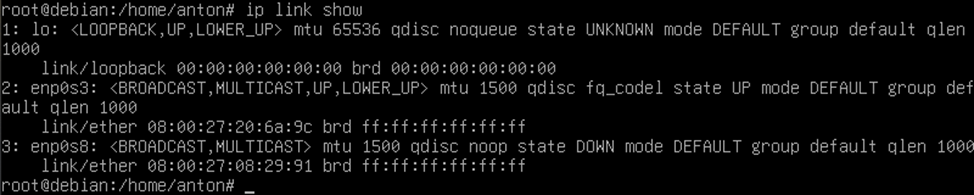
In this case we have interface enp0s8 on both servers.
2. We assign an IP address to our interface

ip addr add 192.168.1.1/24 dev enp0s8
ip addr add 192.168.1.2/24 dev enp0s8
We will also add this to the /etc/network/interfaces file

auto enp0s8
Iface enp0s8 inet static
 address 192.168.1.1
 netmask 255.255.255.0
Similarly for the second server:

Reboot the server:
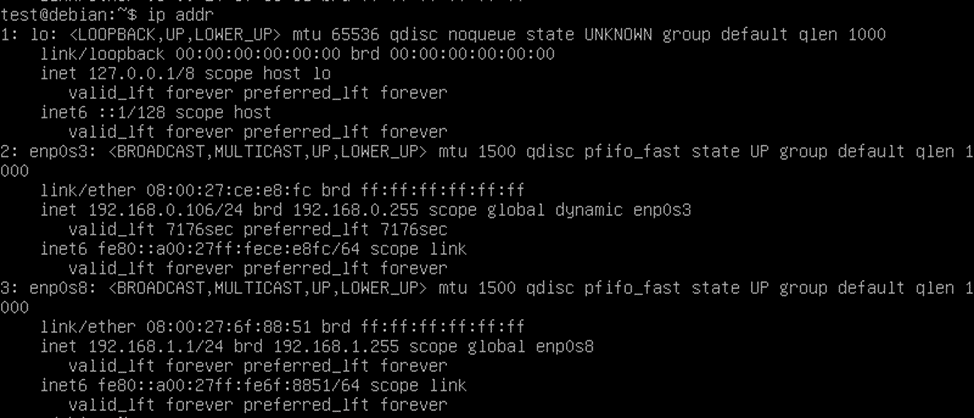
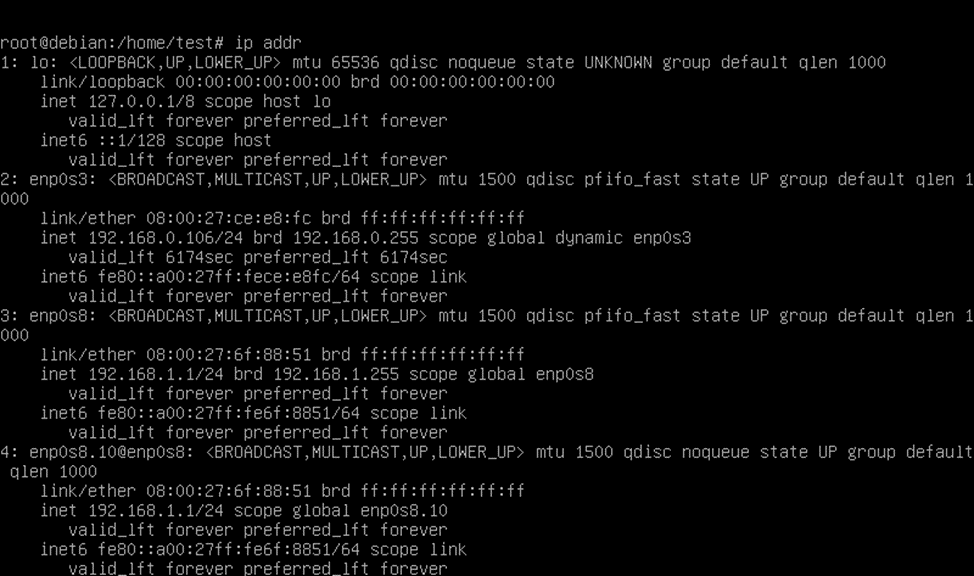
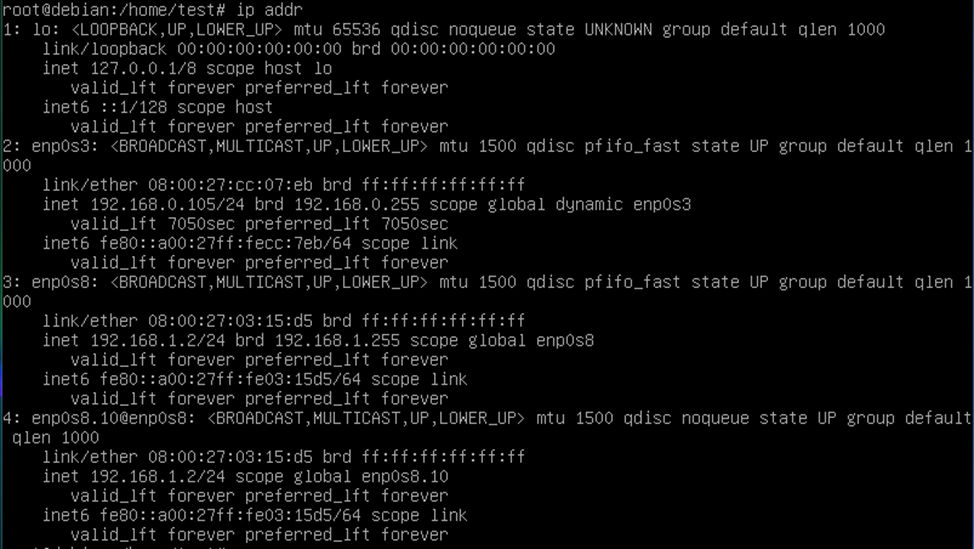
As you can see, the address is registered
Command to check:
ip addr
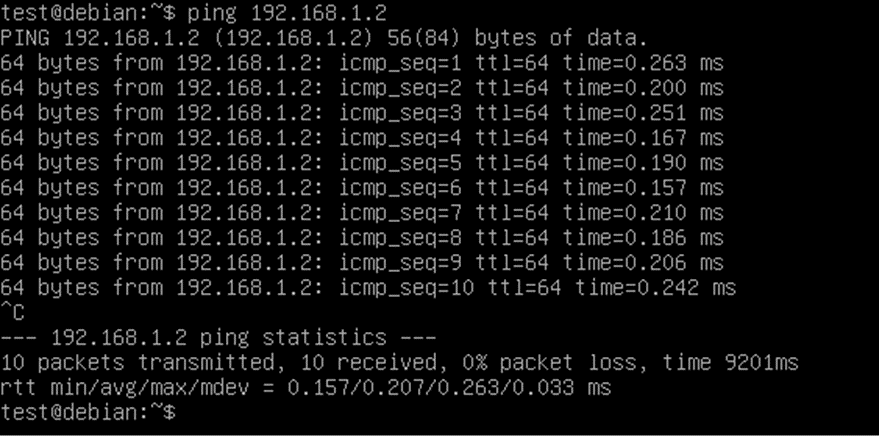
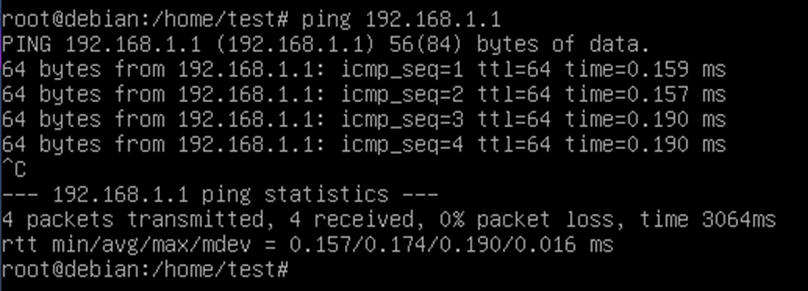
After the reboot we check if the servers are pinging each other:
3. configure a tagged VLAN
All network packets will be tagged before being sent over this interface. For example, let's add VLAN ID 10 to our configuration; all network packets will be tagged before being sent over this interface.
Here enp0s8.10 is the virtual interface for VLAN ID 10, and it is configured to use the physical interface enp0s8.

Similarly for the second server:

Ip addr 192.168.1.1/24 dev enp0s8.10
Ip addr 192.168.1.2/24 dev enp0s8.10
We will also write this in the /etc/network/interfaces config so that our settings will persist after reboot.
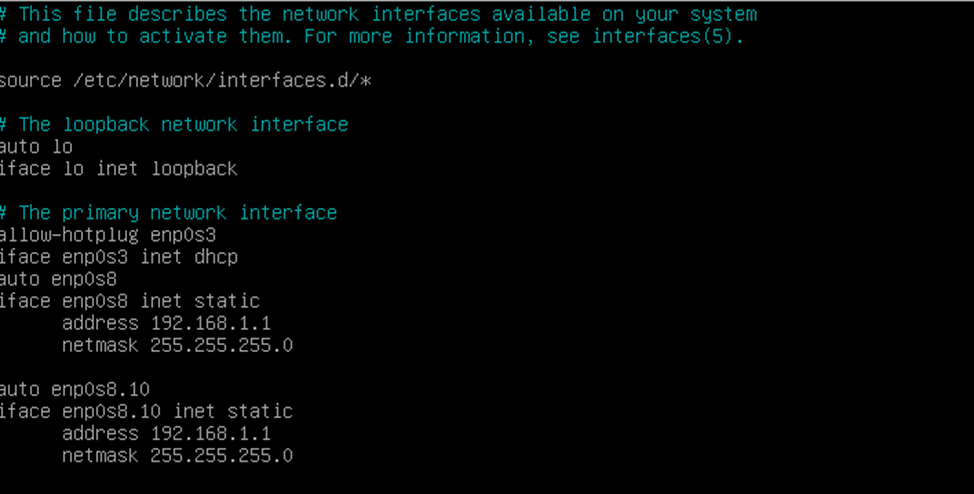
Similarly for the second server:

auto enp0s8.10
Iface enp0s8.10 inet static
 address 192.168.1.1
 netmask 255.255.255.0
4. Check the vlan configuration
Enter the command:
ip addr
CentOS 7.
VLAN configuration on two CentOS servers can be done using network interface configuration files.
1. Configuring a non-tagged VLAN
Let's configure a VLAN without using identifiers (VLAN IDs), but in this case it will be called an "untagged" VLAN. An untagged VLAN means that the traffic of this VLAN will be forwarded without a VLAN tag through the physical interface.
You can find out the interface to configure the VLAN by using the command
ip addr
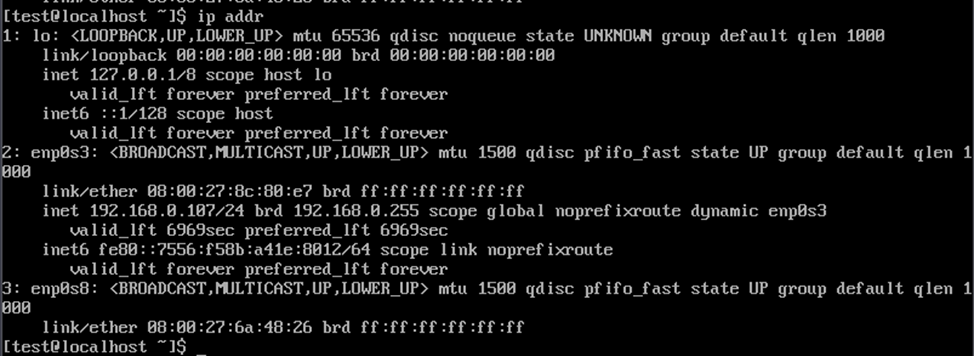
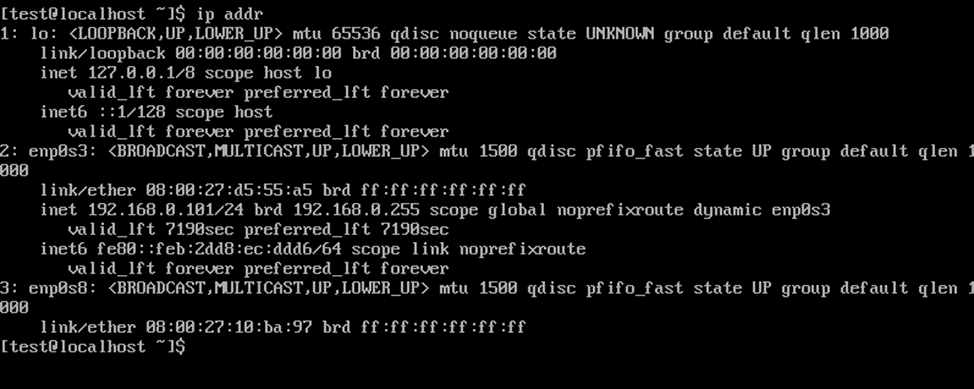
In this case on both servers, it is enp0s8.
2. Assign an IP address to our interface.
Open the network interfaces configuration file for editing:
sudo nano /etc/sysconfig/network-scripts/ifcfg-enp0s8
In this case, it is called in the same way as the interface.

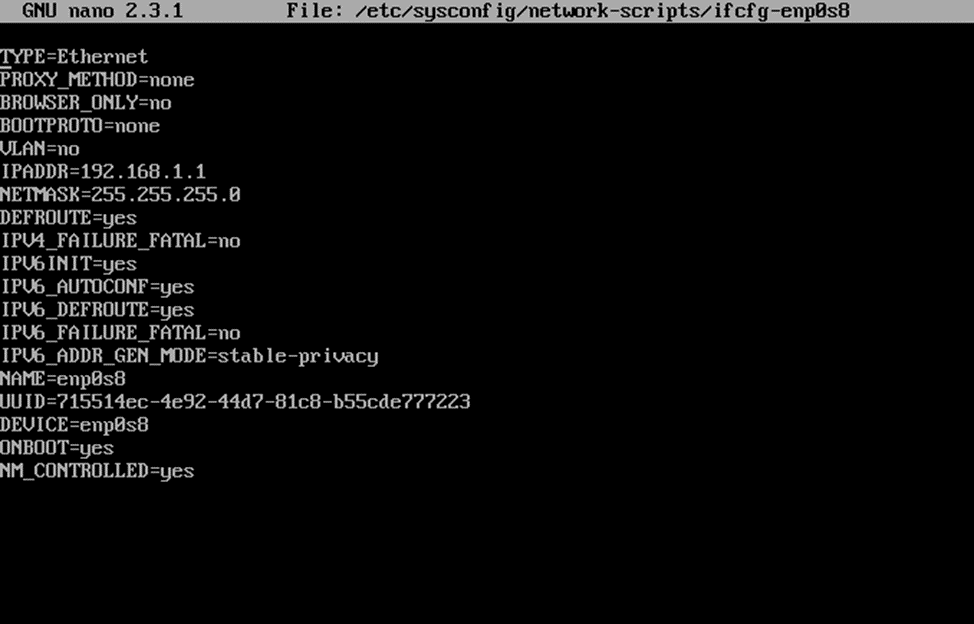

ONBOOT=yes
NM_CONTROLLED=yes
BOOTPROTO=none
VLAN=no
IPADDR=192.168.1.1
NETMASK=255.255.255.0
3. Restart the network service
sudo systemctl restart network

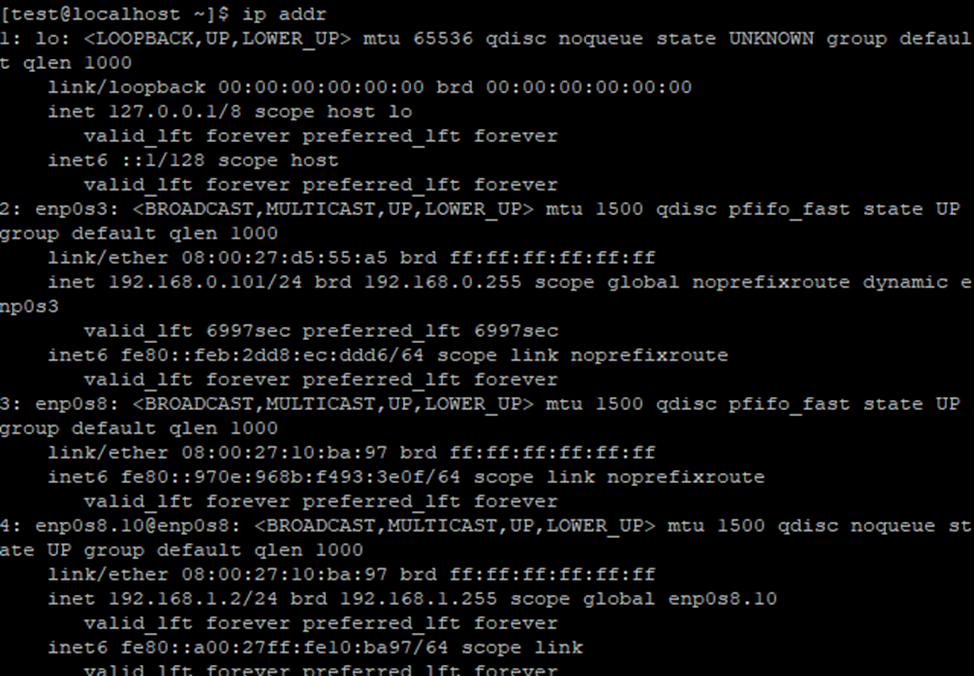
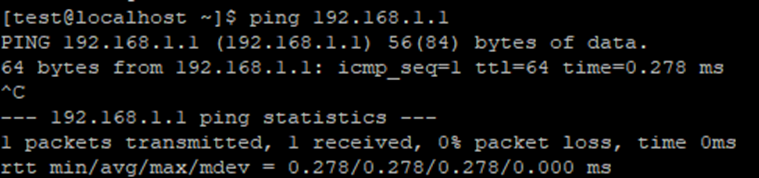
4. Check if the address has been added to the interface and ping the other server
ip addr
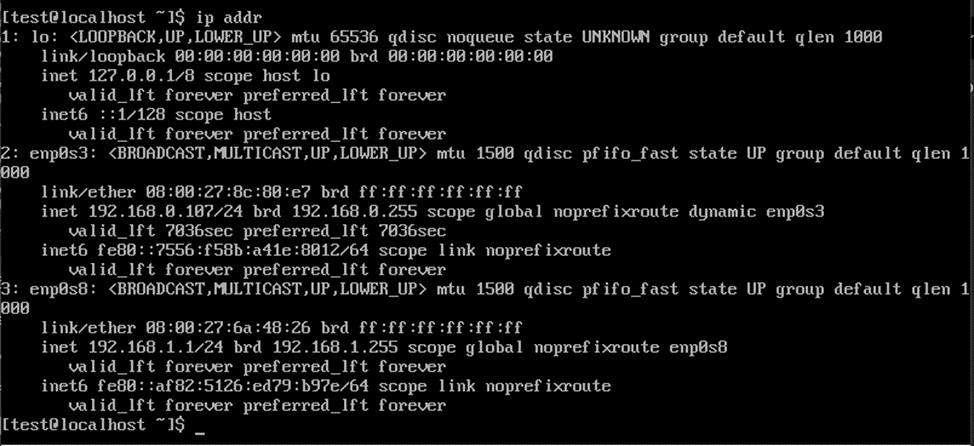
Let's ping the servers.
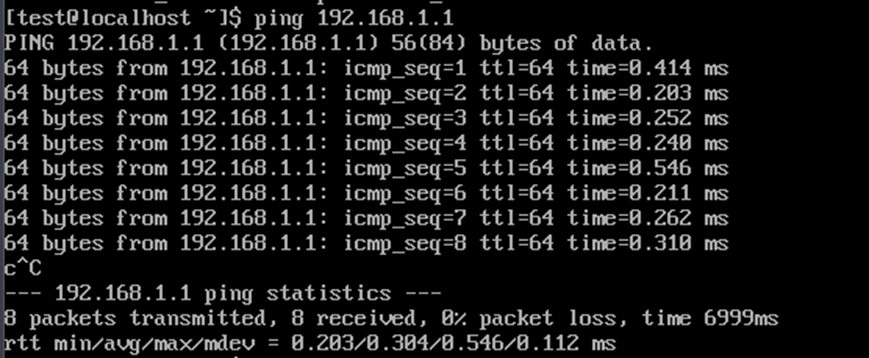
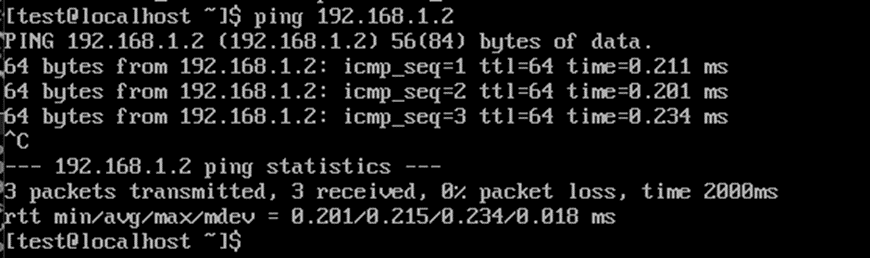
The servers are available to each other.
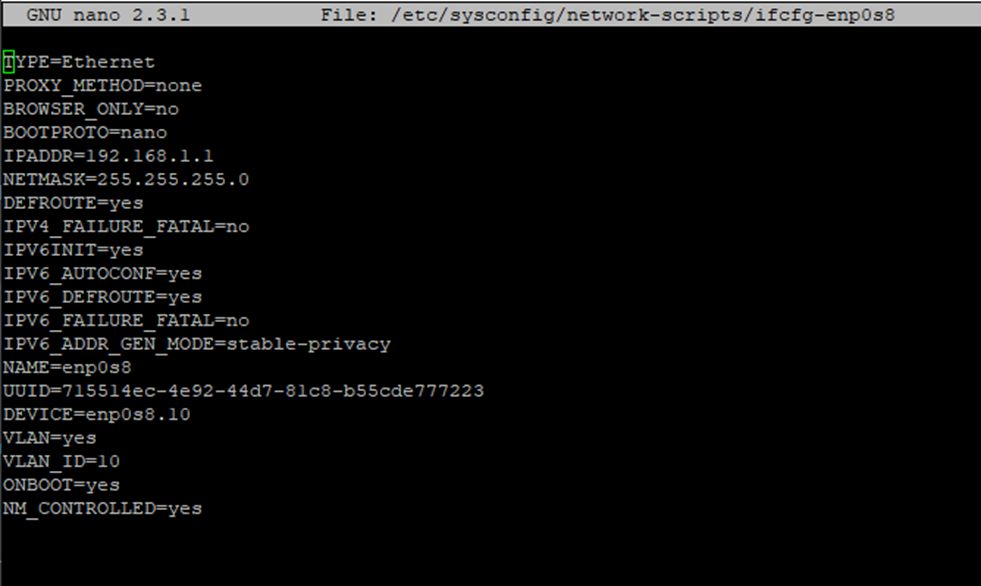
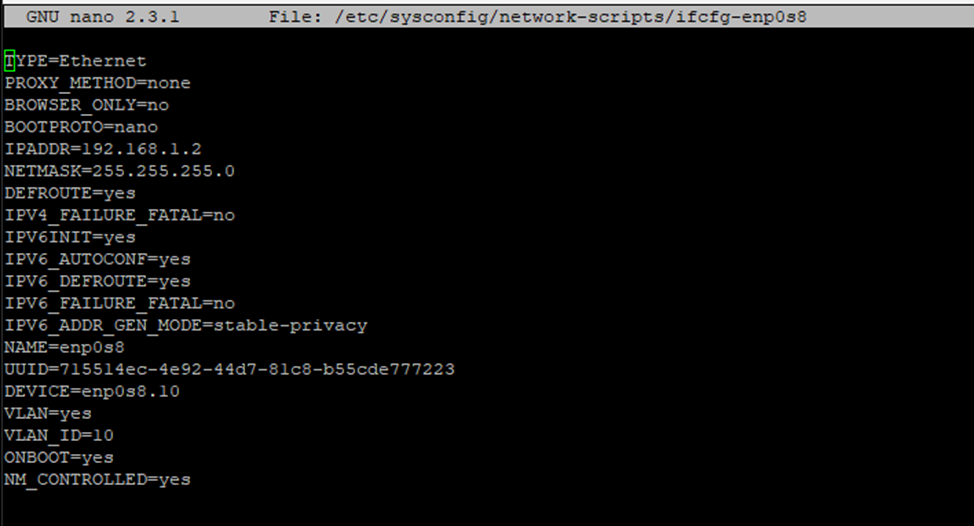
5. Configuring a tagged VLAN
Open the network interface configuration file for editing using the physical interface ( enp0s8 in this case):
sudo nano /etc/sysconfig/network-scripts/ifcfg-enp0s8

Add the following lines to the file:
VLAN=yes
VLAN_ID=10
Также добавим идентификатор VLAN в строку DEVICE=enp0s8
DEVICE=enp0s8.10
6. Restart the network service on both servers
sudo systemctl restart network

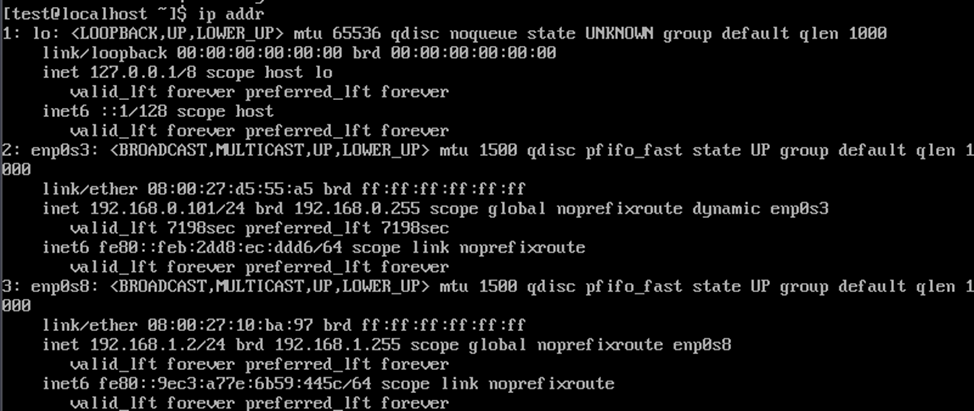
7. Check to see if a label has been added to the interface and ping the other server
ip addr

Both servers have a connection to each other.
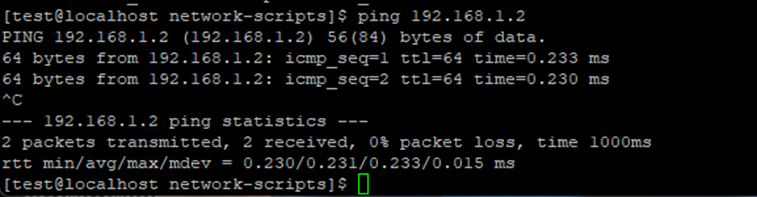
The tagged VLAN is configured.


