
WireGuard Windows setup
Before proceeding with the commands described, please ensure you're using the latest version of WireGuard and have administrator rights on your device
Setup
1) Download the current version for Windows: https://www.wireguard.com/install/ and install
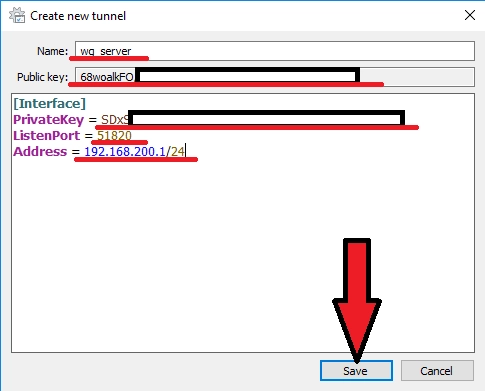
2) Run C:\Program Files\WireGuard\wireguard.exe and add an empty tunnel (we will configure the server side):
Add tunnel → Add empty tunnel ...

We register the settings:
Name - the name of the network connection
Public key - public key of the WireGuard server (needed to configure the client side)
  [Interface]
PrivateKey = # private key of WireGuard server
ListenPort = # port that WireGuard will listen to
Address = # desired IP address of WireGuard server
Configure network interface settings for the WireGuard server. In the tunnel editor window (below the configuration text field), you can optionally enable:
– Block untunneled traffic (kill-switch) — prevents traffic from bypassing the VPN tunnel
– Pre-shared key — an additional security layer (optional)
These settings are optional but recommended for enhanced security.
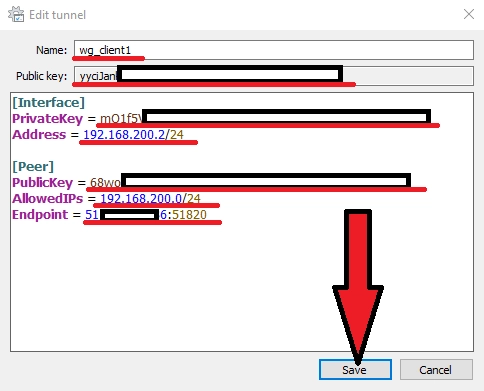
3) Add another empty tunnel (we will configure the client side): Add tunnel → Add empty tunnel
We register the settings:
Name - the name of the network connection
Public key - the public key of the WireGuard client (needed to configure the server side)
  [Interface]
PrivateKey = # WireGuard client private key
Address = # desired IP address of WireGuard client
[Peer]
PublicKey = # public key of the WireGuard server (from step 2)
AllowedIPs = # specify the IP addresses for which you want to use the created WG tunnel (specifying the subnet 0.0.0.0/0 will allow you to route all traffic to the WG tunnel)
Endpoint = # Server IP address (real, not WireGuard) and port that WireGuard server listens on (configured in step 2)
4) Now we need to add our client to the WireGuard server part, to do this go back to step 2 and add its config:
  ...
[Peer]
PublicKey = #WireGuard client public key (from step 3)
AllowedIPs = #IP user address
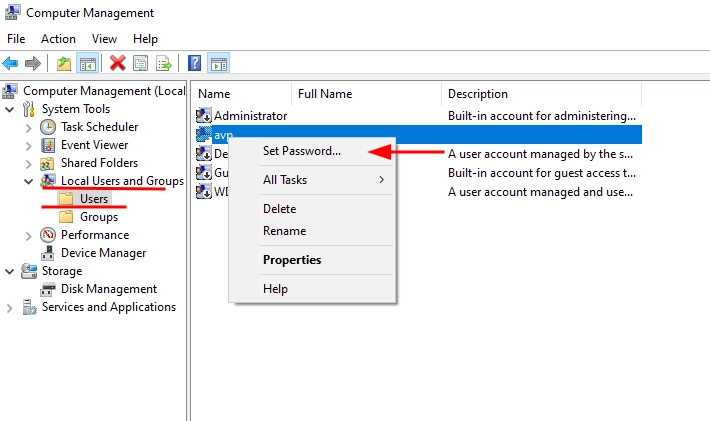
5) Let's configure the Windows Firewall for WireGuard. To do this:
- Create a new inbound rule:
- Open "Windows Defender Firewall with Advanced Security."
- In the left panel, select "Inbound Rules."
- Click "New Rule...".
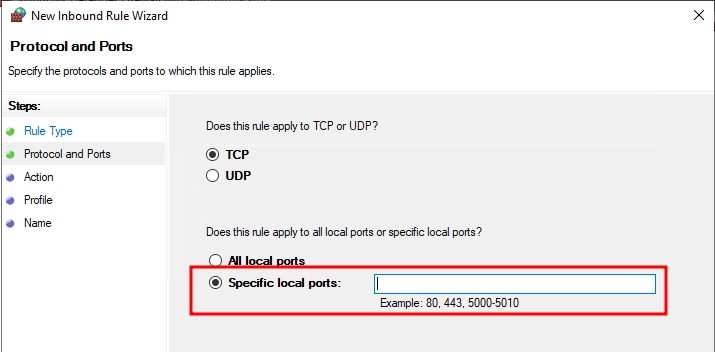
- Specify the protocol (UDP) and ports (e.g., 51820):
- In the "New Inbound Rule Wizard" window, select "Port" and click "Next."
- In the "Protocol and Ports" section, select the protocol type:
- Choose "UDP."
- Specify the specific local ports:
- For example, the default WireGuard port is 51820.
- If multiple ports are used, list them separated by commas (e.g.,
51820, 51821).
- Click "Next."
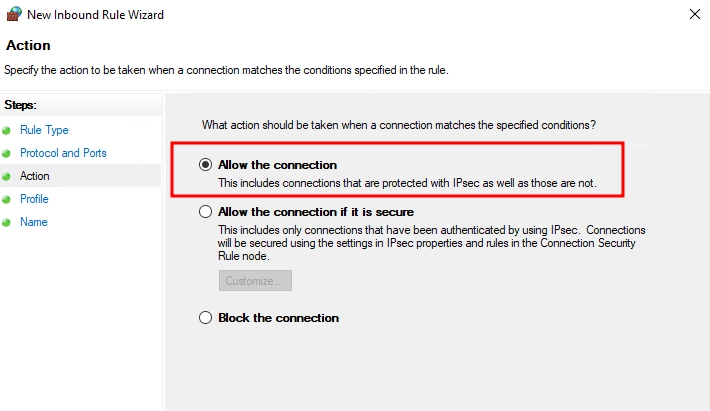
- Allow the connection:
- In the "Action" section, select "Allow the connection."
- Click "Next."
- Save the rule:
- Specify the profiles to which the rule will apply:
- Domain;
- Private;
- Public.
- Click "Next."
- Provide a meaningful name for the new rule, such as "WireGuard UDP 51820."
- Click "Finish."
- Specify the profiles to which the rule will apply:
Now, your firewall is configured to allow traffic through the specified WireGuard ports.
6) Now it is sufficient to export the configuration files Export all tunnels to zip→ Specify location for export→Save
Next, open the saved archive, there will be configurations of all our tunnels.
Give the client its configuration file.
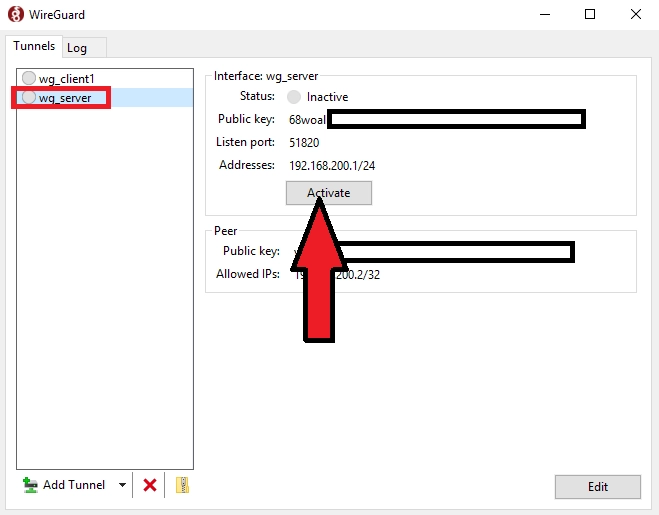
7) On the server, select the server config and run the program
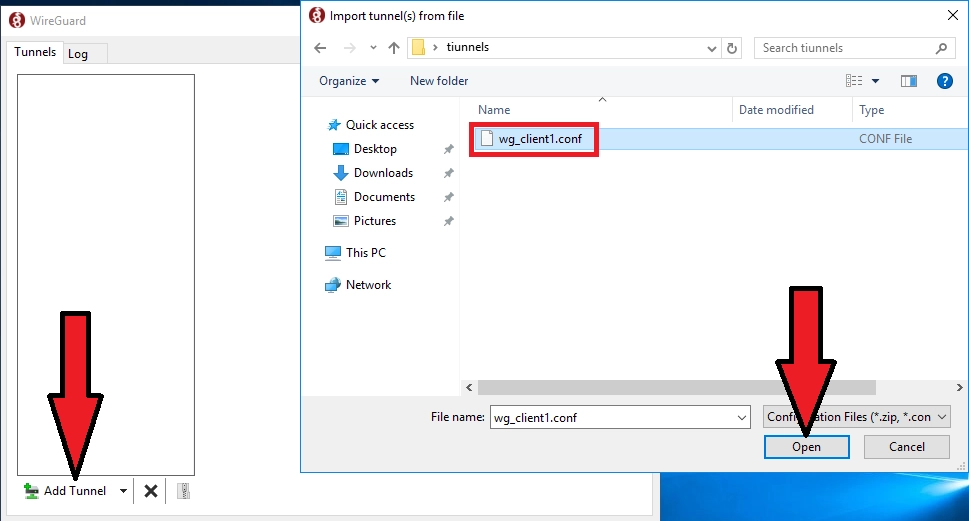
8) On the client add configuration file to WireGuard. Add Tunnel→Select client configuration file->Open
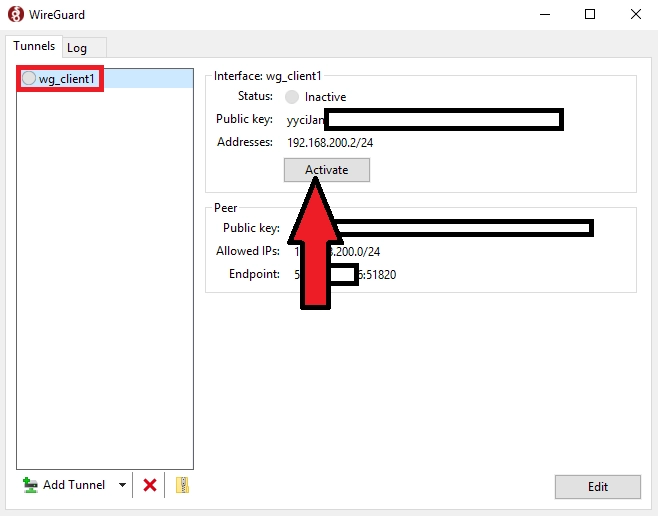
Select client config and run
This completes the configuration of the first client, similarly configuring the other clients by adding their data to the server config (step 4)
Verifying the connection
After activating the tunnel, Windows may display the WireGuard network adapter status as "No network access" or "No Internet access" in the Network and Sharing Center. This is normal and expected behavior — Windows does not recognize VPN tunnel adapters as standard internet connections. This status does not affect the tunnel's functionality.
To confirm that the WireGuard tunnel is working correctly:
1) Check the connection status in the WireGuard client. An active tunnel should display the "Active" status with data transfer counters. If the packet counters are increasing, the tunnel is working.
2) Open the Command Prompt (cmd) and ping the WireGuard server's internal IP address:
ping 10.0.0.1
Replace 10.0.0.1 with the actual WireGuard server IP configured in step 2. If you receive replies, the tunnel is functioning correctly.
3) If you configured AllowedIPs = 0.0.0.0/0 (all traffic routed through the tunnel), you can verify the routing with:
tracert 8.8.8.8
The first hop should be the IP address of your WireGuard server.
Understanding AllowedIPs
The AllowedIPs parameter in the client configuration (step 3) determines which traffic is routed through the WireGuard tunnel.
AllowedIPs = 0.0.0.0/0 — routes all traffic through the tunnel. All connections, including internet browsing, will go through the VPN. Use this option for full traffic protection.
AllowedIPs = 10.0.0.0/24 — routes only internal network traffic through the tunnel. Regular internet traffic will bypass the VPN and use the default connection. Use this option for accessing specific network resources.
You can also specify multiple subnets separated by commas, for example: AllowedIPs = 10.0.0.0/24, 192.168.1.0/24
Troubleshooting
The tunnel is active but there is no connection to the server
– Verify that the WireGuard port (e.g. 51820) is open in the firewall on both the server and client sides.
– Make sure the public keys are correctly copied between the server and client configurations.
– Confirm that the Endpoint in the client config points to the real IP address of the server, not the WireGuard tunnel IP.
DNS is not working after connecting
Add a DNS server to the client configuration:
  [Interface]
PrivateKey = ...
Address = ...
DNS = 8.8.8.8, 8.8.4.4
Packet counters are not increasing
This means the tunnel is not transmitting data. Check the following:
– AllowedIPs is configured correctly on both the server and client sides.
– The WireGuard IP addresses do not conflict with the existing local network.
– The ListenPort is not occupied by another application.
Auto-start WireGuard after a server restart.
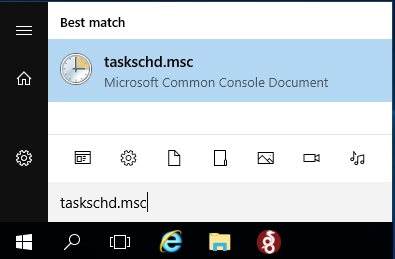
1) Add the startup file to the Windows scheduler autorun: Start→taskschd.msc
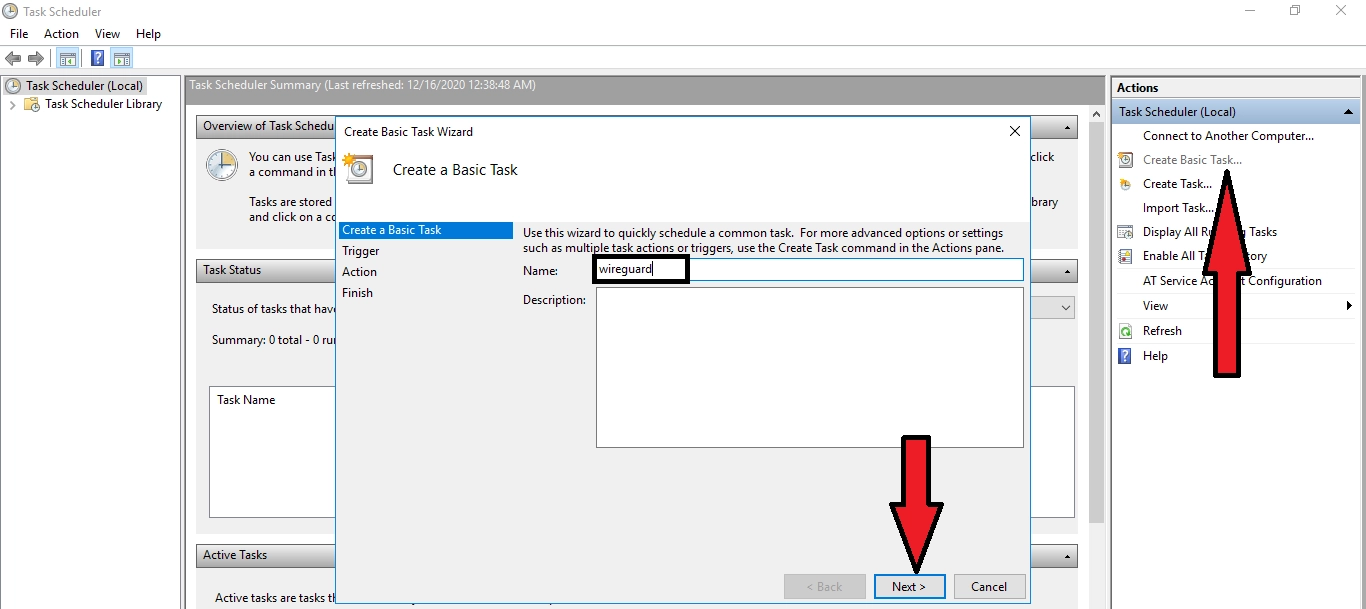
Click on "Create simple task" → Enter a Name for the task (e.g. wireguard) → Next
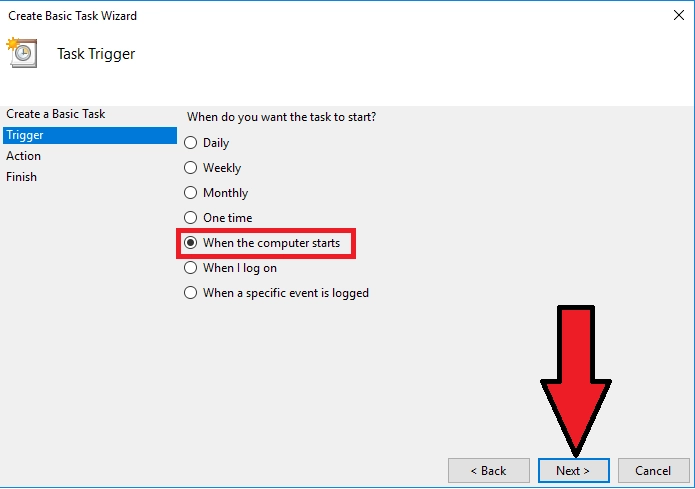
Select "On computer startup"→ Next
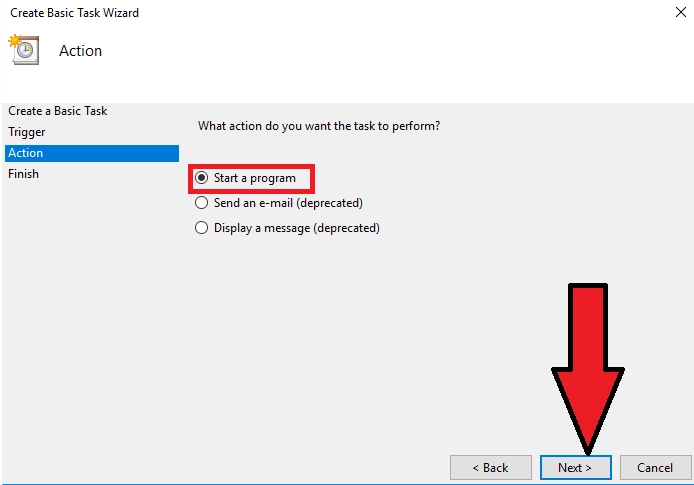
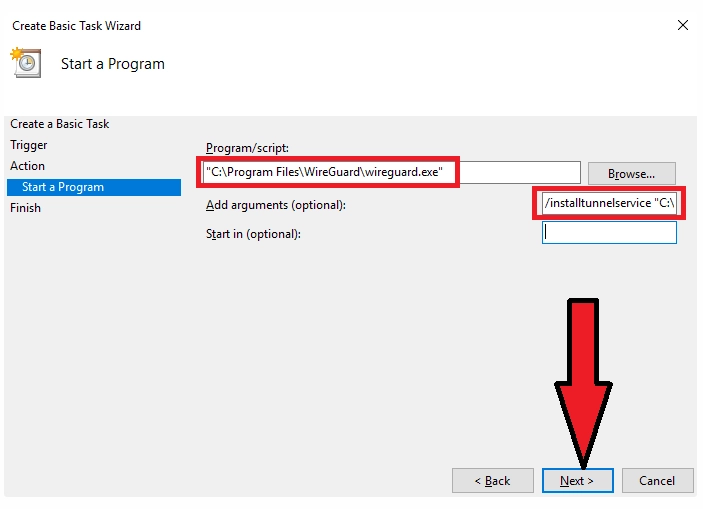
Select "Start programme"→ Next
In the "Program or Script" field, select our file to run WireGuard (default is "C:\Program Files\WireGuard\wireguard.exe")
Add arguments:
/installtunnelservice "C:\Program Files\WireGuard\wg_server.conf"
where:
C:\Program Files\WireGuard\wg_server.conf - location of the configuration file .conf
Check "Open the Properties window for this task after you have clicked 'Done'"→ Done

In the window that opens, tick the "Run with the highest rights"→OK

Done. Do a reboot, check


