
Server backup using Windows Server Backup service
For Windows Server OS, Microsoft has provided built-in utilities and components for full or partial system backup - Windows Server Backup.
This component allows you to perform scheduled or real-time backups to a local disk or network file storage. Next, we will consider the process of installing the Windows Server Backup component, and also perform a full backup of the entire system to a network storage using the SAMBA/CIFS protocol. In the example, we will use the CloudBox solution from Introserv, which supports a number of popular file transfer protocols and is perfect for storing backups of the system or individual applications. The connection process is relevant for any network storage operating via the SAMBA protocol.
Connecting file storage as a network drive
1. Open Explorer - This PC - Map a network drive ...

2. Specify the address of the folder in the format \\your_network_share and click the Finish button. If authorization is required to connect your network resource, a login and password entry window will appear. Fill in the form and after that the network drive will be displayed in Windows Explorer.

The network drive can already be used to save your files. It can be specified in the settings of applications that need to be backed up. To back up the entire server, you can use the Windows Server Backup component.
Installing the Windows Server Backup component
The fastest way to install this component is via the PowerShell console
1. Check if the component is installed:
Get-WindowsFeature Windows-Server-Backup
If the component is already installed, you will see the following:

The component is not installed, but is available for installation:

2. If the WSB component is not installed, install it with the command:
Add-Windowsfeature Windows-Server-Backup –Includeallsubfeature

Alternative option to install Windows Server Backup using the graphical interface
1. Go through the Start button - Server Manager - Manage - Add roles and features
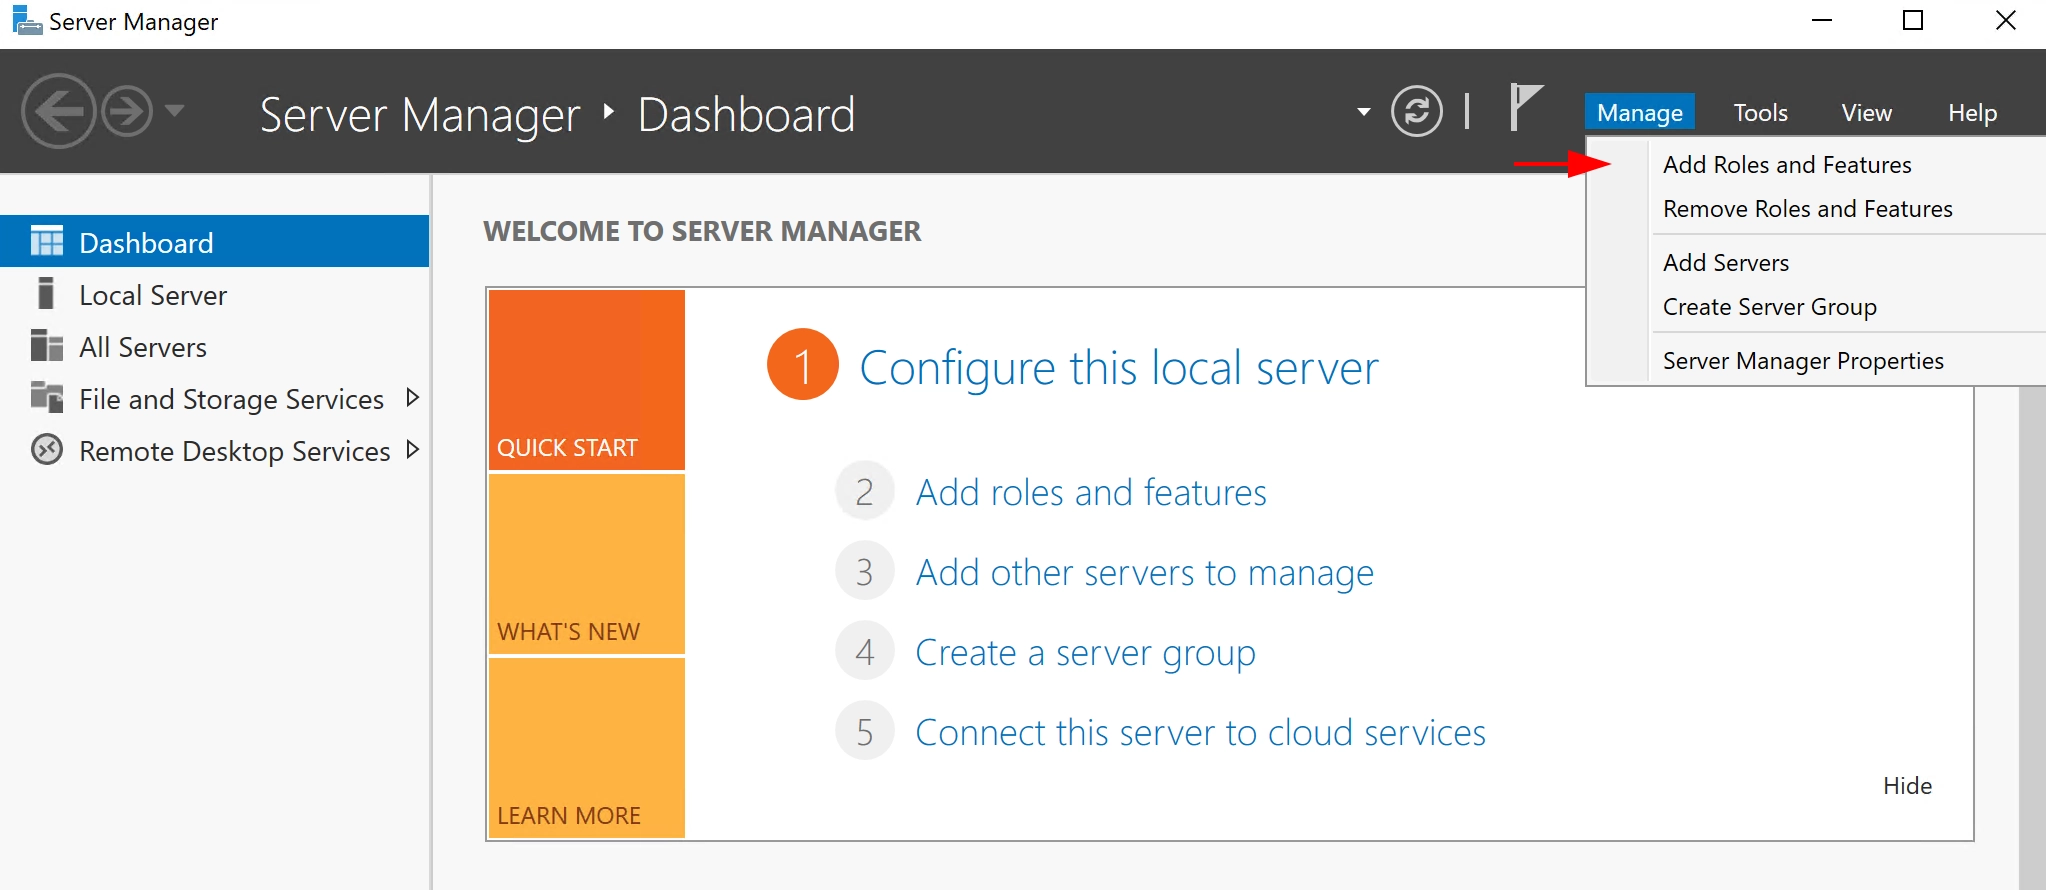
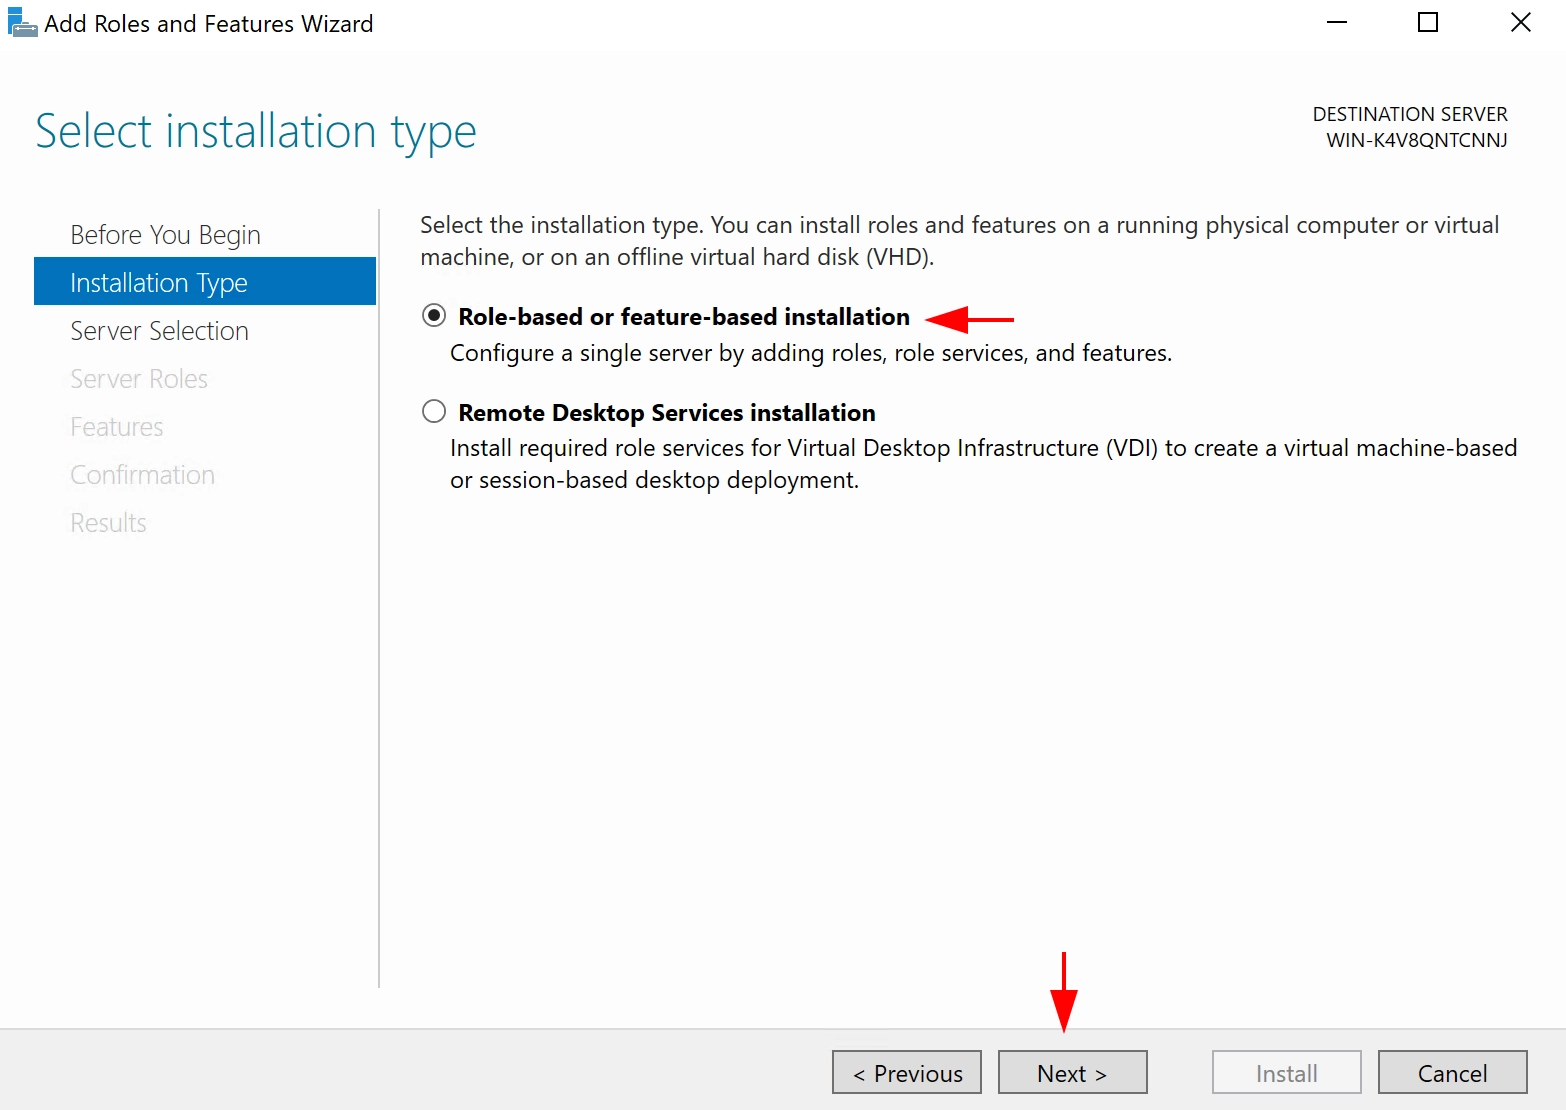
Select the type of installation Role-based or feature-based installation and click Next:
2. At the server selection stage, select the current one and click Next

3. Leave the Server Roles as they are and click Next, and in the next window for selecting components, select Windows Server Backup and click Next

4. At the confirmation stage, click Install and wait for the procedure to complete.

Setting up and creating a system backup
1. Launch the archiving component: Start - Server Manager - Tools - Windows Server Backup
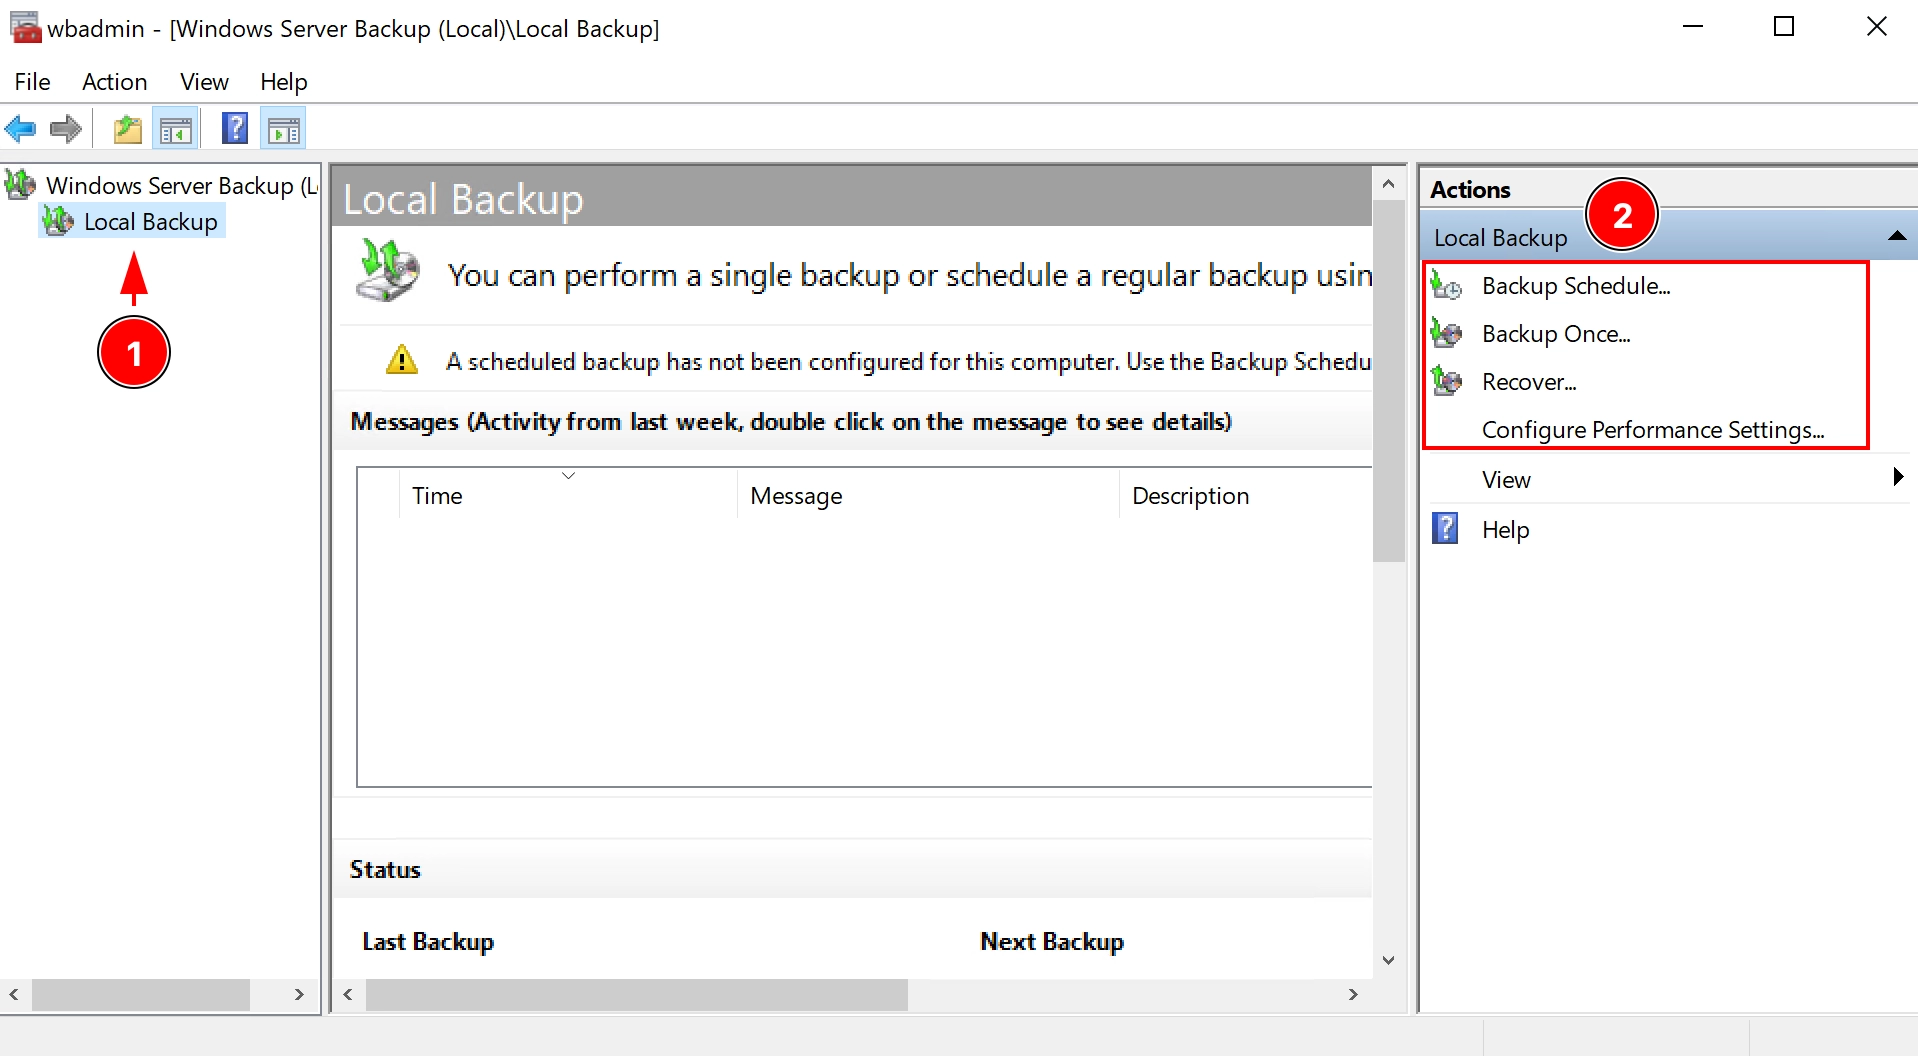
In the Local backup section, we have 2 backup options + Recovery...:
- Backup Schedule
- Backup Once
- Recovery...
The first option is suitable for setting up regular archiving at a specified time every day.
A one-time backup is a single execution of a real-time backup.
One time backup
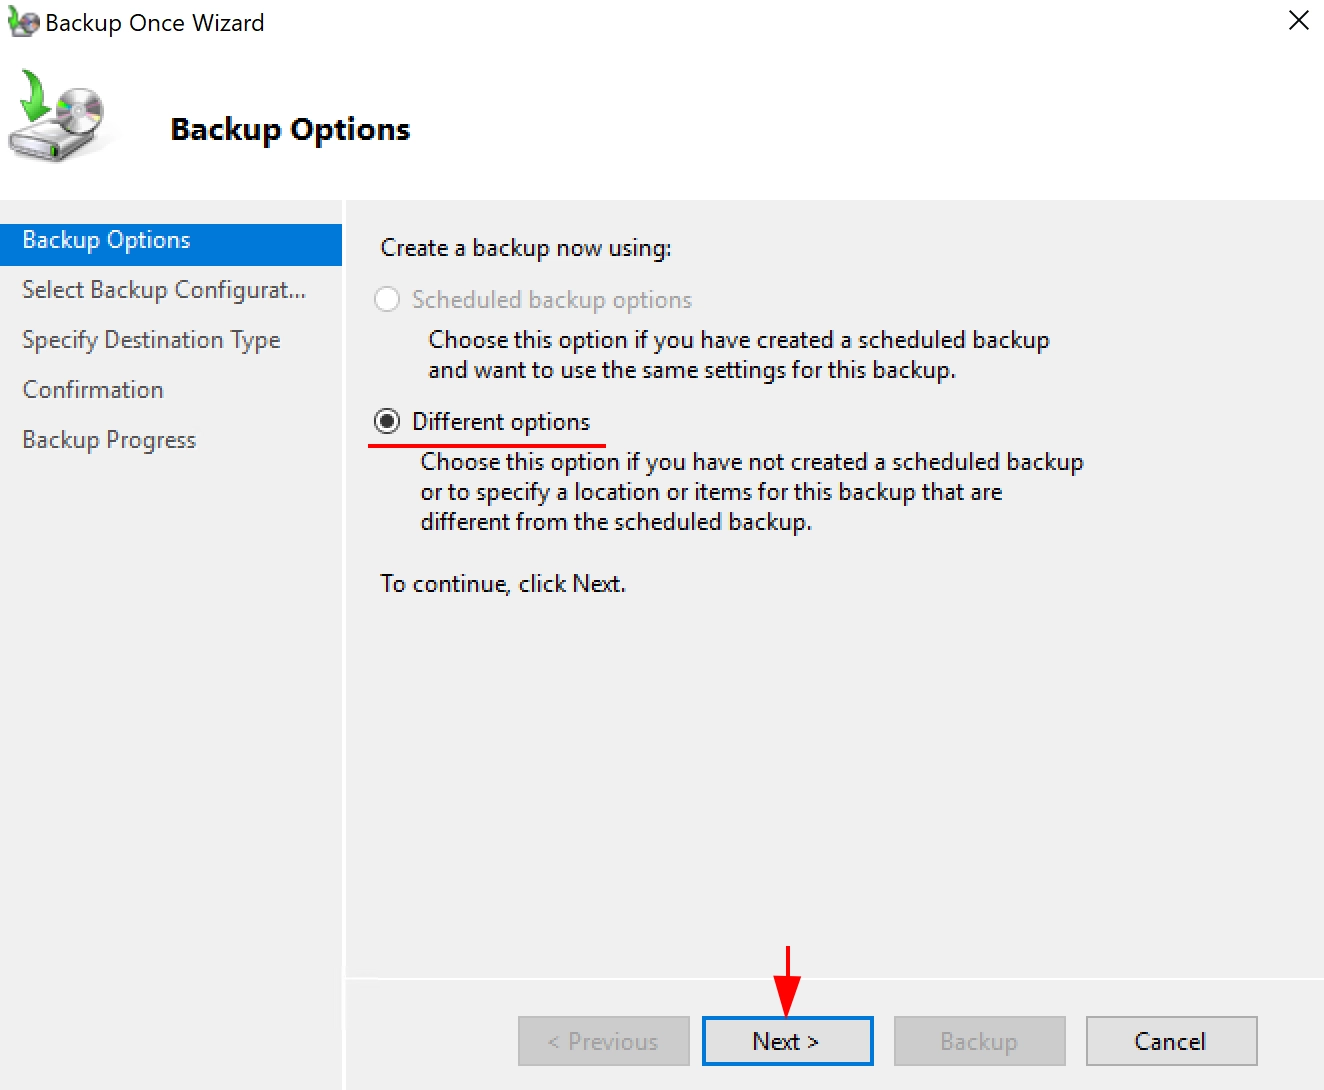
1. Open Backup Once - Backup Options - Different options and click Next
2. In the Backup configuration item, select the appropriate option. Typically, you choose to back up the entire server (Full Server). A Custom option is also available to select individual volumes and directories. We'll look at an example with the Full server option:
3. Select Destination Type. In our example, we will use the previously mapped network drive. If you select Local disk, you should understand that this disk will be formatted and reserved for backups:

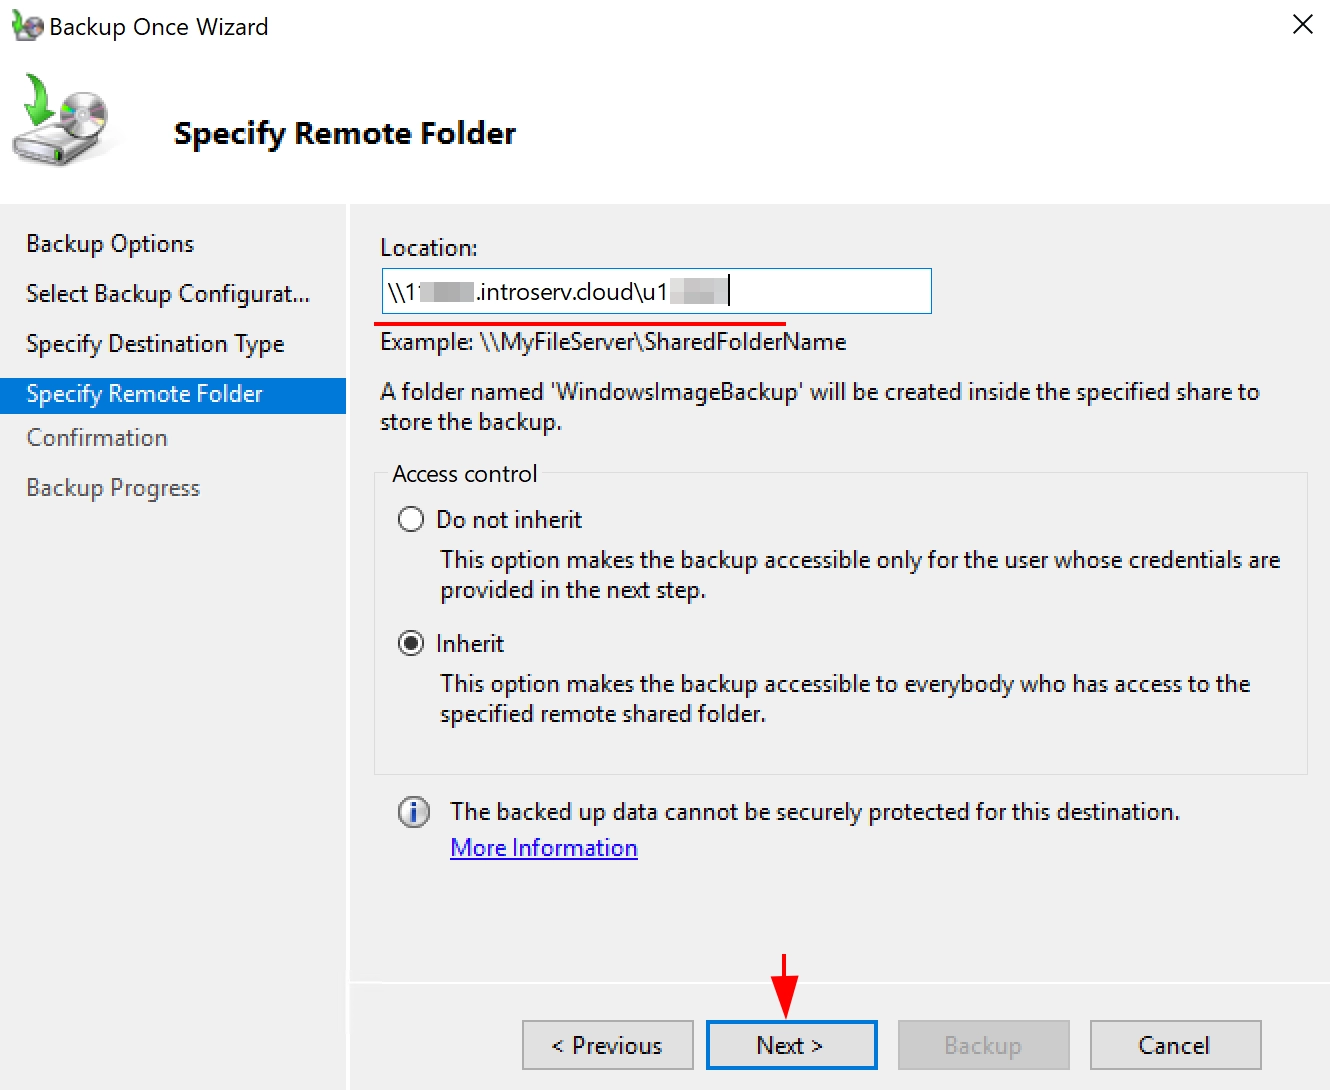
4.Enter the address of your network storage and click Next
5. You are all set to complete the backup. Click the Backup button and wait for the backup to complete:
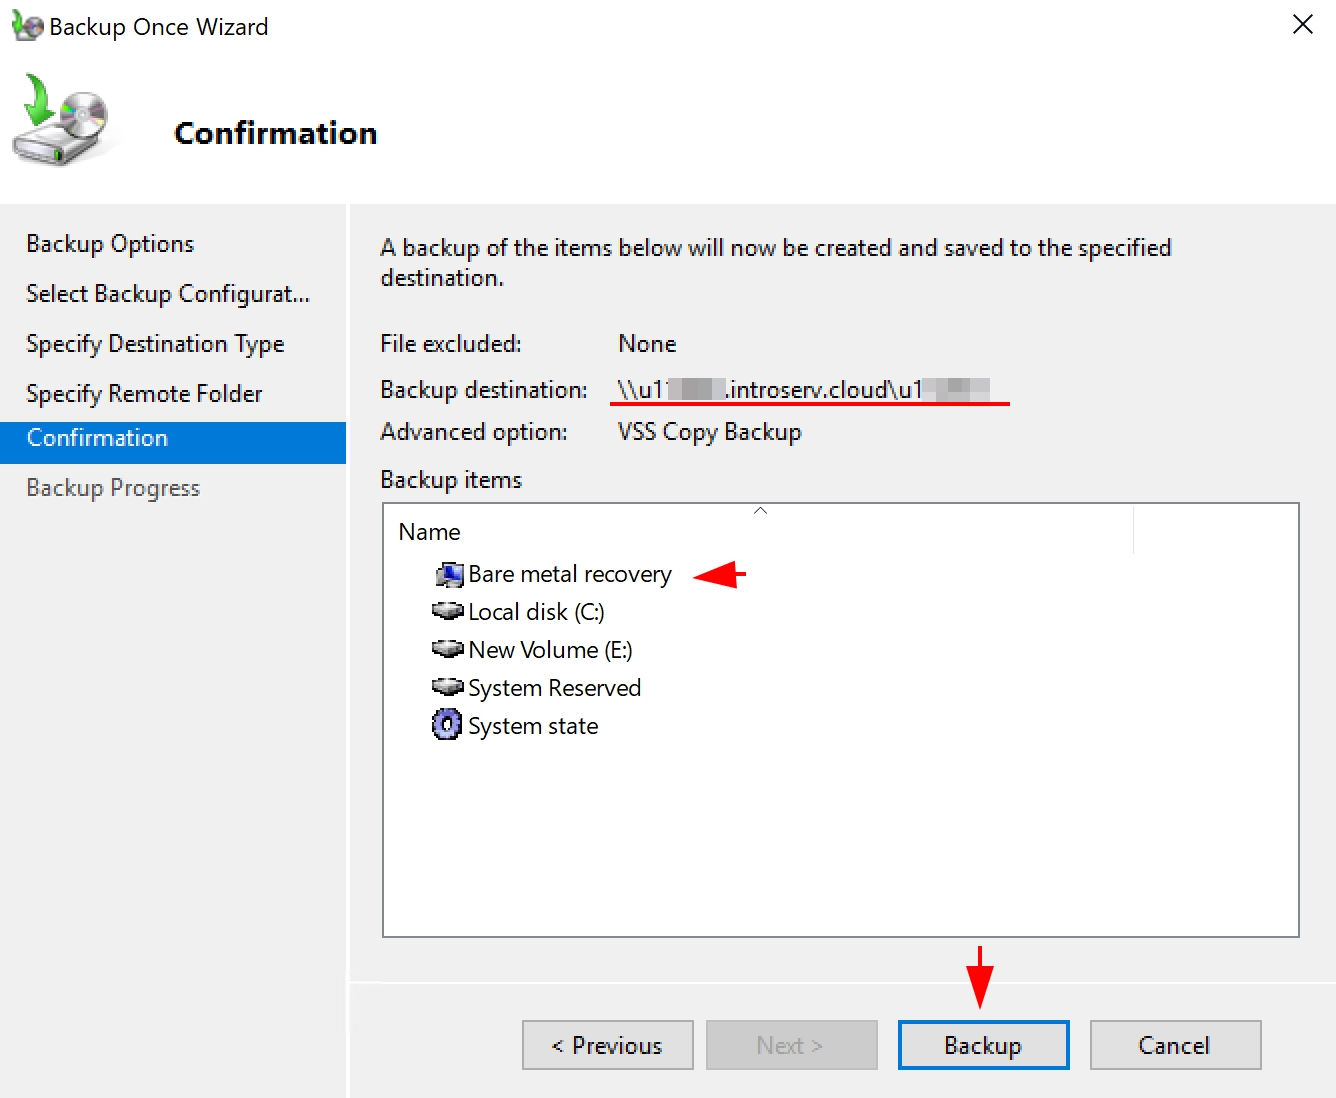
A separate WindowsImageBackup folder will be created on the network storage, all your other files in the storage will be saved and will not be affected by the backup process.
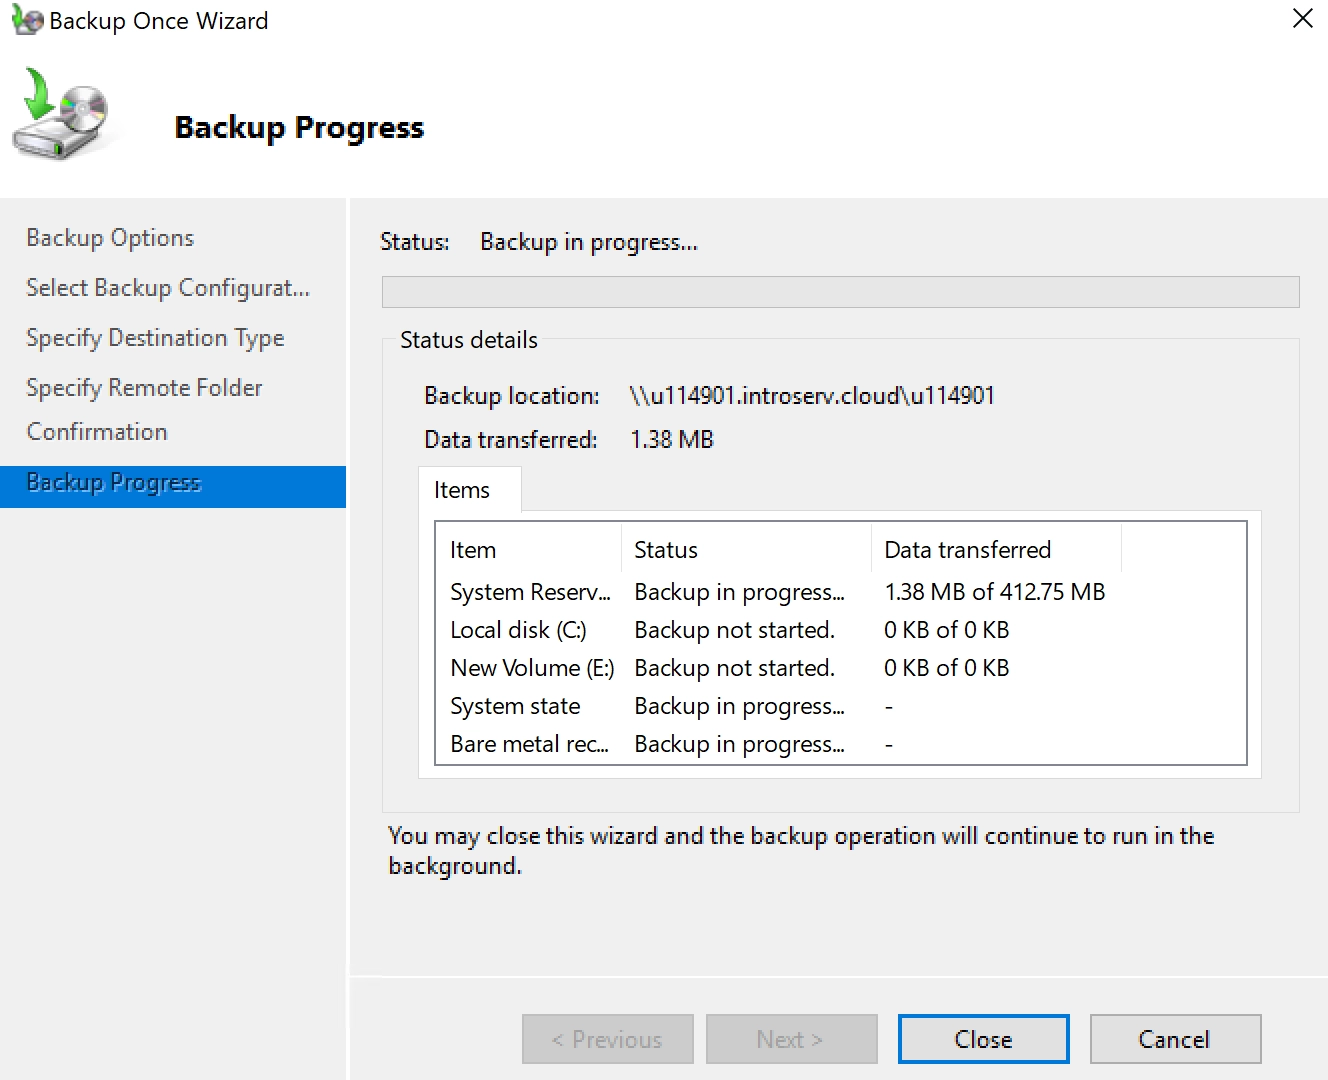
This is how the window in the backup process looks like:
Scheduled Backup of the system is configured in a similar way, the only difference is an additional item in the backup schedule settings. You will need to specify the backup execution time and the multiplicity during the day. The WSB component will create the backup on its own.


