
How to create a user in Windows Server and allow RDP connection
Creating a user
Method 1:
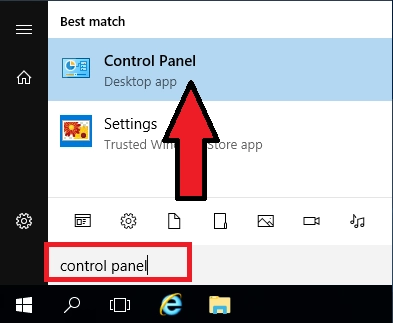
Open the control panel, Start → enter "Control panel" → open

Under "User Accounts" click on "Change account type"

At the bottom of the screen click on "Add a user account"

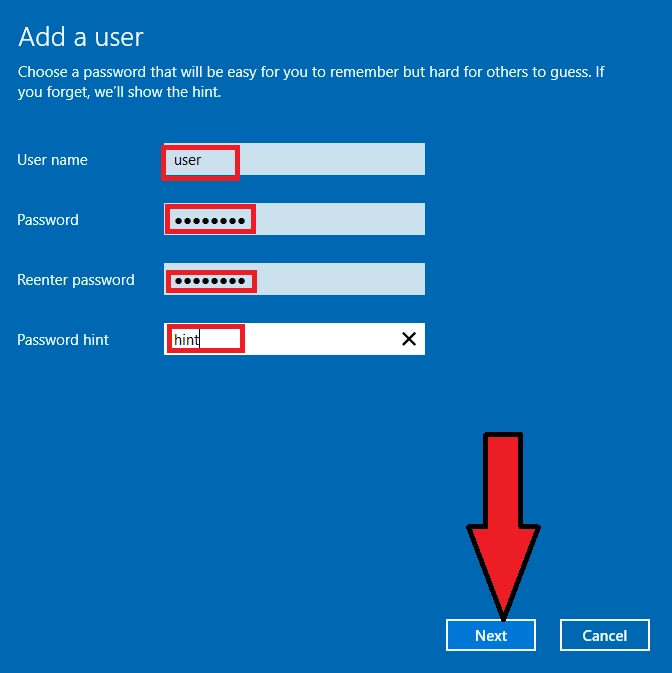
In the window that opens, enter a "user name", "password" that complies with the security rules. The configuration wizard will inform you if the password is not strong enough.
In the "Password hint" field enter a hint in case you forget the password. Next->Finish
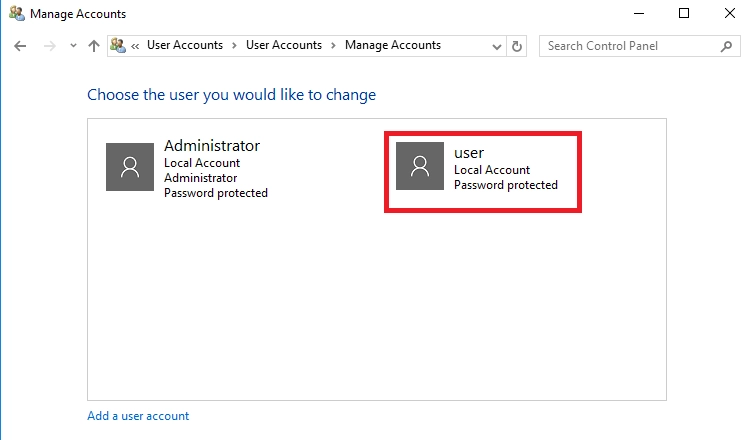
As a result, you will see a new Windows Server User
Method 2:
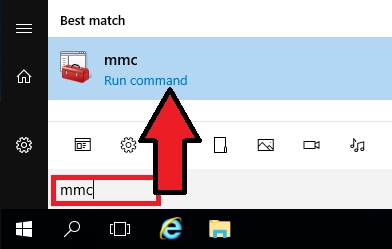
Open the management console, Start → enter "mmc" → open
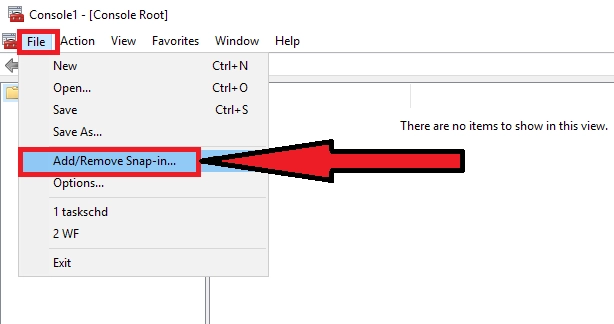
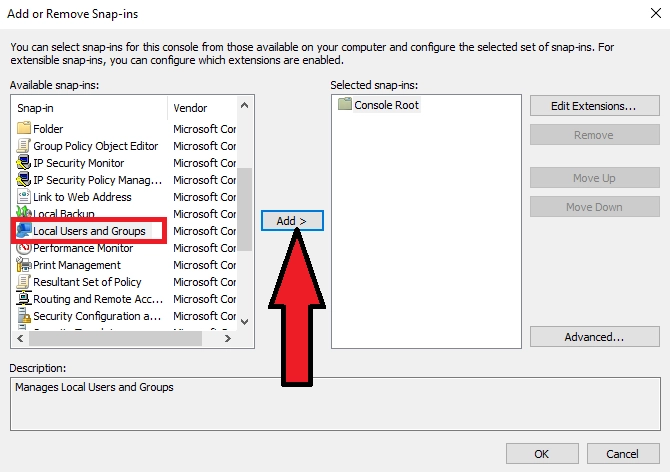
Next we need to add a snap-in, to do this open "File → Add/Remove Snap-in"
and click the "Add" button
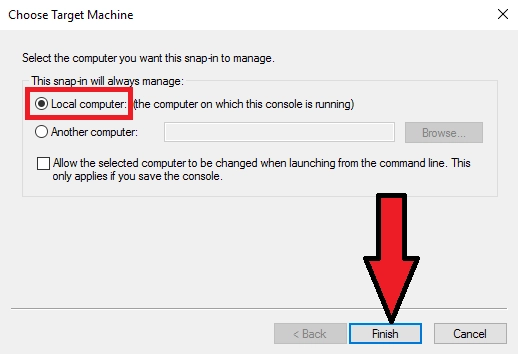
Select "Local computer" and press "Finish".
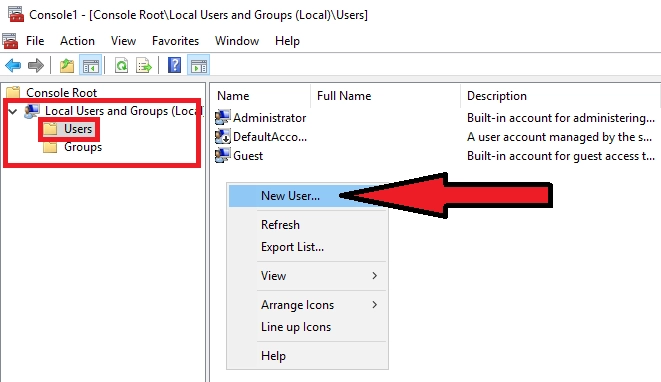
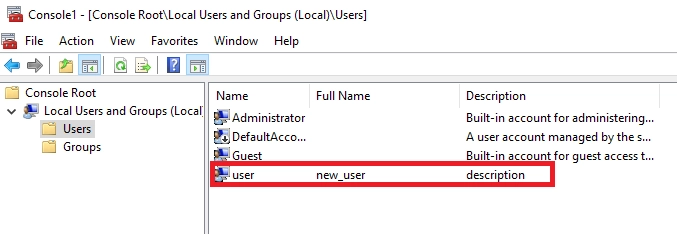
In the "Users" section, right-click to create a new user "New User..."
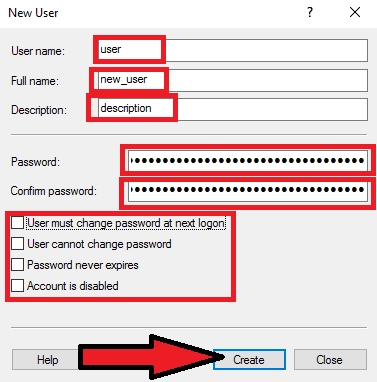
Next, you need to fill in the fields:
User name - enter system name.
Full name - enter full name.
Description - fill in the description if needed.
Enter and confirm the password.
Check the boxes required options, press "Create".
Eventually you will see a new user:
Permission to connect remotely via RDP
Method 1
Open the control panel, Start → enter "Control panel" → open
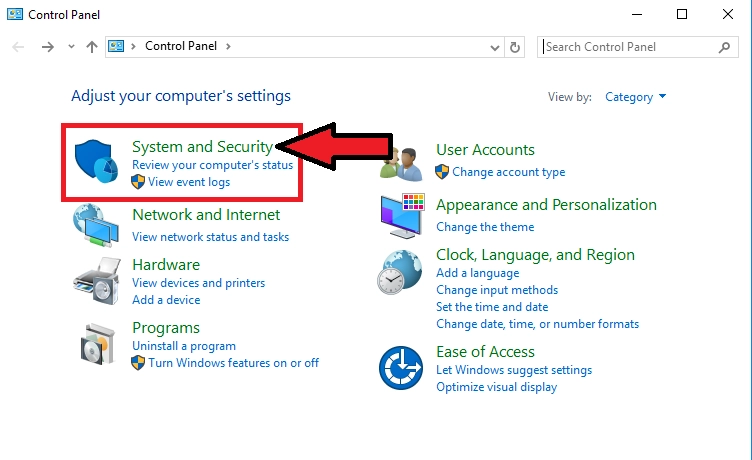
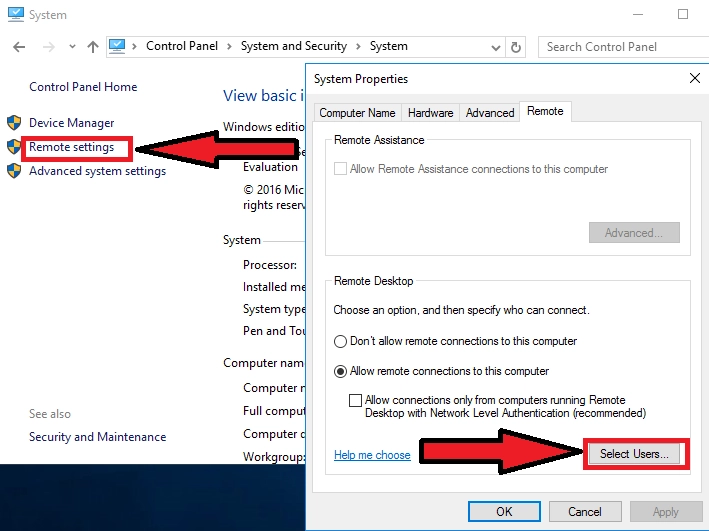
Go to "System and Security"
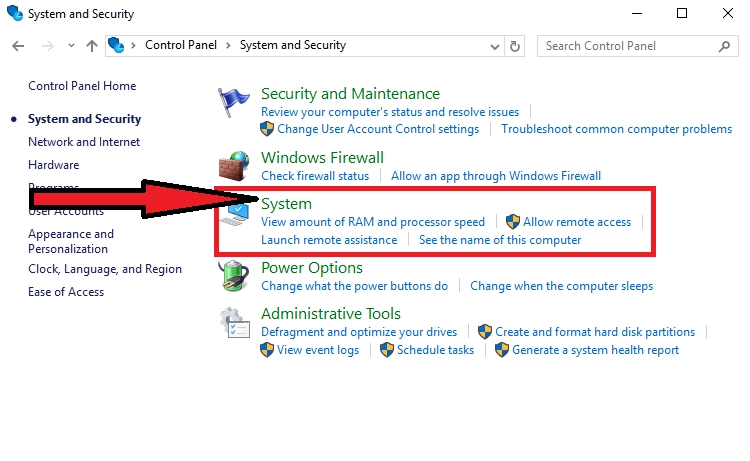
Next, click on "System"
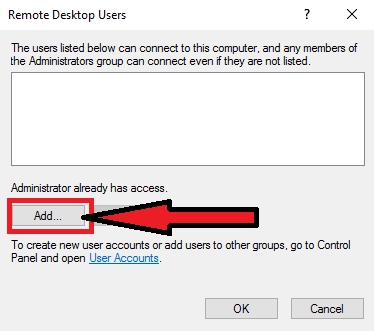
Next, click on "Remote settings" and "Select Users..." on the left side of the window.
Press the "Add" button to add a new user
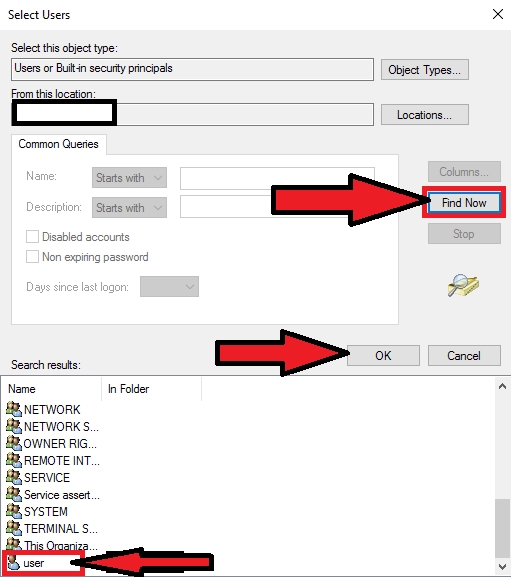
Click on the "Advanced..." button

Click on "Find Now", then select the user you want to allow RDP access, and click "OK.
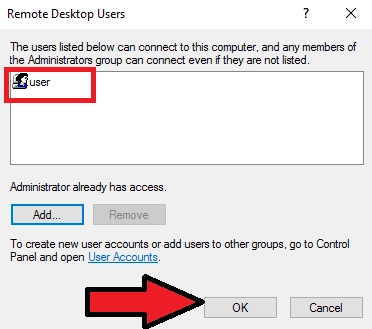
A new user appears in the list. Save the changes by pressing "OK".
Method 2
Open the management console, Start → enter "mmc" → open

Next we need to add a snap-in, to do this open "File → Add/Remove Snap-in"

Find the "Local Users and Groups" snap-in we need and click the "Add" button

Select "Local computer" and press "Finish".

Find the desired user and right-click to open the properties.
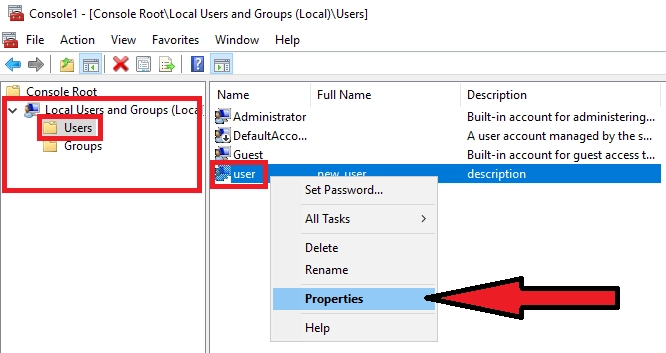
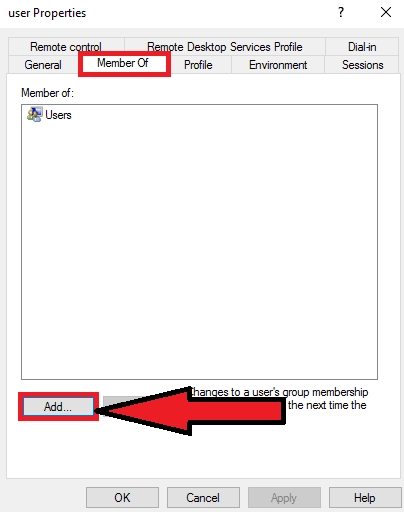
Go to the "Member Of" tab and click "Add"
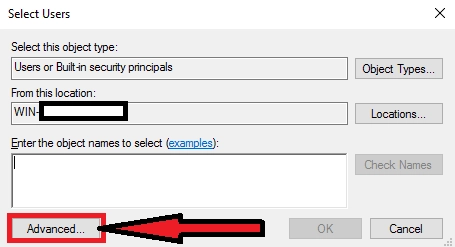
Click on the "Advanced..." button
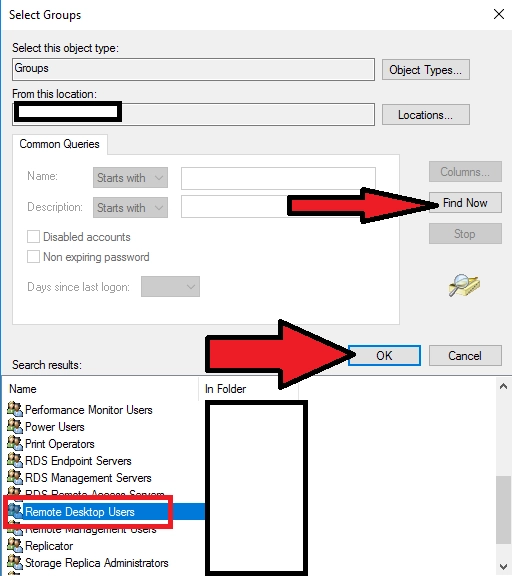
To find the desired group, click "Find Now" and select the group named "Remote Desktop Users". Click OK.
Save the changes with the "OK" button

You can now connect to the virtual server as a new user.


