
Connecting INTROSERV Cloud Storage to the server
The instructions provide examples of connecting Cloud Storage in Windows and Linux operating systems, as well as popular virtualizers Proxmox and VMWare. The examples use today's popular connection protocols: FTP/FTPS, SFTP, Samba/CIFS and NFS, WebDAV.
Connecting storage in Windows OS
Connection via FTP, FTPS protocol
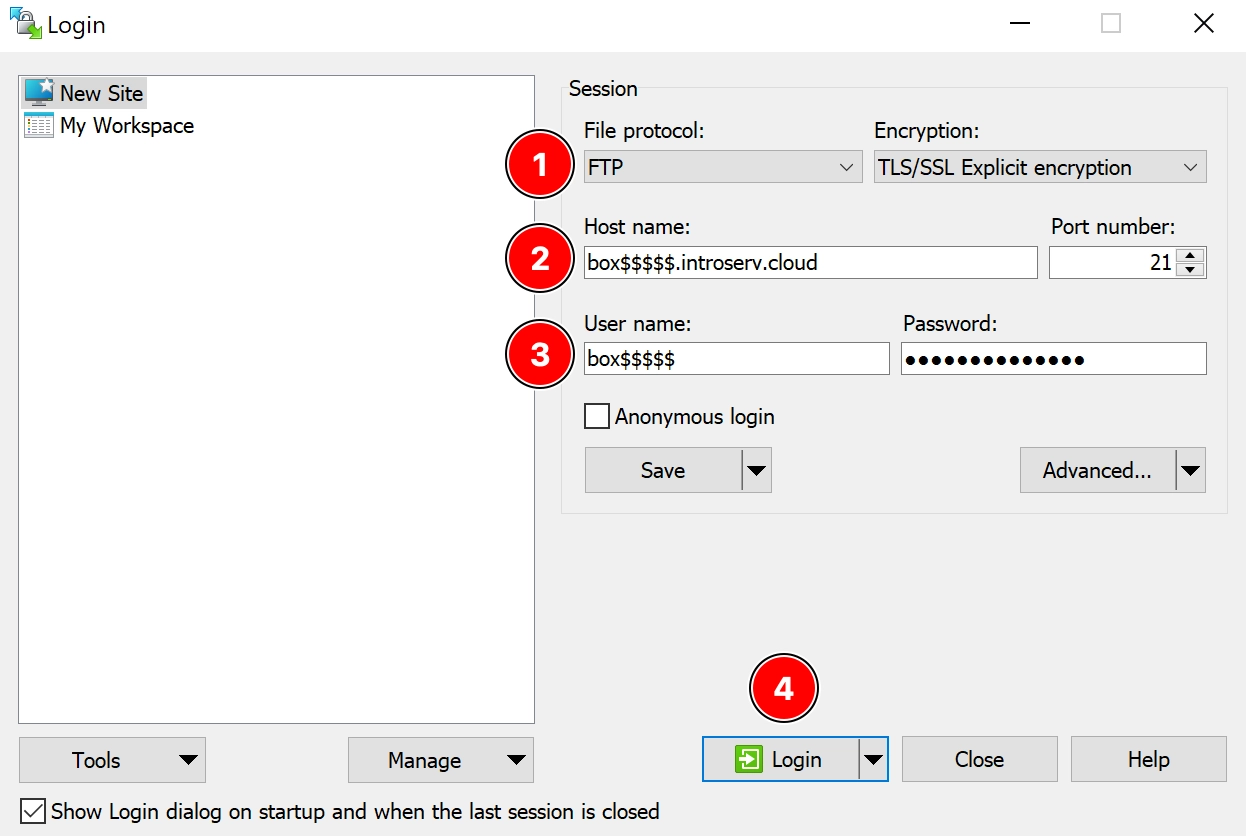
To connect via FTPS (secure connection) or FTP (unsecure connection), you can use a variety of clients like WinSCP or File Zilla. Let's look at an example of connecting using the WinSCP client. Install and run WinSCP.
1. Select the connection protocol (FTP or FTPS)
2. Enter the Cloud Storage address in the format box$$$$$.introserv.cloud
3. Specify the login and password for your storage
4. Click on the "Login" button and you will be taken to the root directory of your storage.
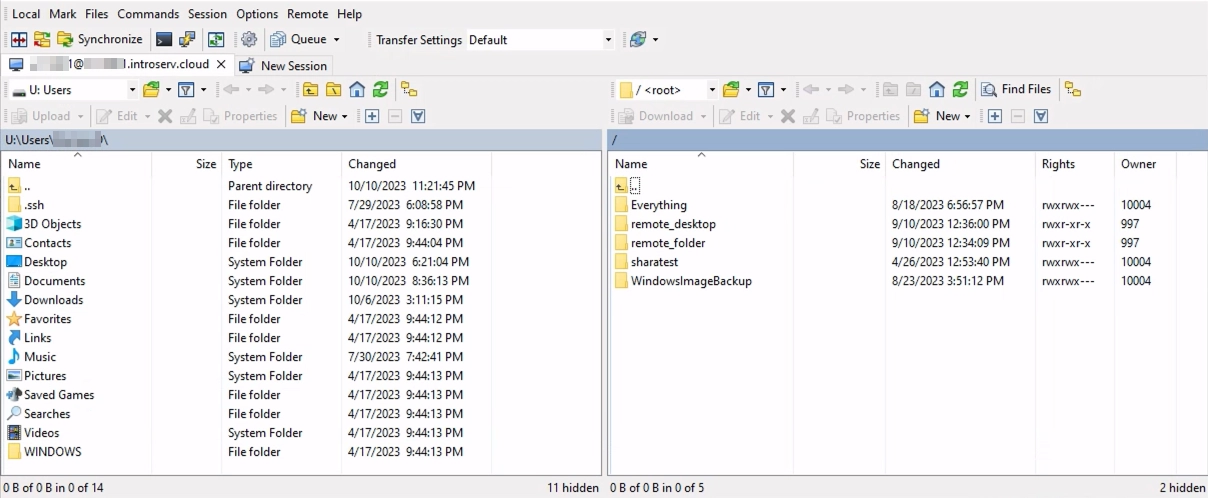
The WinSCP interface is a two-window manager. One half has the ability to open your local directories, the other is the root folder of your Cloud Storage. This will allow you to copy files between a local and remote folder, create and delete directories.
You can also connect storage via these protocols from any application that supports FTPS and FTP (applications for performing backups, for example).
Connection via WebDAV protocol
To connect to the storage using this protocol, you can use various clients or software modules that support this protocol. The connection address has the following format:
https://box$$$$$.introserv.cloud
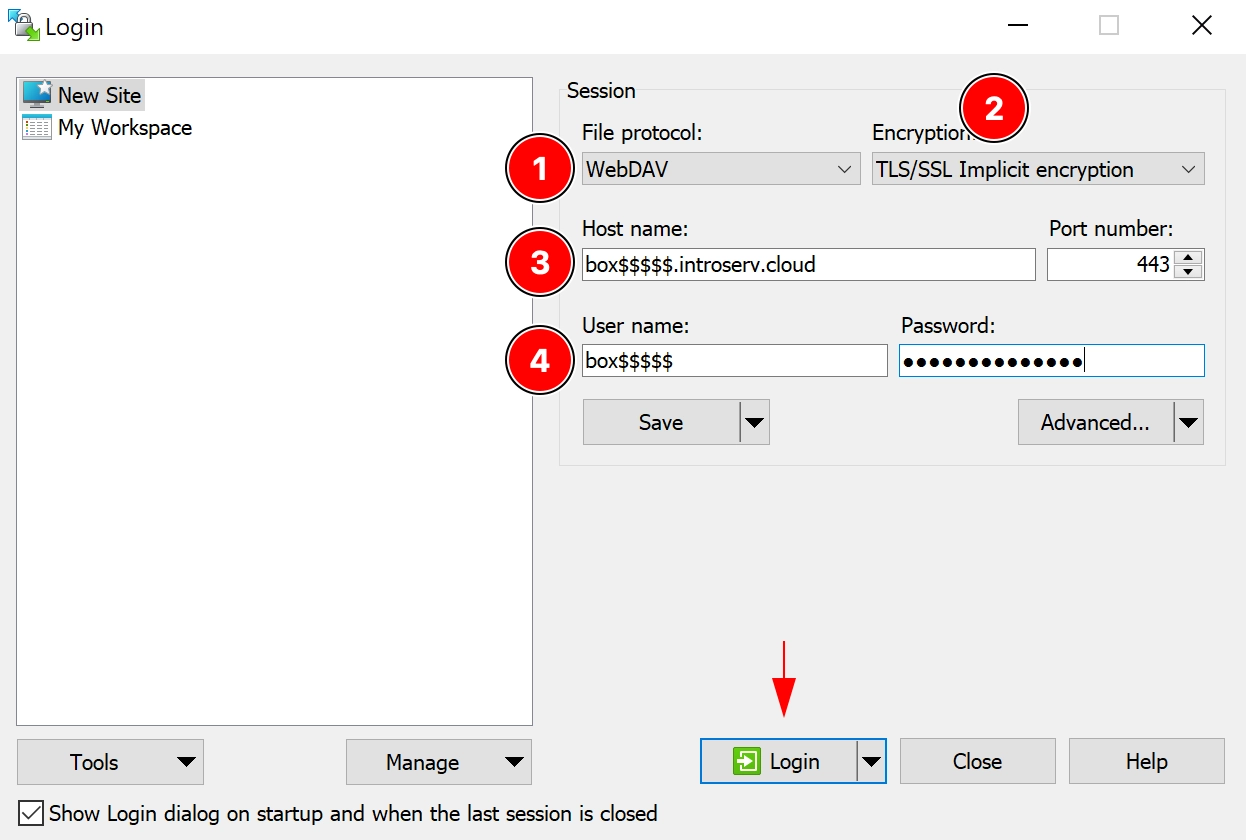
Connection example using the WinSCP client
1. Specify the WebDAV protocol
2. Select TLS/SSL Implicit encryption
3. Specify the connection address
4. Enter your username and password
Connection via samba/CIFS protocol
This option requires connecting the Cloud Storage as a network drive.
1. In your personal account in the Cloud Storage management section, you need to enable the samba/CIFS protocol. For security reasons, it is disabled by default.

2. When enabling the protocol, you need to indicate the IP address from which you plan to connect using this protocol (if you plan to connect only from your server, then you need to indicate the IP address of your server)

3. In Windows Explorer, right-click on "This PC" and select Map network drive...
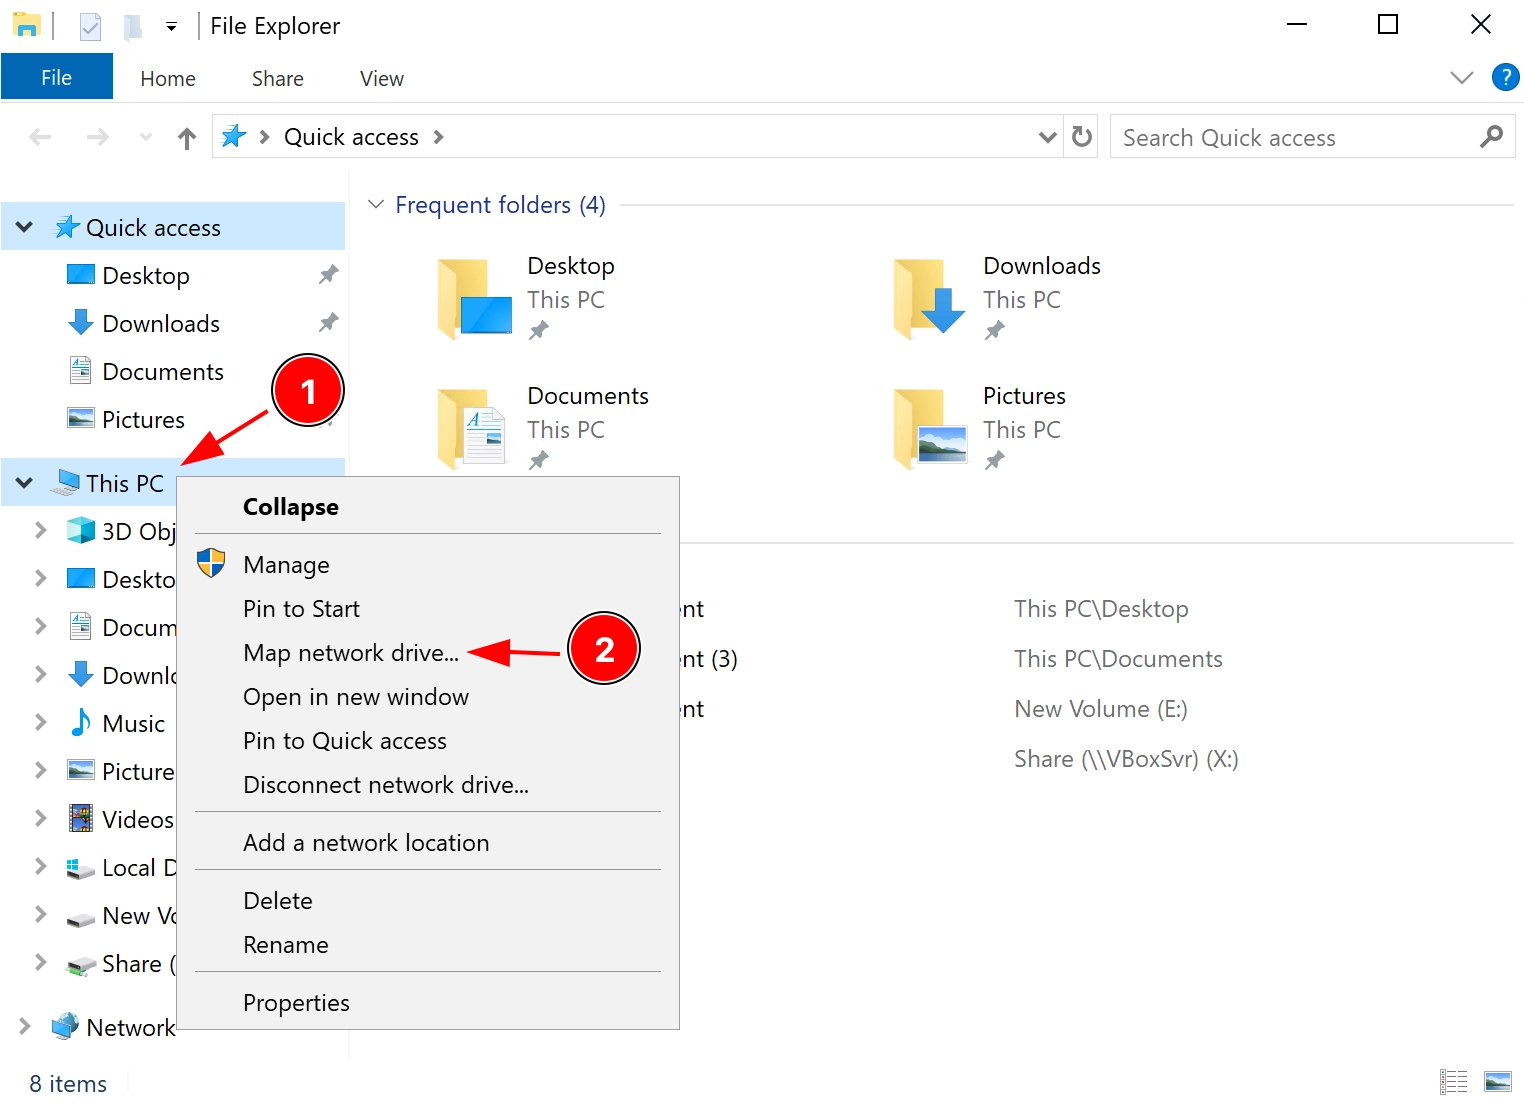
4. A window for entering the remote storage address will open. Enter your Cloud Storage address in the format \\box$$$$$.introserv.cloud\box$$$$$
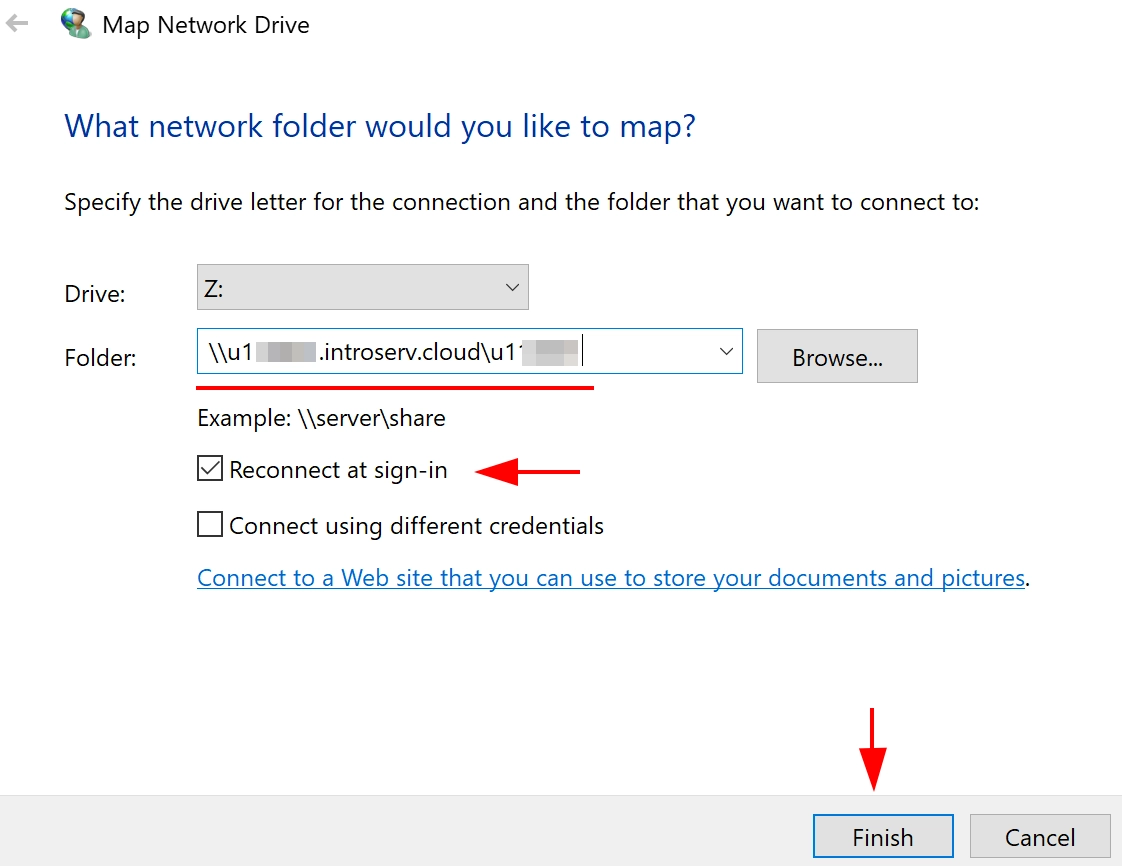
5. When you connect for the first time, you will be asked for a login and password. Use the login and password for your storage. After connecting the remote storage, a network drive will appear in Explorer and will look like any other partition on a physical drive.
Once connected to this network drive, you can create folders and copy files in the usual way. You can also use this section for various applications, including those that create long-term backups.
Connection via NFS protocol
1. By default, this option is disabled for security reasons. Enable it and specify the IP address from which you plan to connect to the resource via the NFS protocol. If you plan to connect only from the server, then indicate the IP address of your server.

2. First you need to install an NFS client for Windows Server OS. In the PowerShell console, run the command:
Install-WindowsFeature NFS-Client, RSAT-NFS-Admin
3. Next, in the CMD console, mount the network drive, specifying the volume letter (in the example we gave the letter M):
mount -o "nolock,sec=sys" mtype=soft box$$$$.introserv.cloud:/export/box$$$$ M:
After successful mounting, a network drive with the specified volume letter will appear in the system. Now you can copy files to this volume, create and delete folders in the usual way.
Connecting storage in Linux Server OS
Mounting storage via SFTP protocol
1. To connect Cloud Storage using the SFTP protocol, you need to install SSHFS
Installation on Debian-based distros:
apt install sshfs
Installation in RHEL-based distros (one of the options):
dnf install sshfs
yum install sshfs
2. Create a mount folder (specify your directory where you plan to mount the storage):
mkdir -p /mnt/cloudbox
3. Now you can mount the SFTP folder to the created directory:
sshfs box$$$$@box$$$$.introserv.cloud:/ /mnt/cloudbox/
When asked to confirm the key during the first connection, indicate "yes"
Now in the /mnt/cloudbox/ directory you will see all the folders and files that are on the storage. You can delete and create directories or files. You can also use this path to connect storage in applications and scripts, for example, to save backups.
Mounting storage via FTP protocol
Warning: The curlftpfs package is deprecated and not available in Ubuntu 22.04+ and newer Debian versions. For modern systems, use SFTP protocol instead (see "Mounting storage via SFTP protocol" section above).
1. Install the CurlFtpFS package
RHEL-based distros:
yum install curlftpfs
Debian-based distros (Ubuntu 20.04 and older):
apt install curlftpfs
2. Create a mount folder, for example /mnt/ftp:
mkdir -p /mnt/ftp
3. Mount the remote storage with the command:
curlftpfs ftp://box$$$$:your_password@box$$$$.introserv.cloud /mnt/ftp
Now in the /mnt/ftp/ directory you will see all the folders and files that are on the storage. You can delete and create directories or files. You can also use this path to connect storage in applications and scripts, for example, to save backups.
4. If you need the storage to be automatically mounted at system startup, then add the following line to /etc/fstab:
curlftpfs#ftp://box$$$$:your_password@box$$$$.introserv.cloud /mnt/ftp fuse defaults 0 0
Mounting storage via samba/CIFS protocol
First, you need to activate the samba/CIFS protocol in your Introserv user account and add the IP address from which you plan to connect to the storage via the samba/CIFS protocol.
1. Install the cifs-utils package
RHEL-based distros:
yum install cifs-utils
Debian-based distros:
apt install cifs-utils
2. Create a folder to mount the storage, for example /mnt/cifs:
mkdir -p /mnt/cifs
3. Connect Cloud Storage with the command:
mount -t cifs -v -o username=box$$$$,password=your_password //box$$$$.introserv.cloud/box$$$$ /mnt/cifs
Mounting storage via NFS protocol
First, enable the NFS protocol in the Introserv user's personal account and add the IP address from which you plan to connect to the storage via the NFS protocol.
1. Install the nfs-utils package
RHEL-based distros:
yum install nfs-utils
Debian-based distros:
apt install nfs-common
2. Create a folder for mounting the storage, for example /mnt/nfs:
mkdir -p /mnt/nfs
3. Connect Cloud Box with the command:
mount.nfs box$$$$$.introserv.cloud:/export/box$$$$$ /mnt/nfs
4. If you need the storage to be automatically mounted at system startup, then add the following line to /etc/fstab:
box$$$$$.introserv.cloud:/export/box$$$$$ /mnt/nfs nfs _netdev,auto,nofail 0 0
Connecting storage in ProxmoxVE
ProxmoxVE has 2 options for connecting storage via the web interface - NFS and samba/CIFS.
First, enable the NFS or samba/CIFS protocol in the Introserv user's personal account and add the IP address from which you plan to connect to the storage via the NFS or samba/CIFS protocol.
Connecting storage via NFS protocol
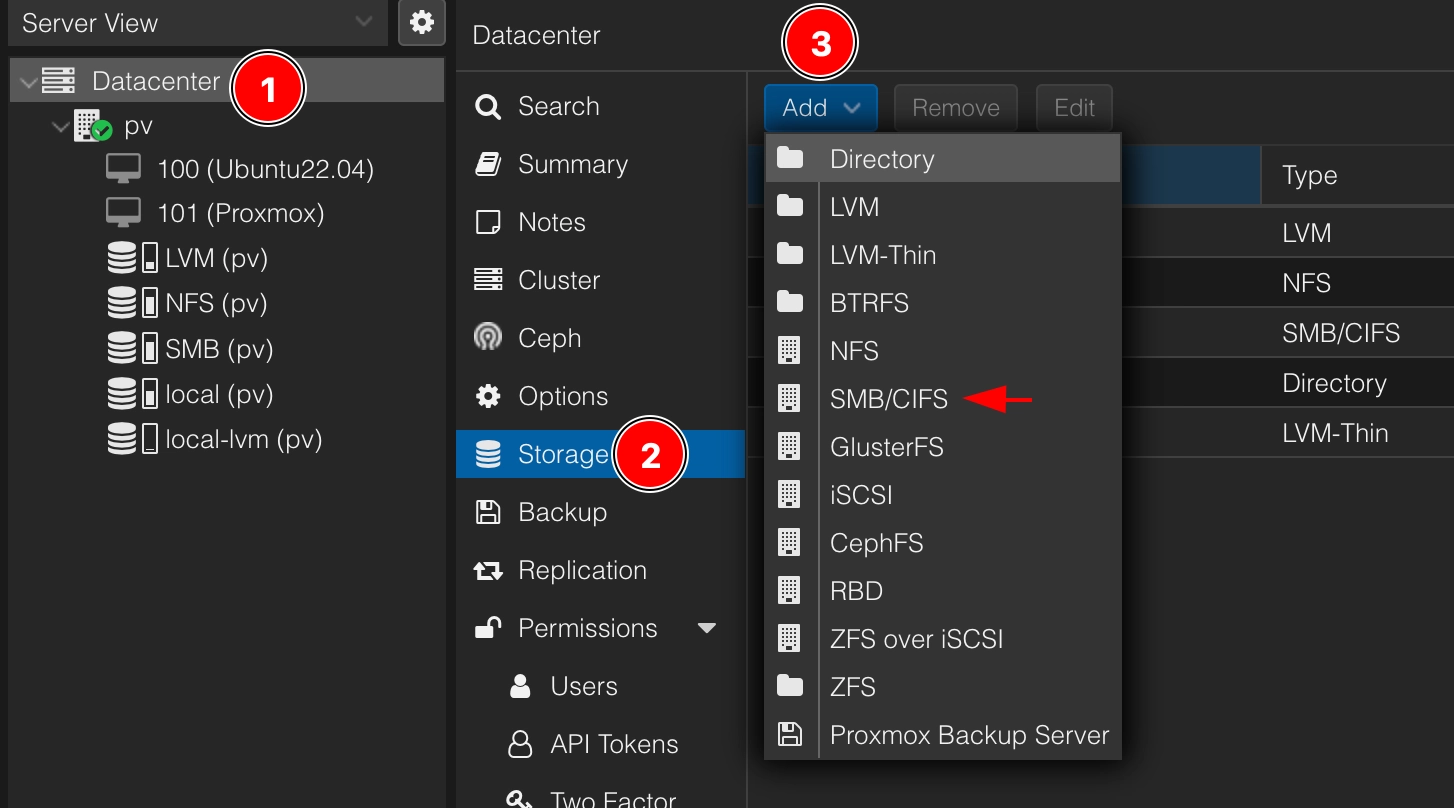
1. Go to Datacenter - Storage - Add - NFS

2. Fill in the required fields and click the "Add" button:
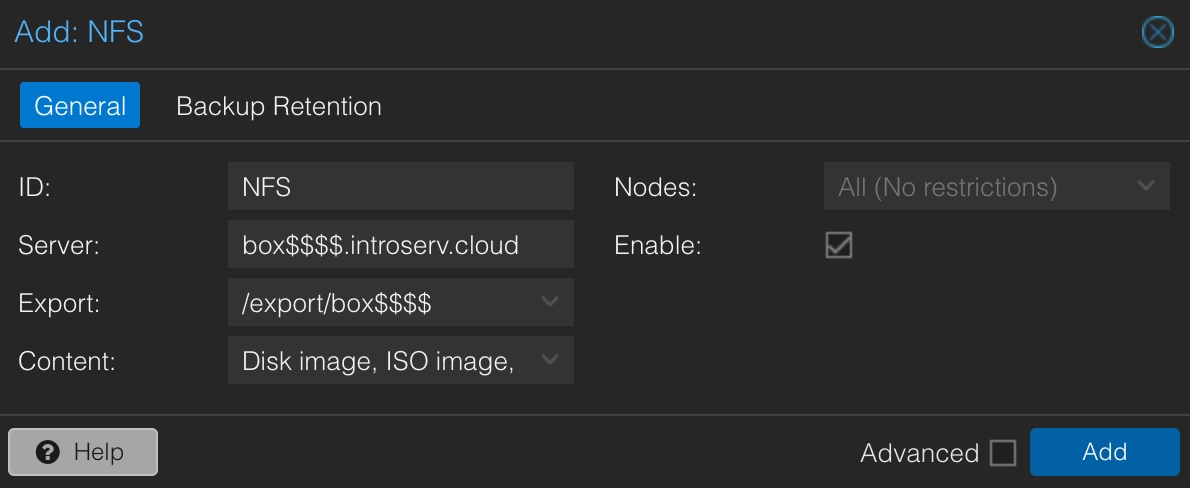
After successfully adding a storage with the name NFS (because in the example we used the ID "NFS") will be visible among other ProxmoxVE storages
Connecting storage via samba/CIFS protocol
1. Go to Datacenter - Storage - Add - SMB/CIFS
2. Fill in the required fields and click the "Add" button:
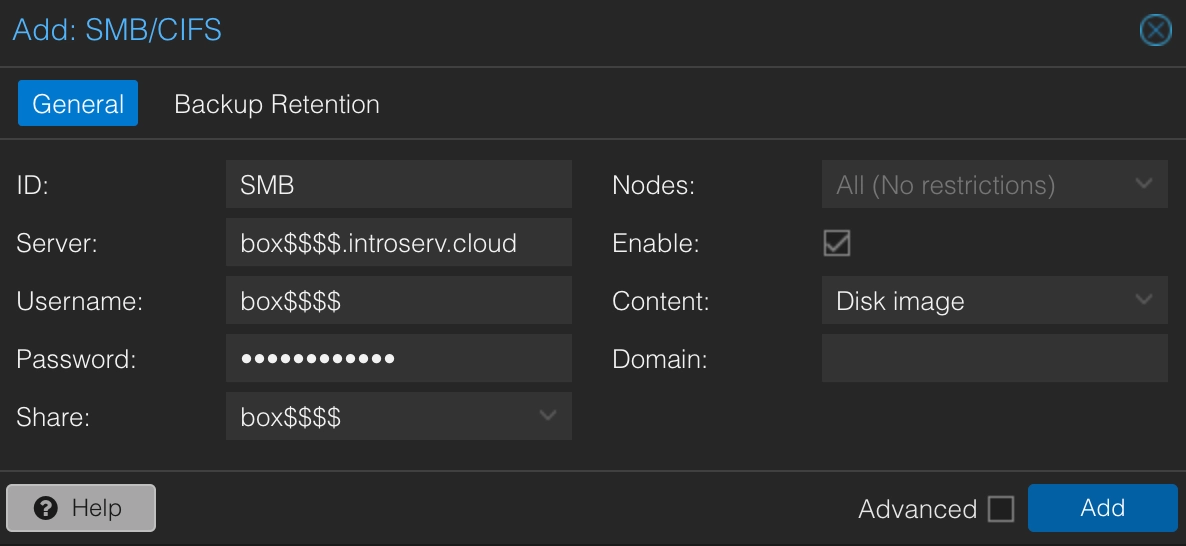
After successful addition, a storage named SMB (because in the example we used the ID "SMB") will be visible among other ProxmoxVE storages.
Mounting storage in VMWare ESXi
1. Enable the NFS protocol in the Introserv user's personal account and add the IP address from which you plan to connect to the storage via the NFS protocol.
2. Go to the web-GUI of the virtualizer and follow the path Storage - New datastore - Mount NFS datastore
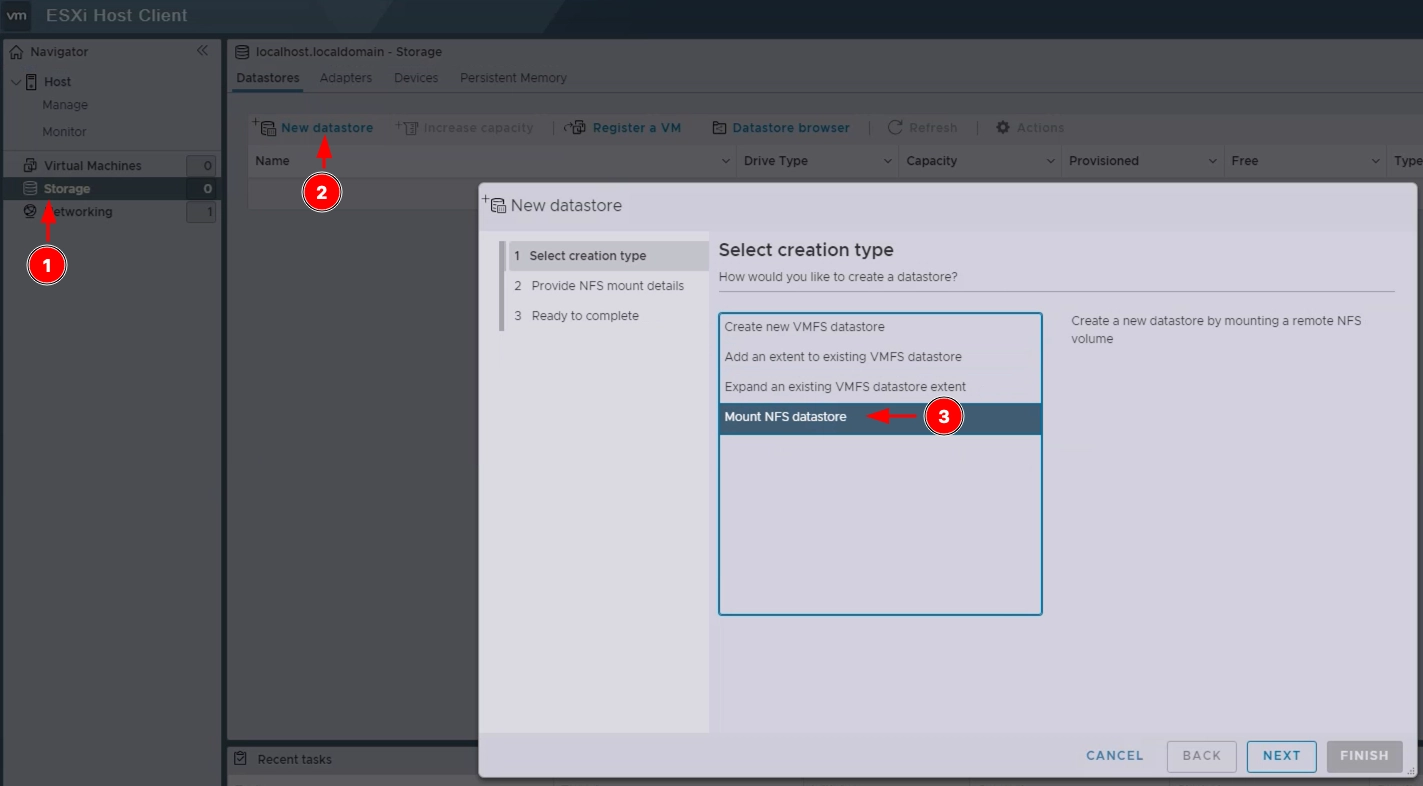
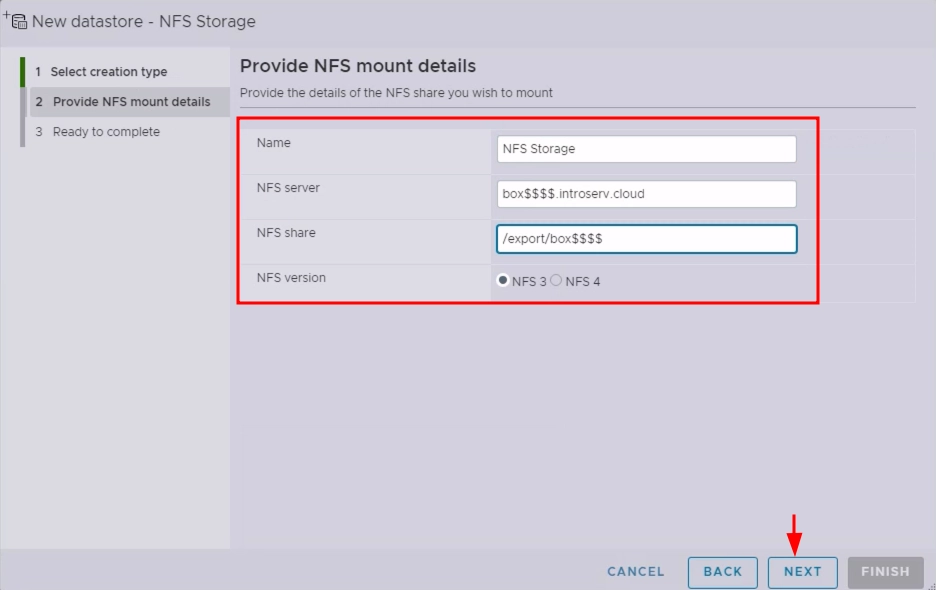
3. Fill in the Name, NFS server, NFS share and NFS version fields as in the screenshot, using your login information. At the last stage, click the Finish button
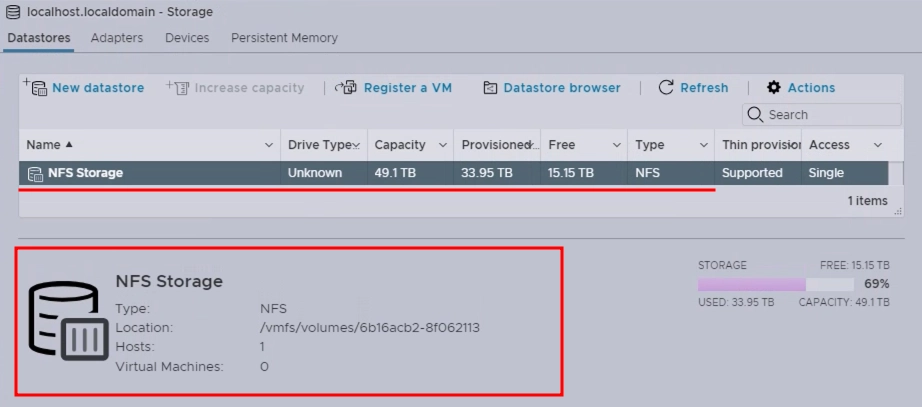
After a successful connection, your storage will appear in the list of available Datastores.
Login to Cloud Storage via HTTPS protocol
The easiest way to connect to the storage is to use a browser, where in the address bar you should enter the address of your remote Cloud Storage folder in this format:
box$$$$$.introserv.cloud/web
You will be taken to the login page, where you need to enter the login and password that are provided to you in your personal account:

After logging in, you will be taken to the root directory of your Cloud Storage, where you can create directories, upload and download files.


