Installing Active Directory Domain Services in Server Manage
Installing Active Directory Domain Services through Server Manager is a classic configuration option for servers with a graphical user interface.
First, open the Server Manager. Select "Add Roles and Features" from the "Manage" section or from the main page of the manager.

The "Add Roles and Features Wizard" will open, where you will need to install Active Directory Domain Services.
1. Skip the first stage "Before you begin" and click "Next" right away.
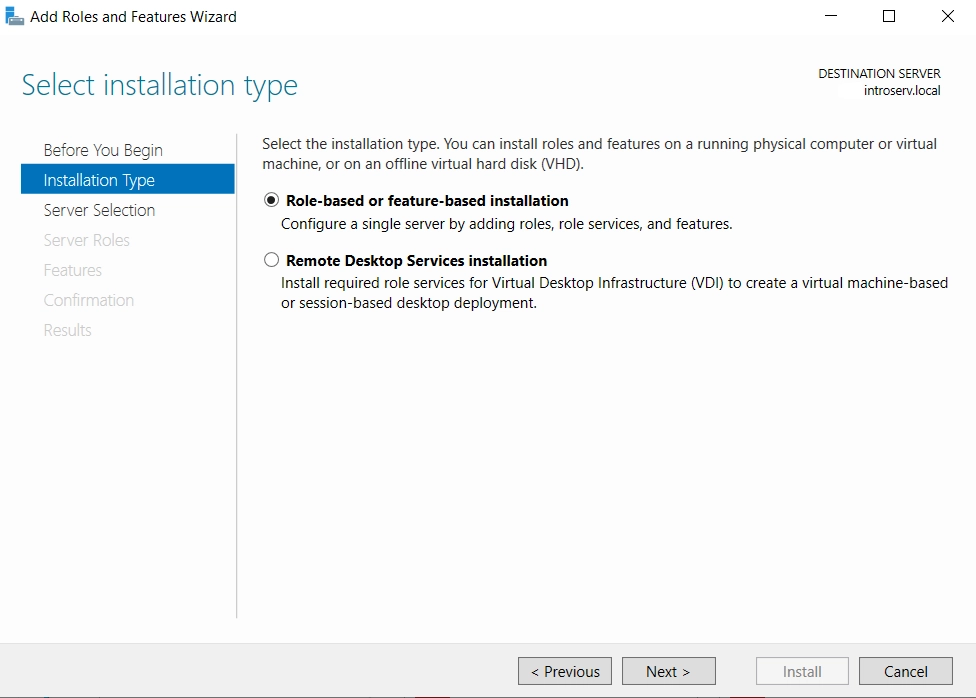
2. Next step "Installation Type", by default, leave the "Role-based or feature-based installation" checkbox checked. Click "Next".
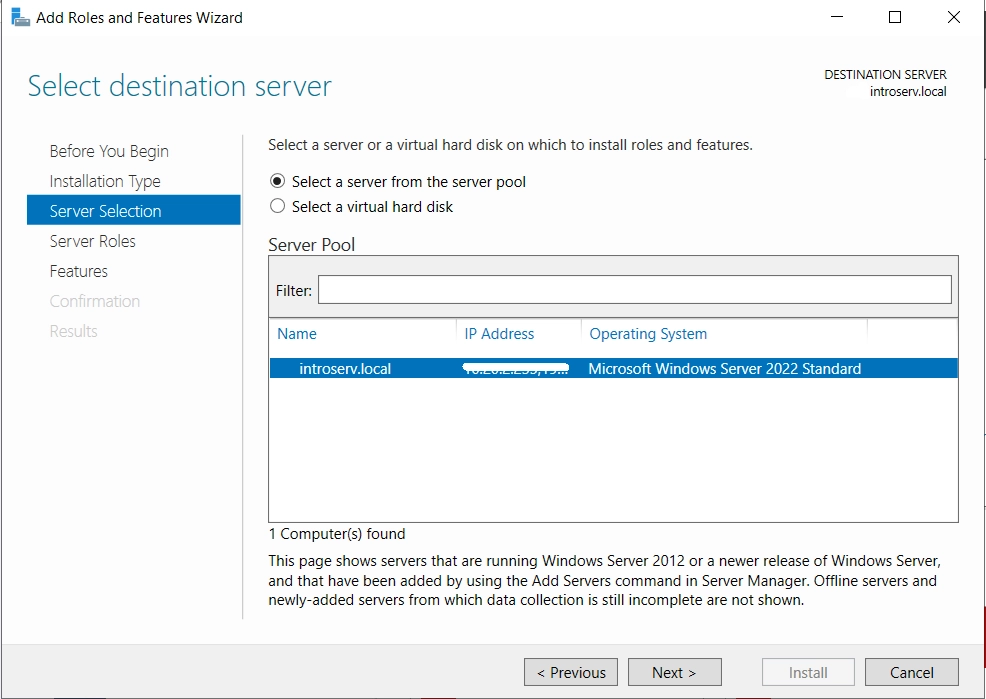
3 .At the Server Selection stage, select the server on which you want to install Active Directory Domain Services. There can be several servers here and they can be pooled for centralized management from a single console.
The role can also be installed on a virtual hard disk. For example, select your local server. Then click "Next".
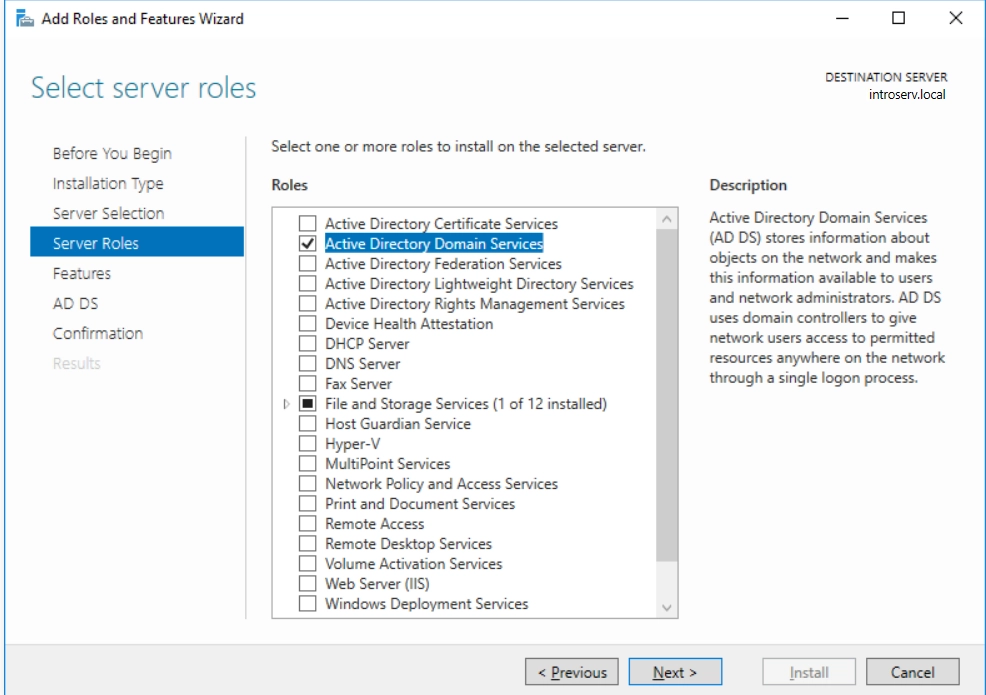
4. At the "Server Rolers" stage, you need to select "Active Directory Domain Services" from the list of services presented. Then click "Next".
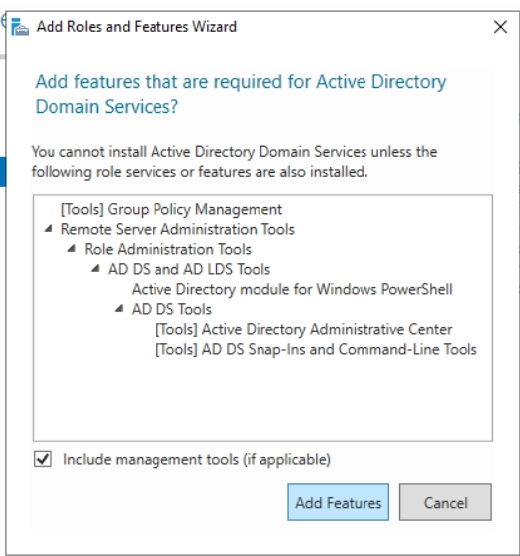
5. Next, you need to confirm the installation of additional components during the Active Directory installation by clicking "Add Features".
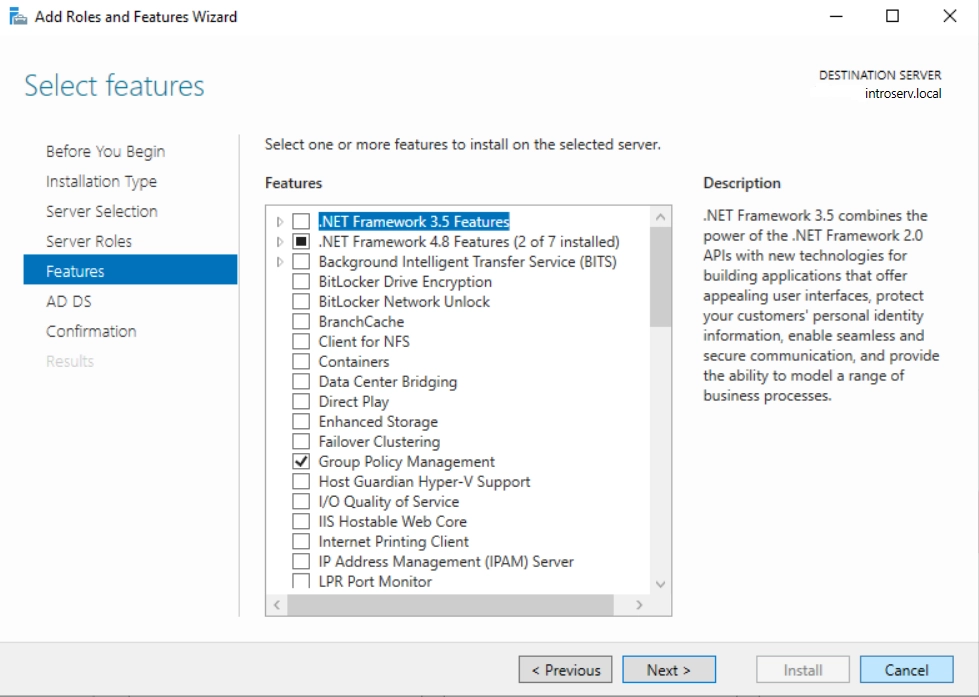
6. At the "Features" stage, you can add the necessary additional components - if you don't need to add anything, click "Next" right away.
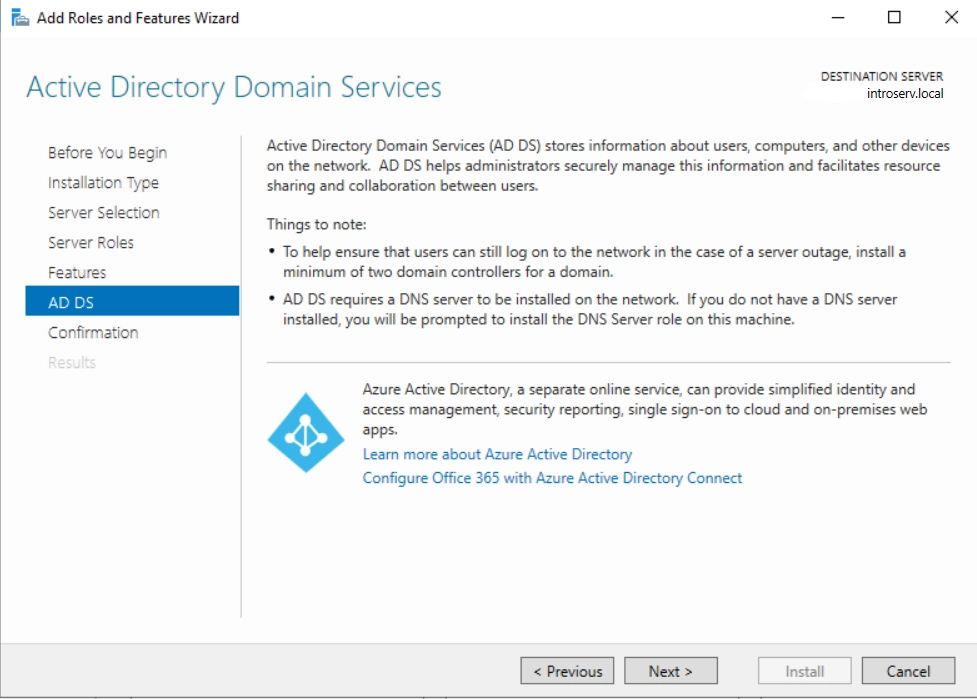
7. The "Active Directory Domain Services" stage is informative. Click "Next".
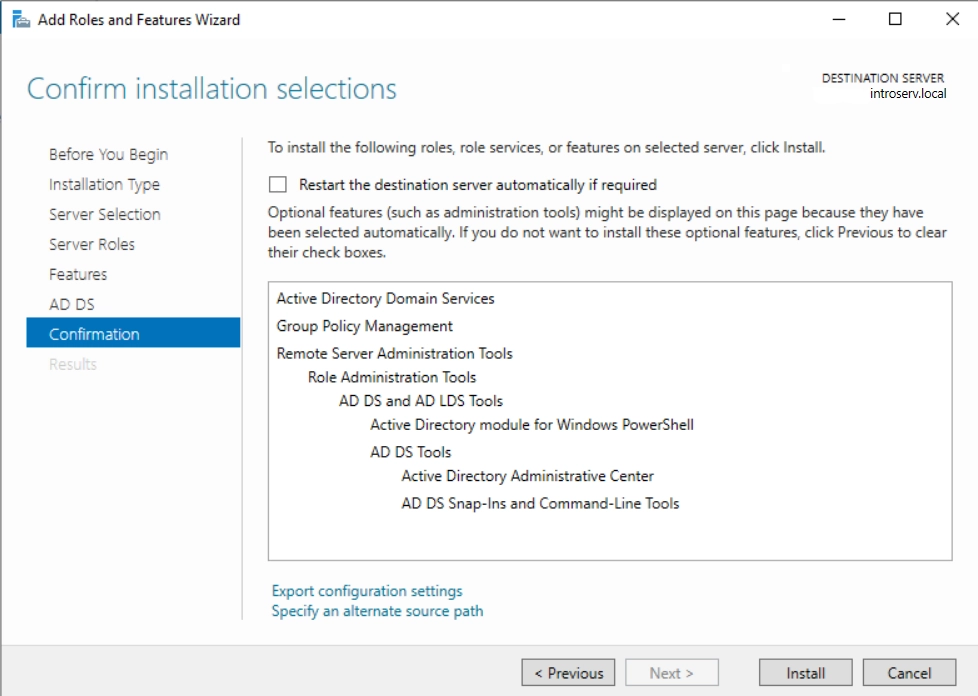
8. At the "Confirmation" stage, if necessary, you can choose to automatically reboot the server after the installation of domain services is complete.
Click "Install".
9. After confirmation, you will see a window with the progress of domain services installation.
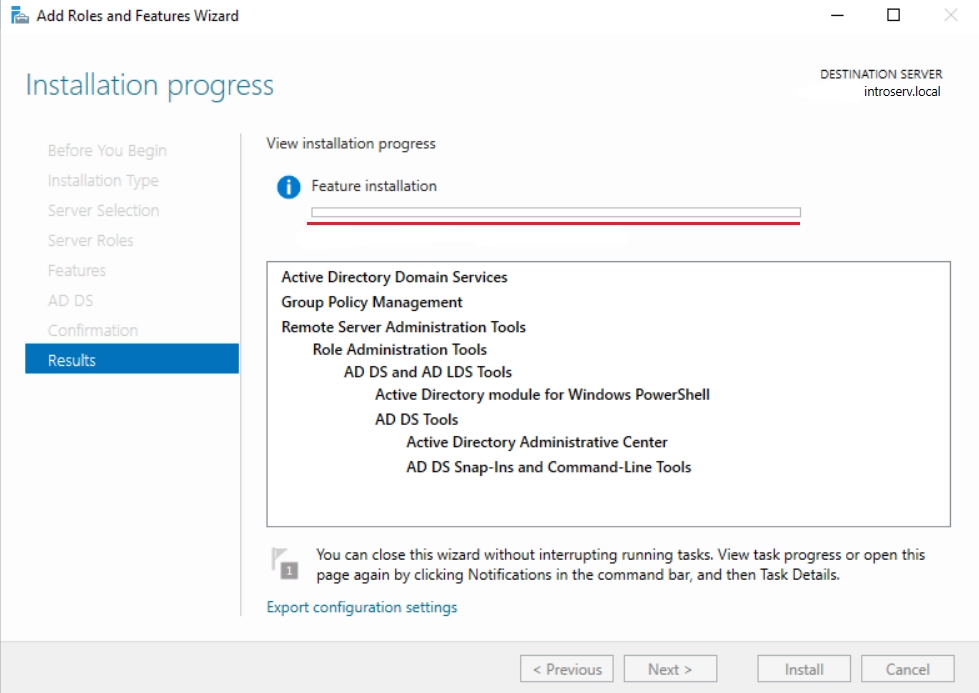
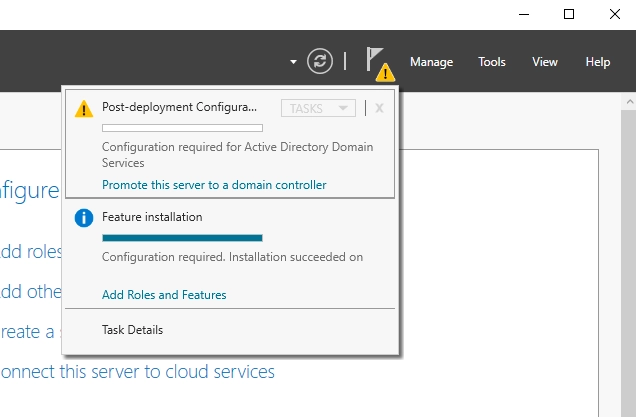
After the installation of domain services is complete, click on the yellow exclamation mark next to the "Manage" tab on the Server Manager main page.

Select Promote this server to a domain controller.
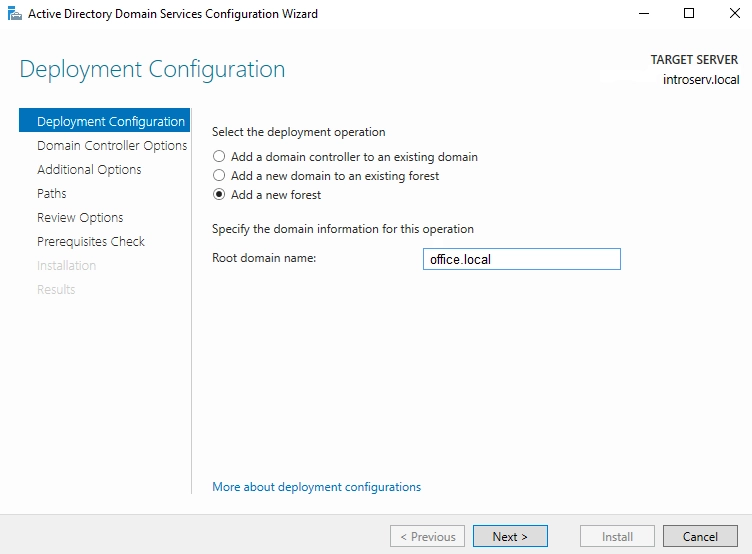
The "Active Directory Domain Services Configuration Wizard" window opens.
1. On the "Deployment Configuration" tab, select the deployment operation - Add a new Forest and add the name of our organization's root domain. Note that:
-the name cannot consist of one word, the name must be separated by a period by adding a prefix to the beginning or end of the word (office.local);
- the domain must be unique;
- for internal domains, the local zone is recommended.
Once the name is specified, click "Next"
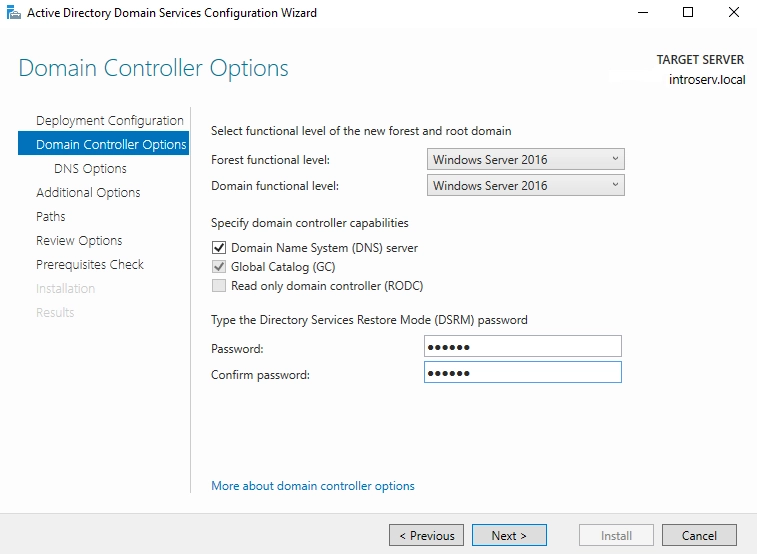
2. On the Domain Controller options tab, leave the default checkboxes selected. Enter the password. After that, click "Next".
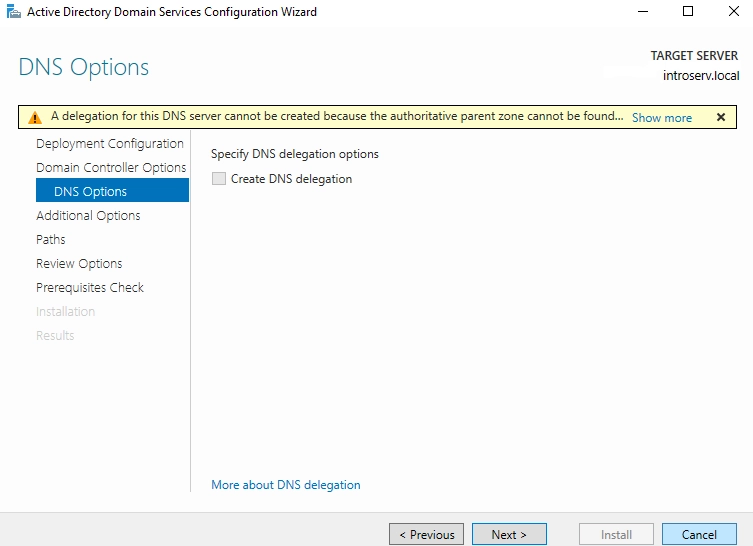
3. After that, the "DNS Options" page will open. Click "Next". You can ignore the error that appears.
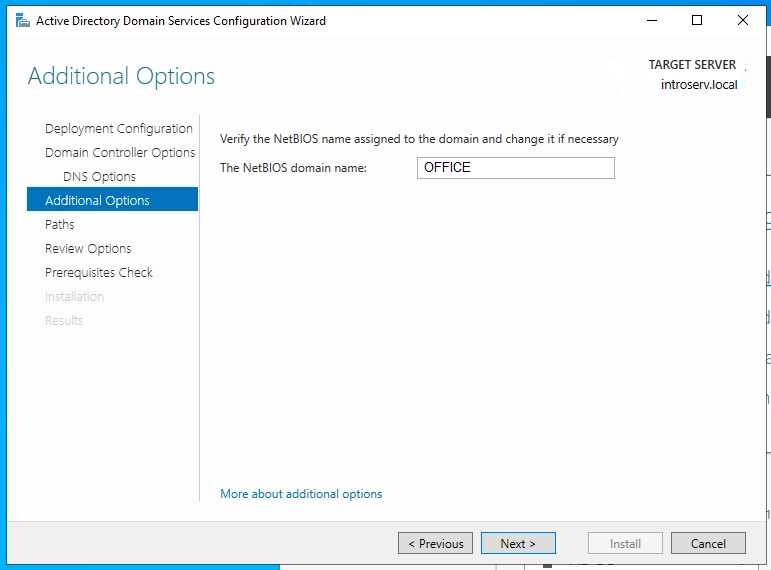
4. "Additional Options" tab - specify the required NetBIOS domain name, for example: OFFICE.
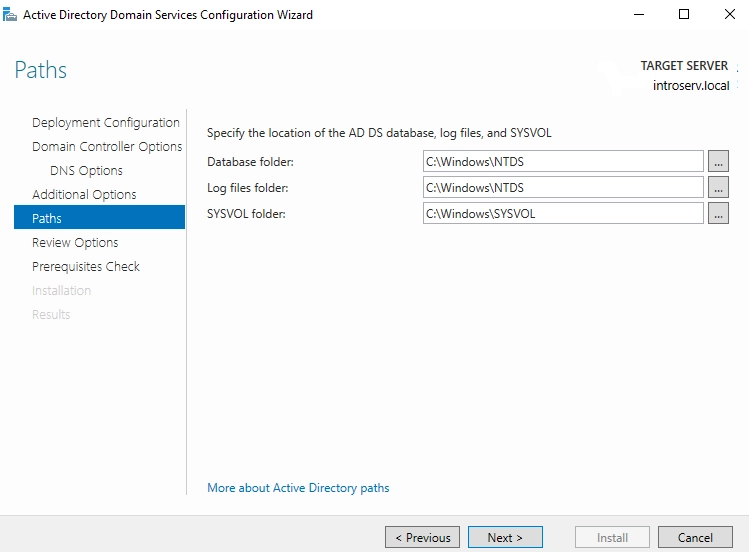
5. On the "Paths" tab, you can leave the default location of the Active Directory system folders. Click Next.
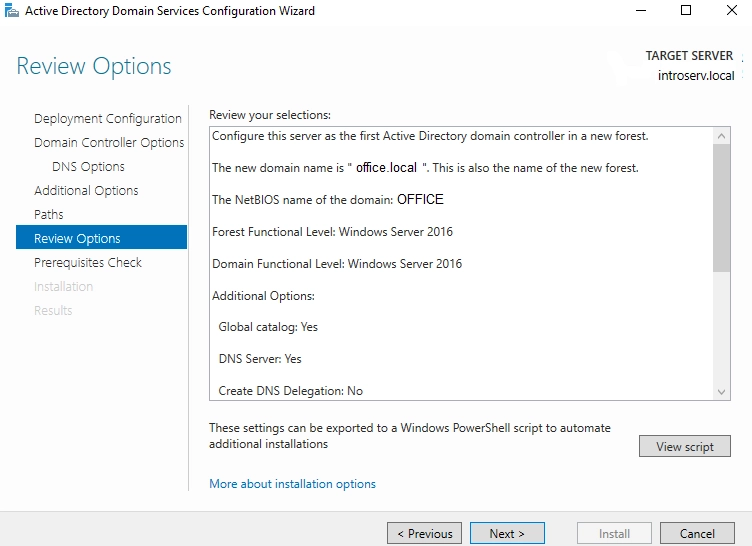
6. On the Review Options page, review the settings that have been specified and will be applied.
If the settings are correct, click "Next".
7. The last step before installing AD is the "Prerequisites Check". If you find any errors at this stage, you need to go back to the previous steps and correct them.
Warnings can usually be ignored. Click "Install".
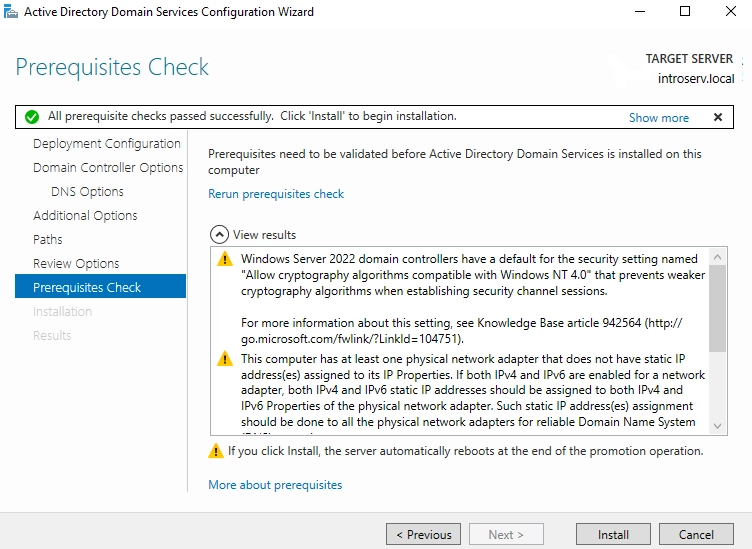
Microsoft Active Directory will be installed.
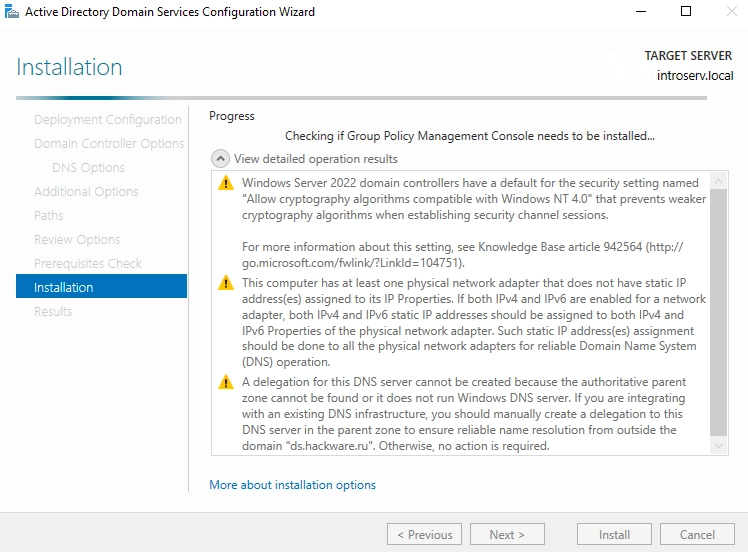
When it is finished, the server will automatically reboot and the installation of Microsoft Active Directory on Windows Server is complete.
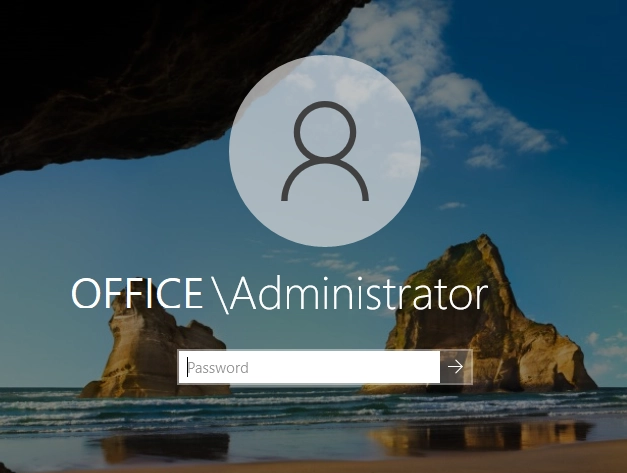
Now you can log in to the domain with the credentials that were installed:
